Introduction

This will show you how to disassemble the camera and show you how to safely and successfully remove the LCD.

  1. aCHlYPSvgMDQCLkf
    • Slide the lock at the bottom of the camera to "Open".

    • The door to the battery pack is spring loaded.

  2. bAHDegt2FbfbXXst
    • Slide the blue clip up and away from the battery.

  3. QUSyALrrQLSeYyiu
    • Remove the battery.

  4. a5W6aJvOcVUlq4Uj
    a5W6aJvOcVUlq4Uj
    NdlleuqqdYLJBFfH
    Xk1fJoeEx6d5dicn
    • Remove the six 3.5mm Phillips #000 screws.

    • Rotate the lock away from the camera.

  5. Pi1XMSPbeBTymXOi
    Pi1XMSPbeBTymXOi
    2pGtYkfvDJTyyuhY
    eIrRwSaLELKZLFyC
    • Pry the device open with the plastic opening tool.

    • There are two clips that help prevent the front panel from separating.

    There is also a small corner piece, coloured the same as camera body, at the battery compartment corner which will also fall out. be careful not to loose it - it’s a bit fidly to fit back when re-assembling, but logcal. The Ifixit tweezers where a great help in locating it back on its pins.

    Nicholas Smith -

  6. IGTJ1NvD2oZPIfCj
    IGTJ1NvD2oZPIfCj
    ljUrg3amZdXmAZ5w
    SJ2MRWXlQeTPRVrW
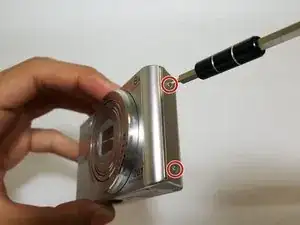
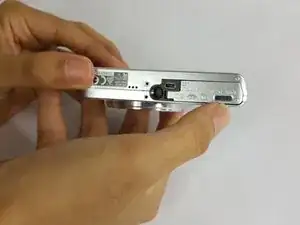
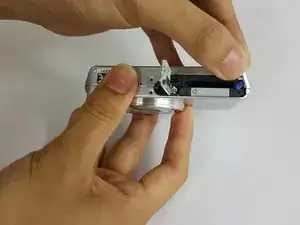
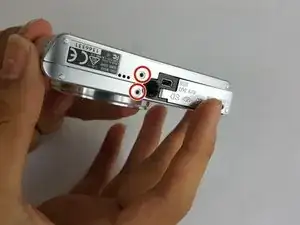
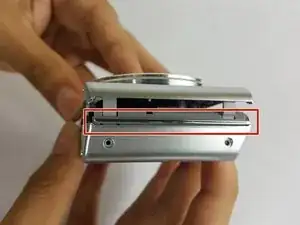
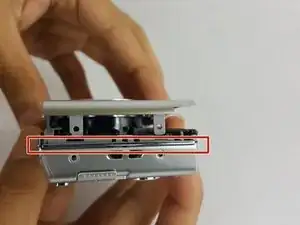
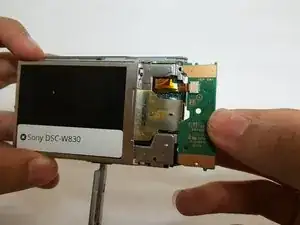
    • Remove the two plastic spacers between the front and the back panels.

    • The spacers may fall out when removing the panels.

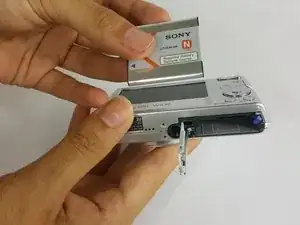
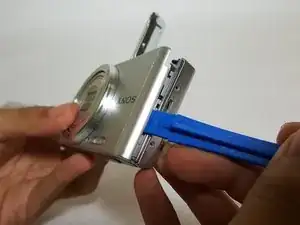
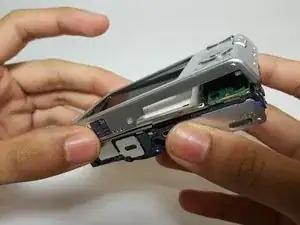
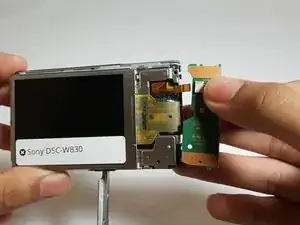
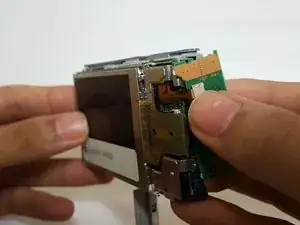
    • Carefully remove the back panel.

  7. gA3AZxiOsHJ4U63c
    gA3AZxiOsHJ4U63c
    DmOfqxkJK5BYHJca
    • Gently release the button board from the clips.

    • Be careful when lifting the button board; the ribbon cable will still be attached.

  8. oOCgXoJtCsuq61nT
    oOCgXoJtCsuq61nT
    oyWjE1GqxaMDmbPB
    • Disconnect the no-fuss ribbon cable by gently pulling it out of the button board.

  9. lPgDDhlCaE6AagXk
    lPgDDhlCaE6AagXk
    1HZEBDEJcYa22pnF
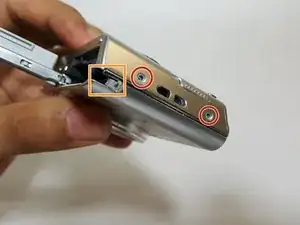
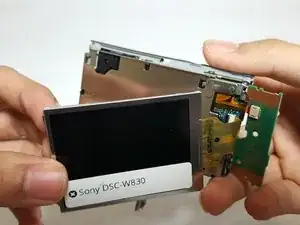
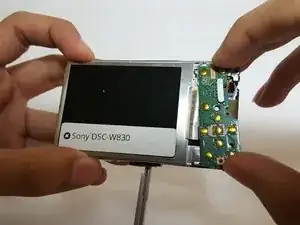
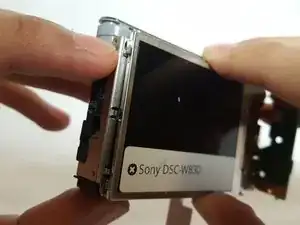
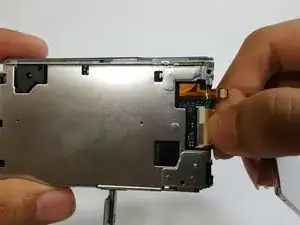
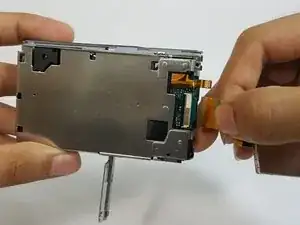
    • Push the bottom right corner of the LCD screen out and slide it to the right to release it from the clips.

    • Be careful when lifting the LCD screen; the ribbon cable will still be attached.

  10. NHrgwiGiiYABMOPW
    NHrgwiGiiYABMOPW
    f6it2XBgmFT1kSwH
    • Grasp the no-fuss ribbon cable and gently pull it out from the motherboard.

Conclusion

To reassemble your device, follow these instructions in reverse order.

Addyson Salalila

Member since: 15/09/16

301 Reputation

5 comments

hii

plaz help me

tajbhatnagar -

Sony Cyber-Shot DSC-W830 LCD ……WowObjects LCD Display Screen For SONY DSC-W150 same hai ya different hai

tajbhatnagar -

Hi I need a one DSC w810 display how much. ?

How can contact you ?

Tamil Varshitha -

Sony dsc s2000 model camera need

Display & lens unit

Tamil Varshitha -