Introduction

Follow this guide to replace the glass back for your Samsung Galaxy S7 Edge.

Note: The curved edge and strong adhesive make the initial opening procedure very challenging. Be patient, repeat multiple heat and pull cycles, and the adhesive will eventually loosen.

  1. yjsAxqeAZCPdMoHe
    • Opening your phone will compromise its waterproof seals. Have replacement adhesive ready before you proceed, or take care to avoid liquid exposure if you reassemble your phone without replacing the adhesive.

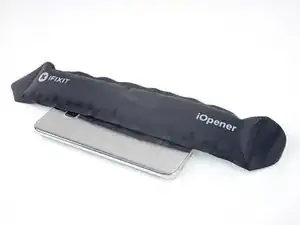
    • Heat an iOpener and apply it to a long edge of the phone for about two minutes.

    • You may need to reheat and reapply the iOpener several times to get the phone warm enough. Follow the iOpener instructions to avoid overheating.

    • A hair dryer, heat gun, or hot plate may also be used, but be careful not to overheat the phone—the OLED display and internal battery are both susceptible to heat damage.

  2. FHHqQpe5TjxgECRI
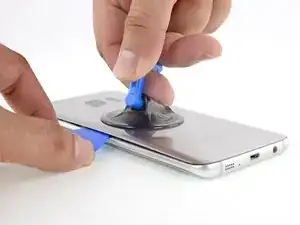
    • Once the back panel is warm to the touch, apply a suction cup as close to the heated edge of the phone as you can while avoiding the curved edge.

    • The suction cup will not adhere well on the curved portion of the glass.

    • If the phone's back cover is cracked, the suction cup may not stick. Try lifting it with strong tape, or superglue the suction cup in place and allow it to cure so you can proceed.

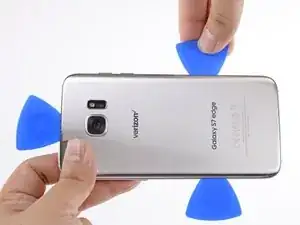
    • Lift on the suction cup and insert an opening pick under the rear glass.

    • Due to the curved glass, you will be pushing up, rather than inserting parallel to the plane of the phone.

    • If you have trouble, apply more heat to further soften the adhesive, and try again. The adhesive cools very fast, so you may need to heat it repeatedly.

    Suction cup does not seem to work.

    Wincess Gentius -

    Makes it sound ridiculously easy, when in reality you have to be pulling with tons of force while also holding the phone down and on top of that you have to insert the pick in a relatively small amount of time.

    Rodrigo Morgado -

    I was getting no where with the iOpener and picks alone, so I followed a YouTube video and used the iOpener as well as a hairdryer. I had to make the first cut in the ahesive with a utility/razor knife, then as soon as I was through the first part I inserted the plastic picks. The back of the phone has to be too hot to touch, ideally all around, so the iOpener alone is not enough.

    Mark Frost -

    Thanks for the above comments. I was also getting nowhere with the iOpener then used a hairdryer on the non-camera end until it was hot to the touch and managed to get a Stanley knife into the gap and lifted enough to get a pick in. Plain sailing from there with patient heating and working the picks in to cut the glue. Eventually success and the back came off.

    Alastair -

  3. bNeaXFpywjbKdsNU
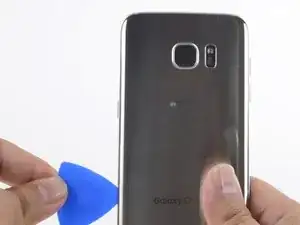
    • Once you have the pick firmly inserted into the glass, reheat and reapply the iOpener to soften the adhesive.

  4. 3MMgFNEMPC2HMMtJ
    3MMgFNEMPC2HMMtJ
    xVvZFCFlmHaJyHQ2
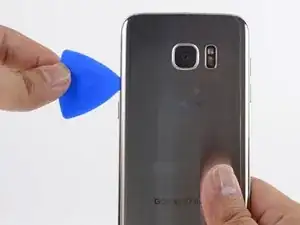
    • Slide the opening pick up along the side of the phone, separating the adhesive.

    • Go slowly so that the tip doesn't slip out of the seam. If sliding becomes difficult, reheat and reapply the iOpener.

    • Leave the pick in place and grab a second pick as you proceed to the next step. Leaving the pick inserted can help prevent the glue you just separated from re-adhering.

  5. Y4LDCRmHgnoSIsJD
    Y4LDCRmHgnoSIsJD
    KHcnbVQvoTJ5S1aI
    f4NGhygd3DgkPpNZ
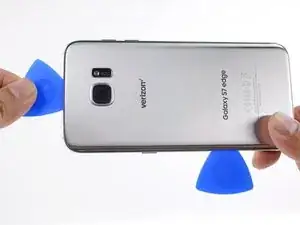
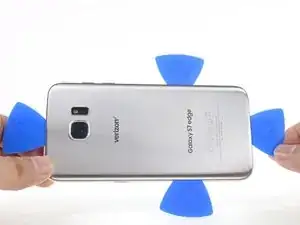
    • Repeat the previous heating and cutting procedure for the remaining three sides of the phone.

    • Leave an opening pick on each side as you continue to the next to prevent the adhesive from resealing.

  6. oMUWlQsL6NDPav6r
    oMUWlQsL6NDPav6r
    ba3VLFbnETGJcxMW
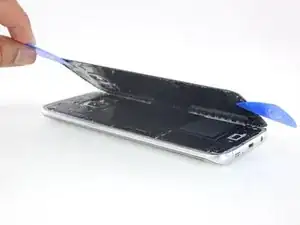
    • Lift the glass and remove it from the phone.

  7. YZtMUpEto3WfwtEC
    YZtMUpEto3WfwtEC
    XcSQlD54SaYWpQXj
    • To install a new back cover:

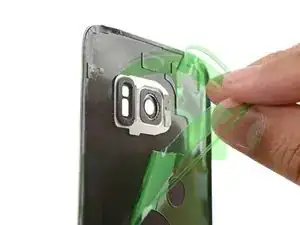
    • Use tweezers to peel away any remaining adhesive from the phone's chassis. Then clean the adhesion areas with high concentration isopropyl alcohol (at least 90%) and a lint-free cloth to prep the surface for the new adhesive.

    • Peel the adhesive backing off of the new rear glass, carefully line up one edge of the glass against the phone chassis, and firmly press the glass onto the phone.

    • If you're reinstalling the old back cover, or using a back cover without adhesive pre-installed, follow this guide.

    • Be sure to turn on your phone and test your repair before installing new adhesive and resealing the phone.

    • If desired, you may reinstall the back cover without replacing the adhesive. Remove any large chunks of adhesive that might prevent the back cover from sitting down flush. After installation, heat the back cover and apply pressure to secure it. It won't be waterproof, but the glue is usually more than strong enough to hold.

Conclusion

Compare your new replacement part to the original part. You may need to transfer remaining components (such as the camera lens) or remove adhesive backings from the new part before installing.

To reassemble your device, follow these instructions in reverse order.

Arthur Shi

Member since: 03/01/18

248651 Reputation

4 comments

this didn’t address the camera lens

sammann1948 -

They have a separate article for the camera lens.

Komoto Kigiri -

Is it waterproof with new adhesive film? Isn't it better to use a liquid glue like B-7000 or T-7000?

Ist es wasserdicht mit neuer Klebefolie? Ist es nicht besser, einen flüssigen Kleber wie B-7000 oder T-7000 zu verwenden?

Tobias Claren -

Hi Tobias,

The phone will not be “waterproof” with new adhesive, as that requires a special press. It will be water resistant to a certain degree if you clean the mating surfaces and apply either adhesive or B7000.
Arthur Shi -