Introduction
Use this guide to remove or replace the battery on your Samsung Galaxy Note10+. If your battery is swollen, take appropriate precautions.
For your safety, discharge your battery below 25% before disassembling your phone. This reduces the risk of a dangerous thermal event if the battery is accidentally damaged during the repair.
Tools
Parts
-
-
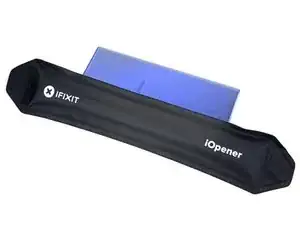
Apply a suction cup to the heated edge of the rear cover, as close to the edge as possible.
-
Pull up on the suction cup with strong, steady force to create a gap between the rear cover and the frame.
-
Insert the point of an opening pick into the gap.
-
-
-
Slide the opening pick along the left edge towards the bottom left corner to slice the adhesive.
-
Leave the pick inserted in the bottom left corner to prevent the adhesive from re-sealing.
-
-
-
Repeat the previous heating and cutting procedure for the remaining three sides of the phone.
-
Leave an opening pick on each side as you continue to the next to prevent the adhesive from resealing.
-
-
-
Use a Phillips screwdriver to remove the five 4 mm screws securing the wireless charging coil.
-
-
-
Use a pair of tweezers to lift up and flip back the metal shield covering the battery connector.
-
-
-
While holding the metal shield up and out of the way, use the pointed end of a spudger to pry up the battery connector to disconnect it.
-
-
-
Use the pointed end of a spudger to disconnect the wireless charging coil connector from the motherboard.
-
-
-
Tilt the metal shielding up so you can grip it with your fingers.
-
Peel the wireless charging coil up and away from the device.
-
Remove the wireless charging coil.
-
-
-
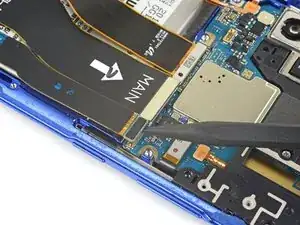
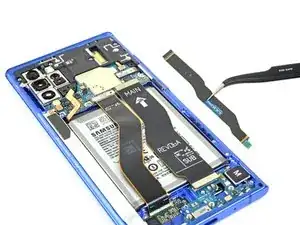
Use the pointed end of a spudger to disconnect the main interconnect cable from the motherboard.
-
Disconnect the secondary interconnect cable from the motherboard.
-
-
-
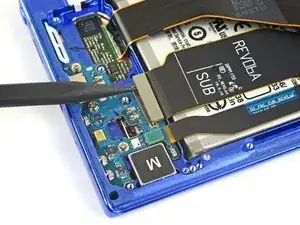
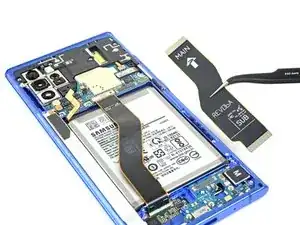
Use the pointed end of a spudger to disconnect the main interconnect cable from the daughterboard.
-
Disconnect the secondary interconnect cable from the daughterboard.
-
-
-
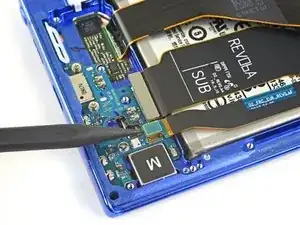
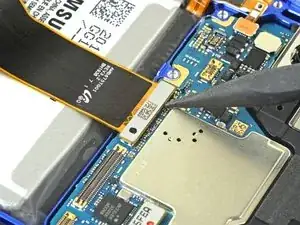
Use the pointed end of a spudger to disconnect the display cable connector from the motherboard.
-
-
-
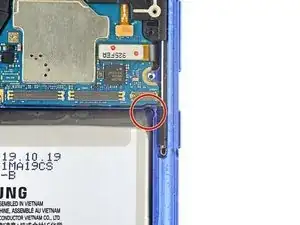
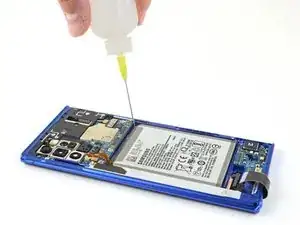
Apply a few drops of high concentration (90% or greater) isopropyl alcohol underneath the battery at the tear-shaped indents near the corners of the battery well.
-
Wait about two minutes for the isopropyl alcohol to penetrate and weaken the battery adhesive before you proceed to the next step.
-
-
-
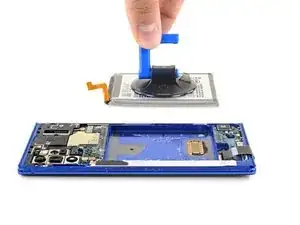
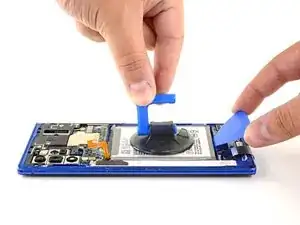
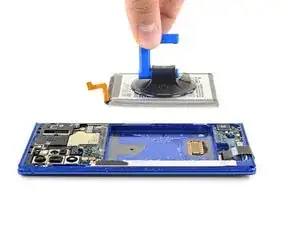
Apply a suction cup to the back of the battery.
-
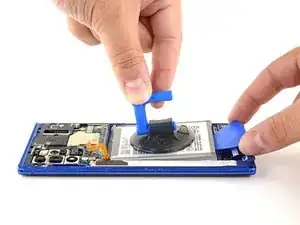
Pull up on the suction cup with strong, steady force to begin to separate the battery from the frame.
-
Insert the point of an opening pick into the gap created between the battery and frame.
-
Pull up on the suction cup to remove the battery.
-
For optimal performance, calibrate your newly installed battery after completing this guide.
Compare your new replacement part to the original part—you may need to transfer remaining components or remove adhesive backings from the new part before installing.
To reassemble your device, follow the above steps in reverse order.
Take your e-waste to an R2 or e-Stewards certified recycler.
Repair didn’t go as planned? Try some basic troubleshooting, or ask our Answers community for help.
12 comments
What kind of adhesive would you recommend to adhere the back glass to the phone after repair?
Hey! Here’s a link to the rear cover adhesive!
Thank you! I have all my stuff ordered now. I can’t wait to follow this guide and get my battery back to new!
Do I only need the rear cover adhesive or the perimeter adhesive as well?
Hi,
I would like to replace my note 10 plus battery, wireless charging n nfc, please advise on what to buy from you.
Thanks
Alex
I performed the battery replacement following instructions to the letter, but now I'm stuck in a custom OS warning screen loop and nothing I do seems to get me out of it.
PDADoc -
It finally came out of it on its own. When I started up, however, I quickly discovered why it happened in the first place: my volume buttons aren't working, so perhaps the adhesive is blocking them. Also, NFC and camera aren't working, so I have to figure it all out.
PDADoc -





I have an adjustable hot plate. I bought it when I replaced the back and battery on a previous note. I am wondering about some type of shim so that the camera bump is not in contact with the hot plate. I am thinking about fender washers. Is there a better way?
Rusty Lingenfelter -