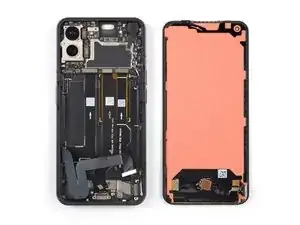
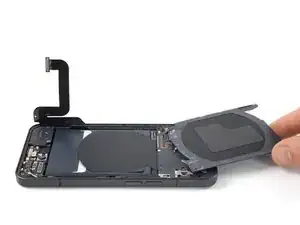
Introduction
Use this guide to replace a cracked or broken screen on your Nothing Phone (1).
If the frame is deformed, it's important to replace it to make sure the new screen will mount correctly and won’t suffer damage from uneven pressure.
If your battery is swollen, take appropriate precautions. Before disassembling your device, discharge the battery below 25%. This reduces the risk of a dangerous thermal event if the battery is accidentally damaged during the repair.
Note: This guide instructs you to replace only the screen while leaving the original frame and motherboard in place. However, some replacement screens come pre-installed in a new frame (a.k.a. chassis), which requires a very different procedure. Make sure you have the correct part before starting this guide.
You’ll need replacement adhesive to reattach the rear glass when reassembling the device. Your device will function normally, but will most likely lose its IP (Ingress Protection) rating.
-
-
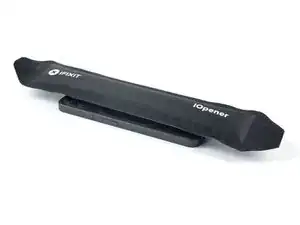
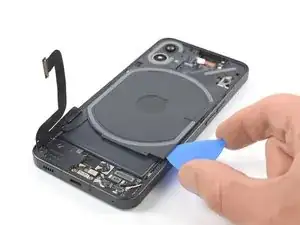
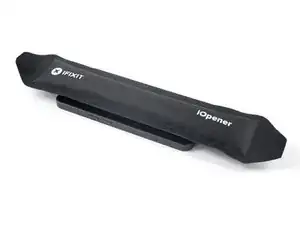
Prepare an iOpener and apply it to the rear glass for at least two minutes to loosen the adhesive underneath.
-
-
-
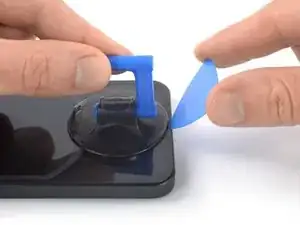
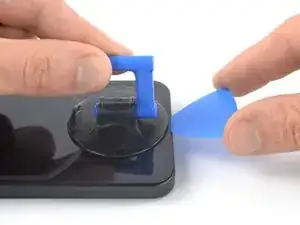
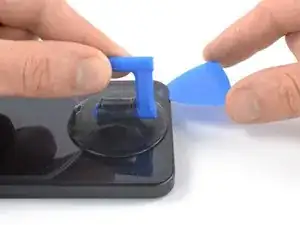
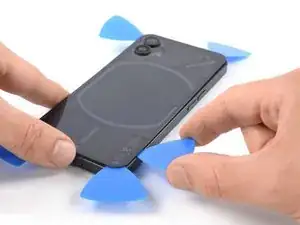
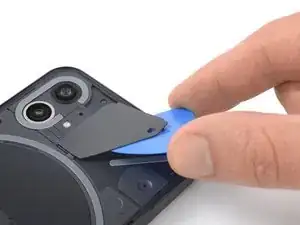
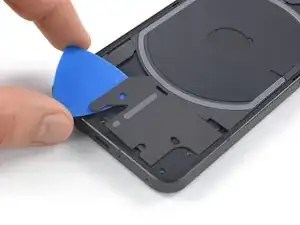
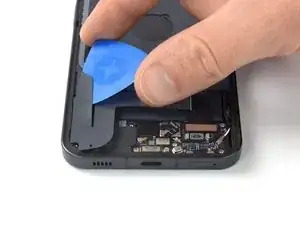
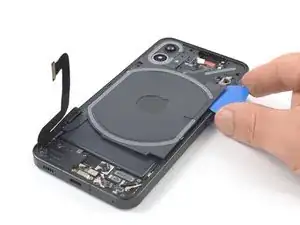
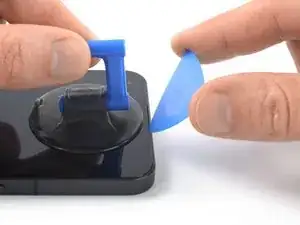
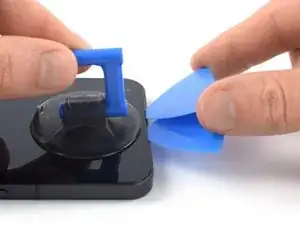
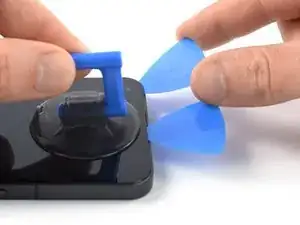
Secure a suction handle to the bottom edge of the rear glass, as close to the edge as possible.
-
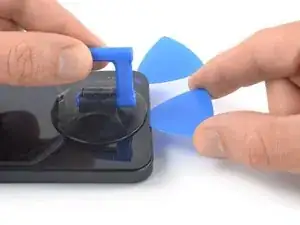
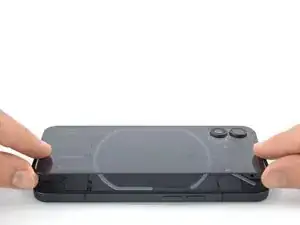
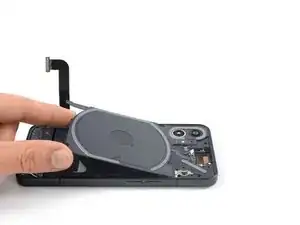
Lift the rear glass with the suction handle to create a small gap between the back cover and the frame.
-
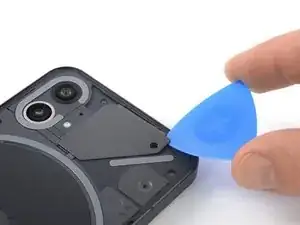
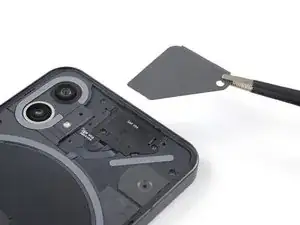
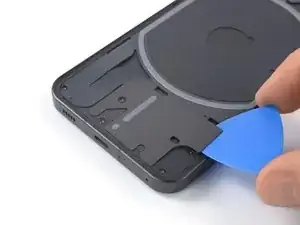
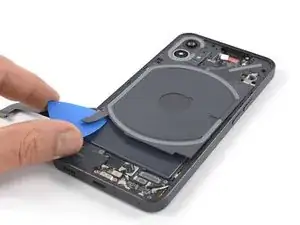
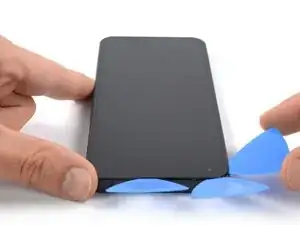
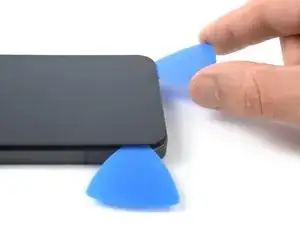
Insert an opening pick into the gap you created.
-
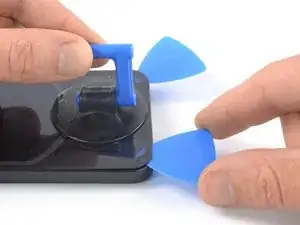
Slide the opening pick to the bottom right corner to slice the adhesive.
-
Leave the opening pick in place to prevent the adhesive from resealing.
-
-
-
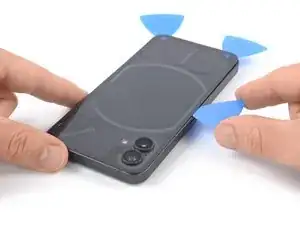
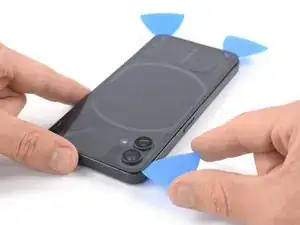
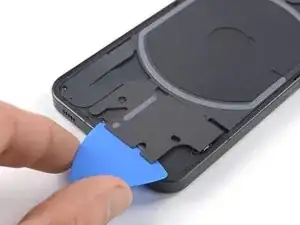
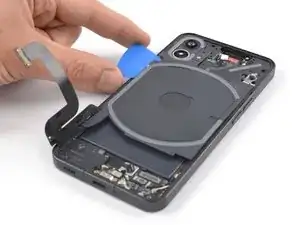
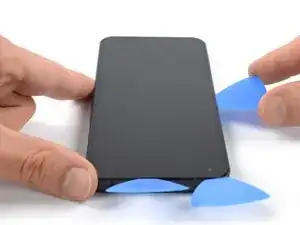
Insert a second opening pick at the bottom edge of your phone.
-
Slide the opening pick to the bottom left corner to slice the adhesive.
-
Leave the opening picks in place to prevent the adhesive from resealing.
-
-
-
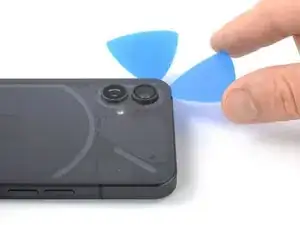
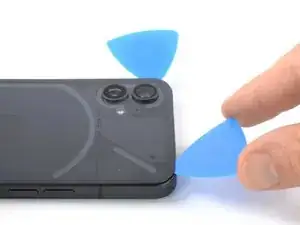
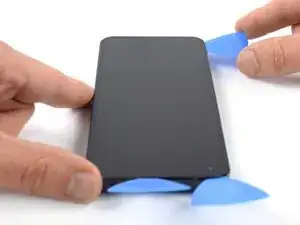
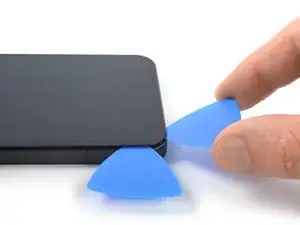
Insert a third opening pick at the bottom left corner of your phone.
-
Slide the opening pick along the left edge of your phone to slice the adhesive.
-
Leave the opening pick in the top left corner to prevent the adhesive from resealing.
-
-
-
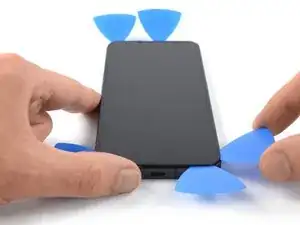
Insert a fourth opening pick underneath the top left corner of your phone.
-
Slide the opening pick along the top edge to slice the adhesive.
-
Leave the opening pick in the top right corner to prevent the adhesive from resealing.
-
-
-
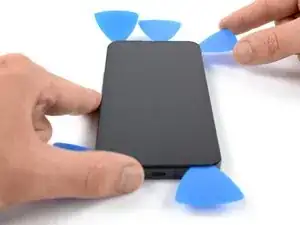
Insert a fifth opening pick underneath the top right corner.
-
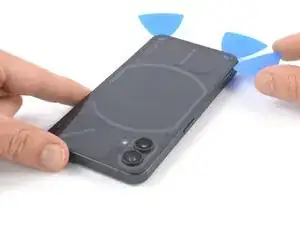
Slide the opening pick along the right edge of the rear glass to slice the remaining adhesive.
-
-
-
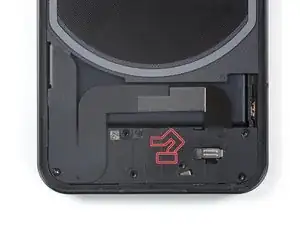
Insert an opening pick underneath the grey plastic cover at the top edge of your phone.
-
Use your opening pick to pry up the plastic cover.
-
Remove the plastic cover.
-
-
-
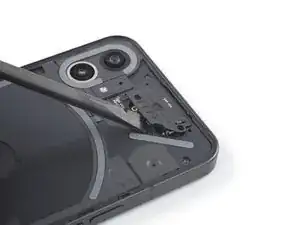
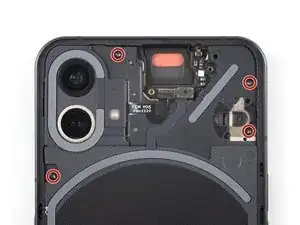
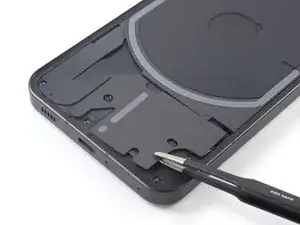
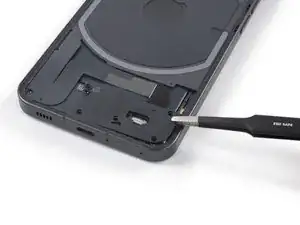
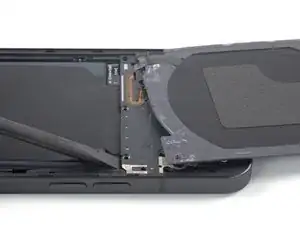
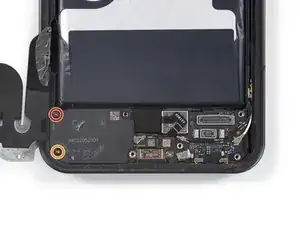
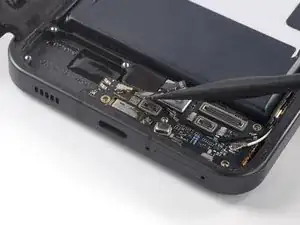
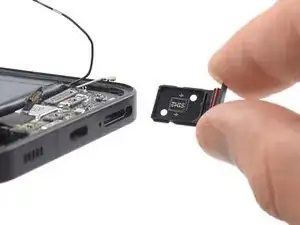
Use a Torx T5 screwdriver to remove the two 4.2 mm-long screws securing the earpiece speaker.
-
-
-
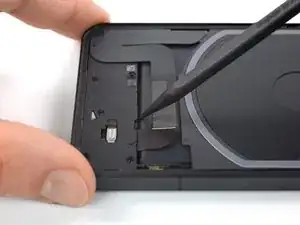
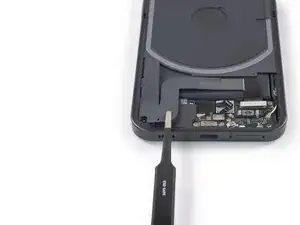
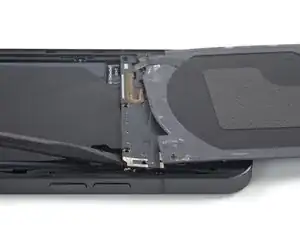
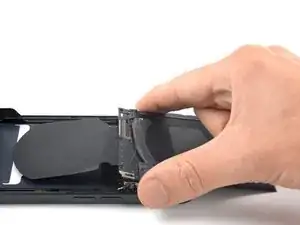
Insert the flat end of a spudger underneath the bottom edge of the earpiece speaker.
-
Use your spudger to pry up the earpiece speaker.
-
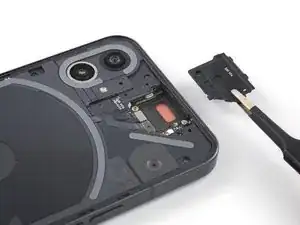
Use a pair of tweezers or your fingers to remove the earpiece speaker.
-
-
-
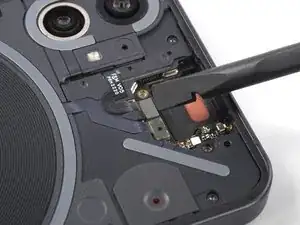
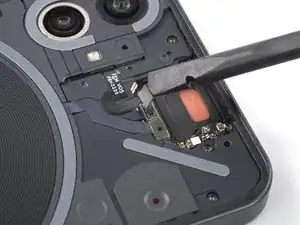
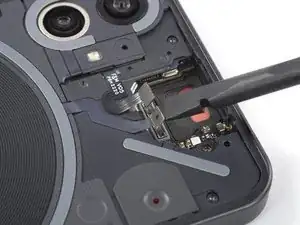
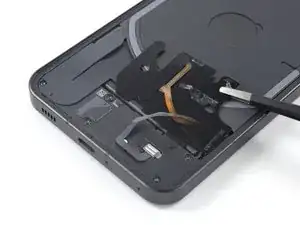
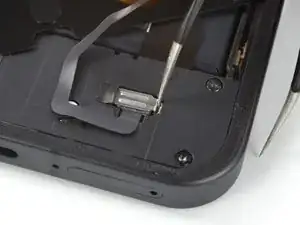
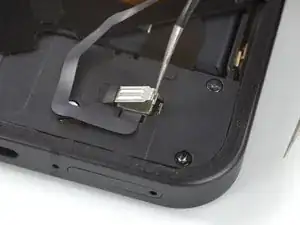
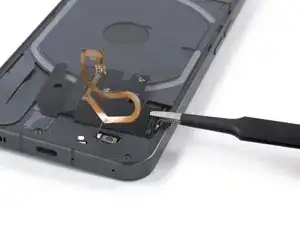
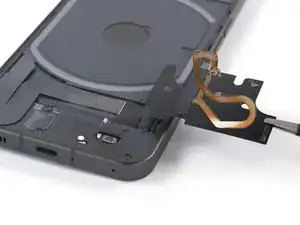
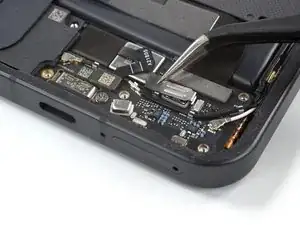
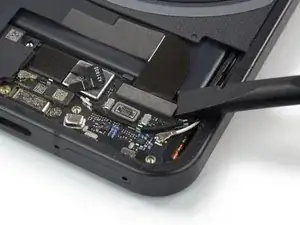
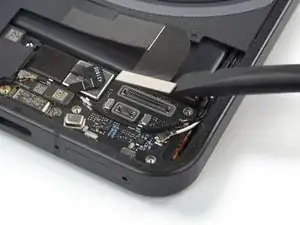
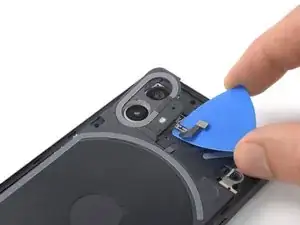
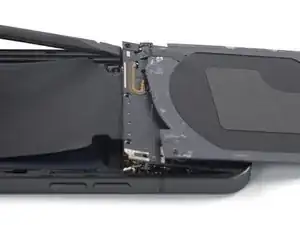
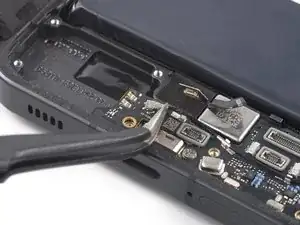
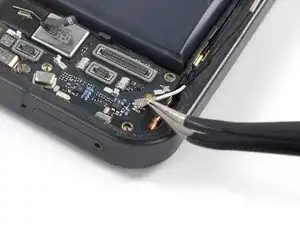
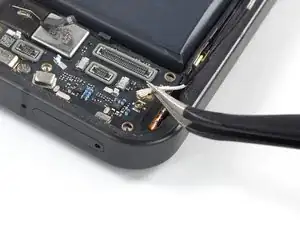
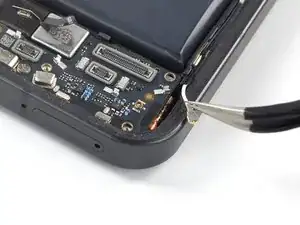
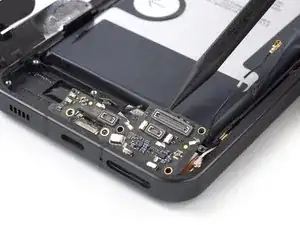
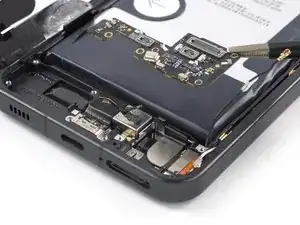
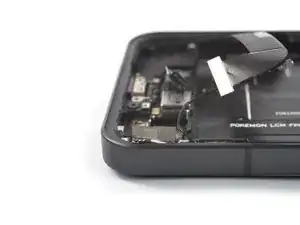
Use a spudger to disconnect the flash assembly cable by prying the connector straight up from its socket.
-
Use a spudger to disconnect the LED glyph cable by prying the connector straight up from its socket.
-
-
-
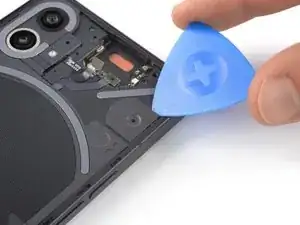
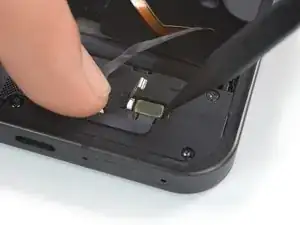
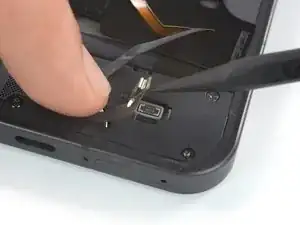
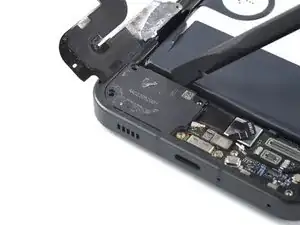
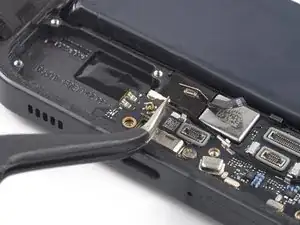
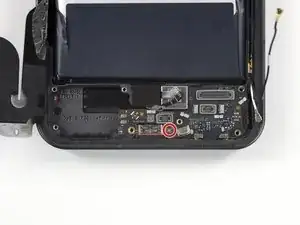
Insert an opening pick underneath the recording indicator light cover at the top right corner of the screen.
-
Use your opening pick to pry up the plastic cover.
-
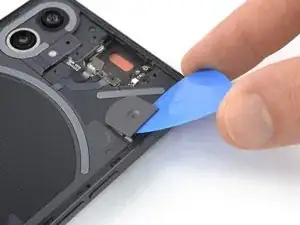
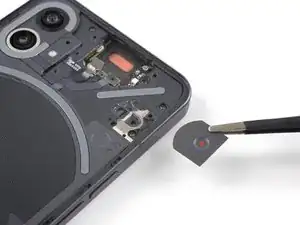
Use a pair of tweezers or your fingers to remove the recording indicator light cover.
-
-
-
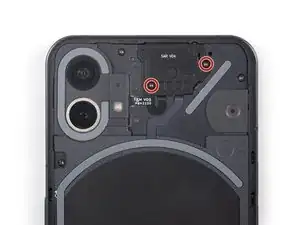
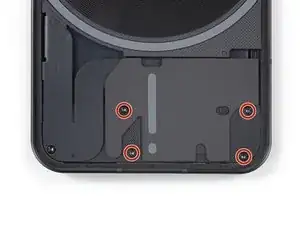
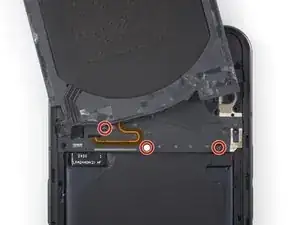
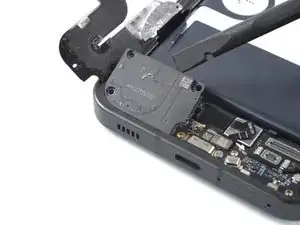
Use a Torx T5 screwdriver to remove the four 4.2 mm-long screws securing the motherboard cover.
-
-
-
Use a Torx T5 screwdriver to remove the four 4.2 mm-long screws securing the daughterboard cover.
-
-
-
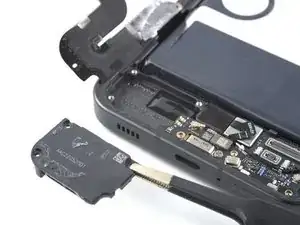
Slide an opening pick underneath the right, bottom and left edge of the bottom LED assembly to carefully separate it from the daughterboard cover.
-
-
-
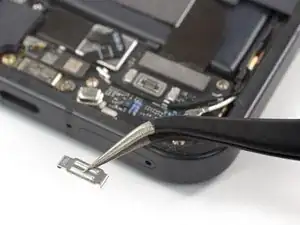
Use a pair of blunt nosed tweezers and carefully fold the bottom LED assembly over to get free access to the LED cable connector.
-
-
-
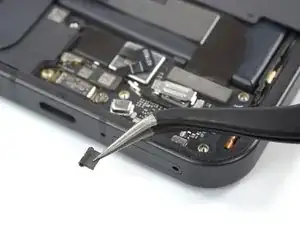
Insert one arm of a pair of tweezers into the gap at the right side of the connector bracket.
-
Push your tweezers toward the left edge of the phone to free the closure flap of the connector bracket.
-
Lift the connector bracket with your tweezers to access the LED connector.
-
-
-
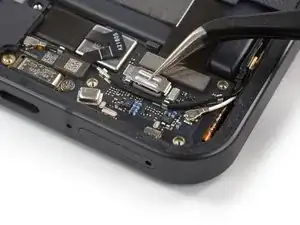
Use a spudger to disconnect the LED cable by prying the connector straight up from its socket.
-
-
-
Use a Torx T5 screwdriver to remove the five 4.2 mm-long screws securing the daughterboard cover
-
-
-
Use a pair of tweezers to carefully separate the grey plastic shield from the daughterboard cover and remove it.
-
-
-
Insert the pointed end of a spudger underneath the top edge of the daughterboard cover just above the black rubber guard securing the LED connector bracket.
-
Pry up with the spudger to release the daughterboard cover from its clips.
-
-
-
Use a spudger to disconnect the interconnect cable by prying the connector straight up from its socket.
-
-
-
Carefully slide an opening pick underneath the interconnect cable to separate it from the charging coil assembly and the loudspeaker.
-
-
-
Use a pair of tweezers to fold the interconnect cable to the left like you'd open the cover of a book.
-
-
-
Insert an opening pick underneath the bottom right edge of the charging coil assembly.
-
Slide the opening along the right edge of the charging coil assembly to separate the adhesive.
-
-
-
Insert an opening pick underneath the bottom left edge of the charging coil assembly.
-
Slide the opening along the left edge of the charging coil assembly to separate the adhesive.
-
-
-
Carefully fold the charging coil to the top edge of the phone to access the motherboard cover screws.
-
-
-
Use a Phillips screwdriver to remove the three 4.2 mm-long screws securing the motherboard cover.
-
-
-
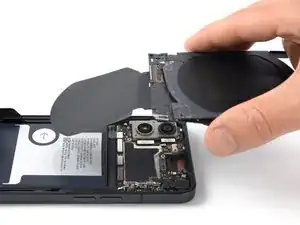
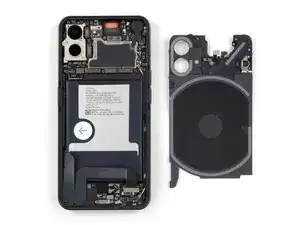
Return the charging coil to its original position.
-
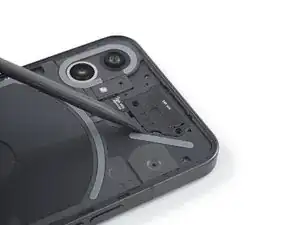
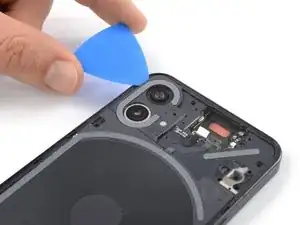
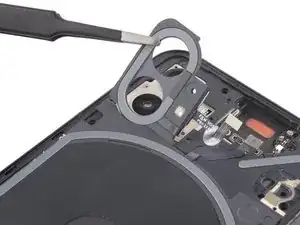
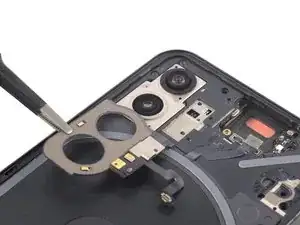
Carefully slide an opening pick underneath the camera cover and flash assembly to separate it from the motherboard cover.
-
-
-
Use a pair of tweezers to carefully fold the camera cover and flash assembly toward the battery.
-
-
-
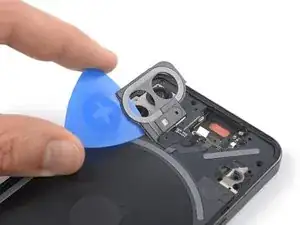
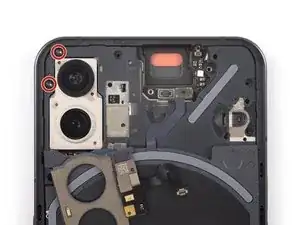
Use a Torx T5 screwdriver to remove the two 4.2 mm-long screws securing the motherboard cover.
-
Return the camera cover and flash assembly to its original position.
-
-
-
Carefully fold the charging coil to the top edge of the phone to access the bottom edge of the motherboard cover.
-
Insert the flat end of a spudger underneath the bottom right edge of the motherboard cover.
-
Pry up with the spudger to release the motherboard cover from its clips.
-
Repeat the prying procedure for the bottom left edge of the motherboard cover.
-
-
-
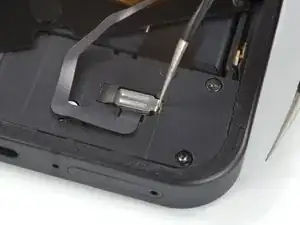
Use a spudger to disconnect the battery cable by prying the connector straight up from its socket.
-
-
-
Remove the two screws securing the loudspeaker:
-
One 4.2 mm-long Phillips screw
-
One 4.2 mm-long Torx T5 screw
-
-
-
Insert an spudger underneath the top edge of the loudspeaker.
-
Use your spudger to pry up the loudspeaker.
-
Use your fingers or a pair of tweezers to remove the loudspeaker.
-
-
-
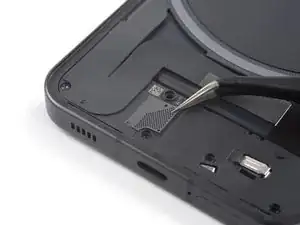
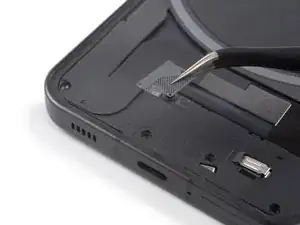
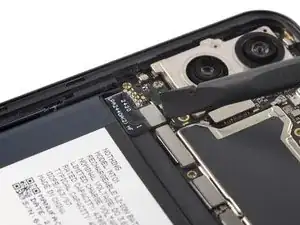
Use a spudger to disconnect the fingerprint reader cable by prying the connector straight up from its socket.
-
-
-
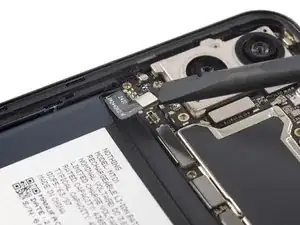
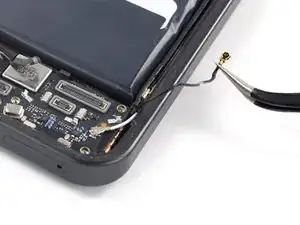
Slide a pair of tweezers under the black coaxial cable until they're snug against the metal connector.
-
Disconnect the black coaxial cable by prying it straight up from the daughterboard.
-
Use your tweezers to carefully loosen the cable from its routing on the daughterboard and bend it to the side.
-
-
-
Slide a pair of tweezers under the white coaxial cable until they're snug against the metal connector.
-
Disconnect the white coaxial cable by prying it straight up from the daughterboard.
-
Use your tweezers to carefully loosen the cable from its routing on the daughterboard and bend it to the side.
-
-
-
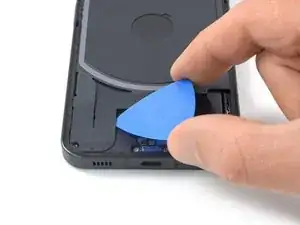
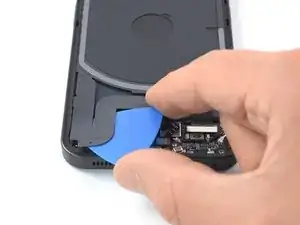
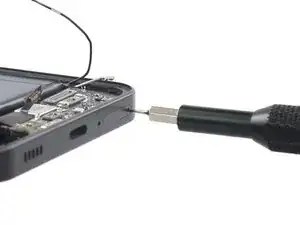
Insert a SIM eject tool, bit, or straightened paper clip into the SIM card tray hole on the bottom edge of the phone.
-
Press the SIM eject tool into the SIM card tray hole to eject the SIM card tray.
-
Remove the SIM card tray.
-
-
-
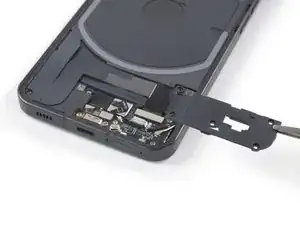
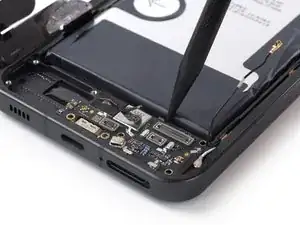
Insert the pointed end of a spudger underneath the top edge of the daughterboard.
-
Use your spudger to pry up the daughterboard.
-
Use a pair of tweezers of your fingers to carefully remove the daughterboard.
-
-
-
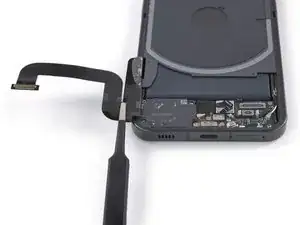
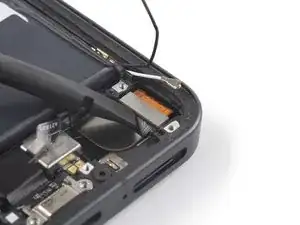
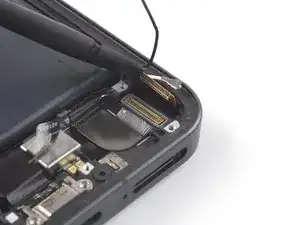
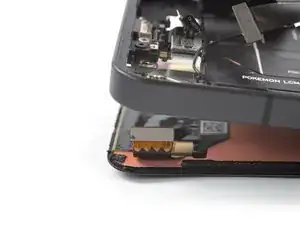
Use a spudger to disconnect the display cable by prying the connector straight up from its socket.
-
-
-
Apply a heated iOpener to the screen to loosen the adhesive underneath. Apply the iOpener for at least 5 minutes.
-
-
-
Once the screen is warm to touch, apply a suction handle to the top edge of the screen and as close to the edge as possible.
-
Lift the screen with the suction handle to create a small gap between the screen and the frame.
-
Insert an opening pick into the gap between the midframe and the screen, to the right side of the earpiece speaker cut-out.
-
Leave the opening pick in place to prevent the adhesive from resealing.
-
-
-
Insert a second opening pick at the left side of the earpiece speaker cut-out.
-
Slide the opening pick along the top edge of the screen to slice the adhesive.
-
Leave the opening pick in place to prevent the adhesive from resealing.
-
-
-
Insert a third opening pick at the top left corner of the screen.
-
Slide the opening pick along the left edge of the phone to slice the adhesive.
-
Leave the opening pick in the bottom left corner to prevent the adhesive from resealing.
-
-
-
Insert a fourth opening pick underneath the bottom left corner of the screen.
-
Slide the opening pick along the bottom edge of the screen to slice the adhesive.
-
Leave the opening pick in place to prevent the adhesive from resealing.
-
-
-
Insert a fifth opening pick at the bottom right corner of the screen.
-
Slide the opening pick along the right edge to slice the remaining adhesive.
-


If possible, turn on your device and test your repair before installing new adhesive and resealing.
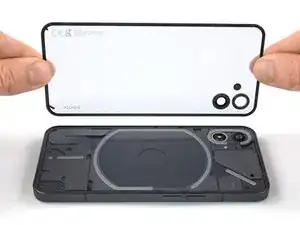
Compare your new replacement part to the original part—you may need to transfer remaining components or remove adhesive backings from the new part before installing.
To reassemble your device, follow these instructions in reverse order.
The best way to secure the new screen is to apply a sheet of custom-cut double-sided tape to the back of the screen.
Take your e-waste to an R2 or e-Stewards certified recycler.
Repair didn’t go as planned? Try some basic troubleshooting, or ask our Answers community for help.

8 comments
Hi. I recently had to disassemble my Nothing Phone. when reassembling it, I used a normal adhesive (T700). I noticed that the glass back isn't on the same level as the edge of aluminum frame. when I looked back at the original back adhesive, I noticed that it has some thickness to it (it has some cushion) which was keeping the glass back flush with the edge of the aluminum frame. I'm wondering if the Tesa 61395 Tape is similar to the original adhesive that the phone was sealed with? I just want to know before purchasing the tape you've listed above. Thanks in advance.
Where to buy the LCD screen?
Saba -
Hello, did you need to do any kind of parts pairing for the in-screen fingerprint scanner during the replacement process?
Bereite einen iOpener* vor und platziere ihn für einige Minuten am rückseitigen Glas, um den Kleber darunter zu lösen.
*Ein Haarfön, eine Heissluftpistole und ähnliches könnte auch zum erwärmen verwendet werden. Dies aber BITTE mit Vorsicht, Akkus mögen zu starke Hitze nicht z.B.
byte park -