Introduction
Accessing the RAM in this computer is straightforward and requires minimal disassembly.
-
-
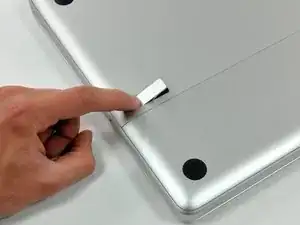
With the case closed, place the Unibody top-side down on a flat surface.
-
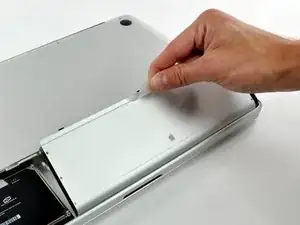
Depress the grooved side of the access door release latch enough to grab the free end. Lift the release latch until it is vertical.
-
-
-
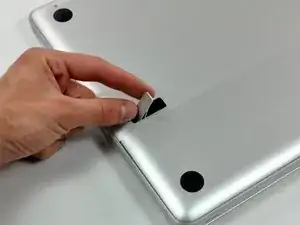
Grab the translucent plastic tab and pull the battery up and out of the Unibody.
-
If the latch is depressed it will lock the battery in place.
-
-
-
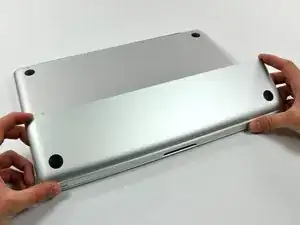
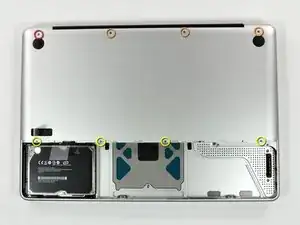
Remove the following eight screws securing the lower case to the chassis:
-
One 5.4 mm Phillips screw.
-
Three 14 mm Phillips screws.
-
Four 3.5 mm Phillips screws.
-
-
-
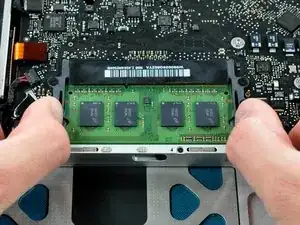
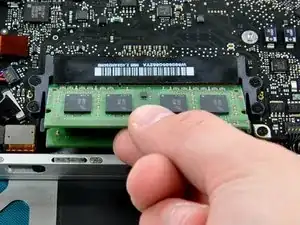
Release the tabs on each side of the chip by simultaneously pushing each tab away from the RAM.
-
To reassemble your device, follow these instructions in reverse order.

10 comments
Thank you ifixit. It was a breeze... 8Gb in the house... Best Regards
Hi Bruno!
Assuming you still have the MBP, I am curious to see what memory you installed to get 8 gigs. I just installed 2 X 4 gigs of Kingston PC3 106000 SODIM and my MBP does not want it. My tech assured me that if anything would do it, it was this memory.
Suggestions?
Thank you!
Ghislain
Ghislain -
As a breeze. Man, was my computer dirty! Now my computer feels like it's on amphetamines! Lol. So happy the pinwheels are gone. I can finally get work done and feel right about charging my clients hourly!
Thanks ifixit ... Easy reward & proud 8GB working power.
Tiny note: I wasn't sure weather or not it is important (or not) to remove the stickers from my 2 x 4GB RAM modules - I left the stickers on and it seems all running happily.
Grit -
The A1286 has no Access Door.!!
I actually can see no sign of the battery!...
aguib -