Introduction
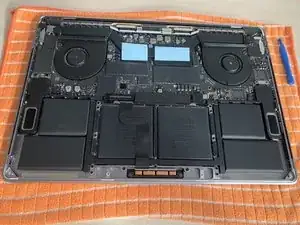
Follow this guide to get a better handle on your MacBook's cooling problem.
"For your safety, discharge your MacBook Pro's battery below 25%" before you begin. A charged lithium-ion battery, if accidentally damaged, can start a dangerous and uncontrollable fire.
After the repair, my MacBook Pro's (2.2GHz 6-core i7 & Radeon Pro 555X 4GB) performance under full load improved from a falling 3.1GHz-2.6GHz at 100°C to a continuous 3.2GHz at 95°C.
-
-
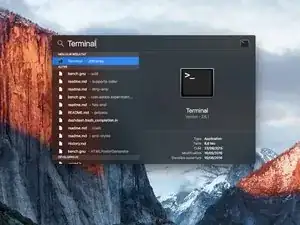
Power on your Mac and launch Terminal.
-
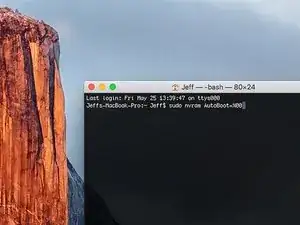
Copy and paste the following command (or type it exactly) into Terminal:
-
sudo nvram AutoBoot=%00
-
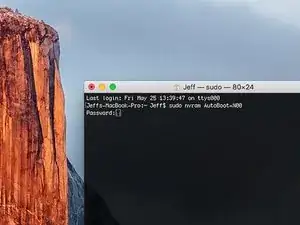
Press [return]. If prompted, enter your administrator password and press [return] again. Note: Your return key may also be labeled ⏎ or "enter."
-
sudo nvram AutoBoot=%03
-
-
-
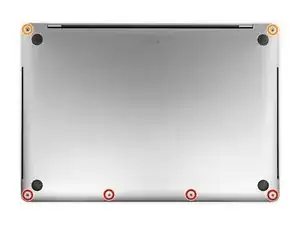
Use a P5 Pentalobe driver to remove six screws securing the lower case, of the following lengths:
-
Four 4.7 mm screws
-
Two 6.6 mm screws
-
-
-
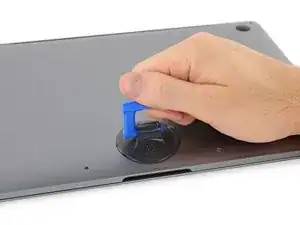
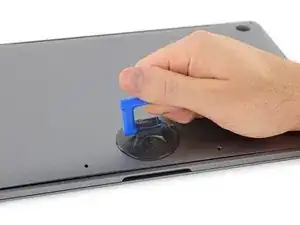
Press a suction handle into place near the front edge of the lower case, between the screw holes.
-
Pull up on the suction handle just enough to open a small gap under the lower case.
-
-
-
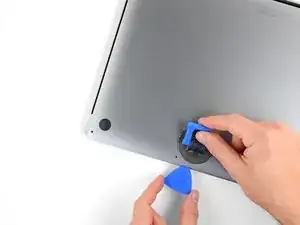
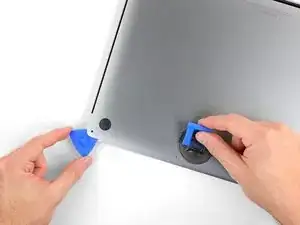
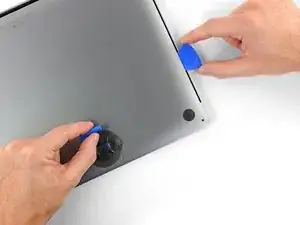
Slide the corner of an opening pick into the gap you just created underneath the lower case.
-
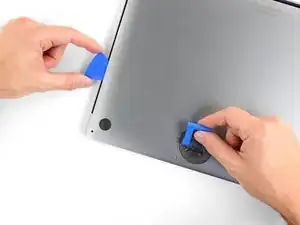
Slide the opening pick around the nearest corner and then halfway up the side of the MacBook Pro.
-
-
-
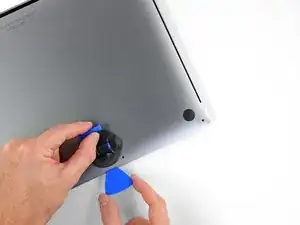
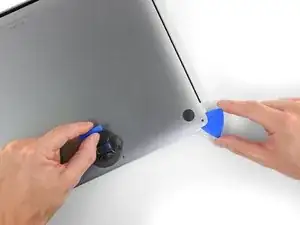
Repeat the previous step on the other side, using an opening pick to to release the second clip.
-
-
-
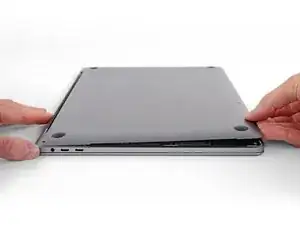
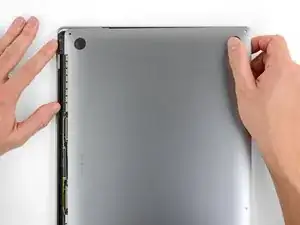
Lift the front edge of the lower case (the side opposite the display hinge) enough to slide your fingertips underneath and get a good grip on it.
-
-
-
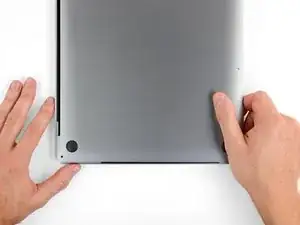
Pull firmly to slide the lower case towards the front edge of the MacBook (away from the hinge area) to separate the last of the clips securing the lower case.
-
Pull first at one corner, then the other.
-
-
-
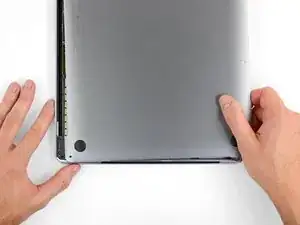
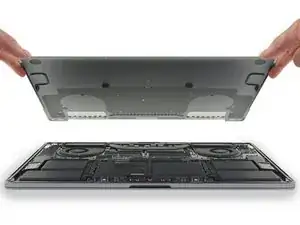
Remove the lower case.
-
Set it in place and align the sliding clips near the display hinge. Press down and slide the cover toward the hinge. It should stop sliding as the clips engage.
-
When the sliding clips are fully engaged and the lower case looks correctly aligned, press down firmly on the lower case to engage the four hidden clips underneath. You should feel and hear them snap into place.
-
-
-
Cut the thermal pad to fit the CPU and GPU.
-
Dimensions: 50 mm x 50m x 0.8 - 1 mm
-
Remove the first protective film from the pad and carefully place it on the two visible areas (CPU and GPU) and press it down lightly.
-
After the pad is pressed down and fits snugly, remove the second side of the protective film.
-


Work through the steps in reverse order to reassemble your device.

10 comments
Thanks for the instruction on how to make this MBP run cooler
macisgr8 -
It would be useful to mention the thermal pad and thermal paste at the beginning.
Please provide specifications for the thermal pad and thermal paste, or suggestions for each.
0,5 mm thermalpad was to thin for me, I used it in two layers, 50x50mm was enough for that
Some One -
Is this step necessary? I can’t perform this step as I am attempting to repair water damage and need to remove logic board & most likely replace the battery.
Macrepair SF -
@mac_medic You definitely don’t want the power coming on while the board is wet. In your case, I think powering on the machine to disable Auto Boot would do more damage than it prevents. I agree, skip this step and be prepared to disconnect the battery quickly if the laptop automatically powers on. Good luck!
Jeff Suovanen -
Thats right! You don't want power running while working on your logic board.
Dan -