Introduction
Replacing a defective fan is pretty easy and will keep your laptop running cool.
-
-
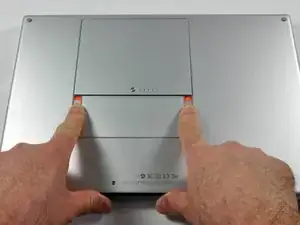
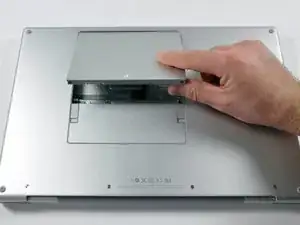
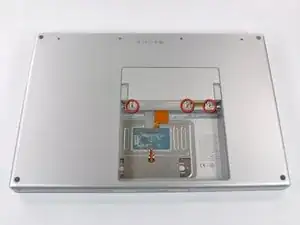
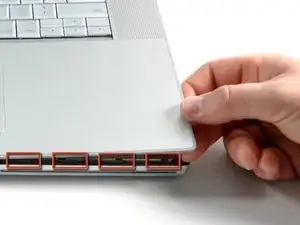
Use your fingers to push both battery release tabs away from the battery, and lift the battery out of the computer.
-
-
-
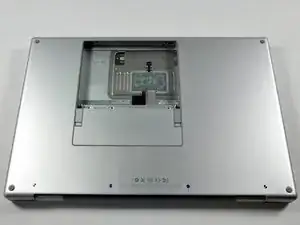
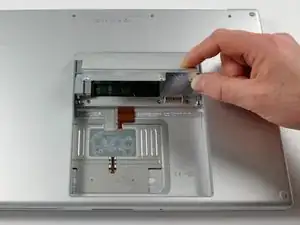
Remove the three identical 2mm Phillips screws from the memory door.
-
Lift the memory door up enough to grip it and slide it toward you, pulling it away from the casing.
-
-
-
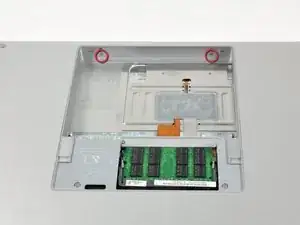
Remove the following 6 screws:
-
Two 10 mm T6 Torx screws on either side of the RAM slot.
-
Four 14.5 mm Phillips screws along the hinge.
-
-
-
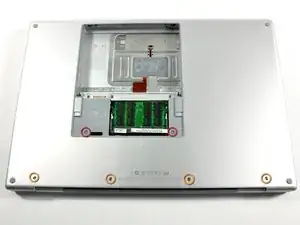
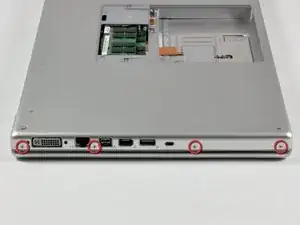
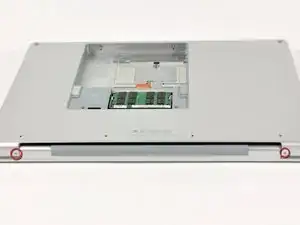
Rotate the computer 90 degrees and remove the two 3.2 mm Phillips screws from the rear of the computer.
-
-
-
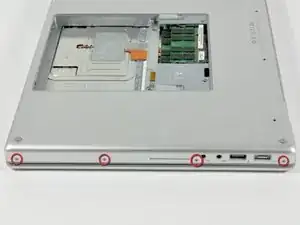
Rotate the computer 90 degrees again and remove the four 3.2 mm Phillips screws from the side of the computer.
-
-
-
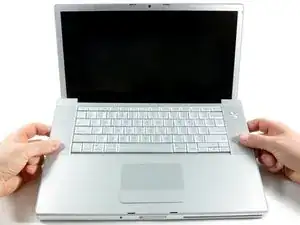
Lift up at the rear of the case and work your fingers along the sides, freeing the case as you go. Once you have freed the sides, you may need to rock the case up and down to free the front of the upper case.
-
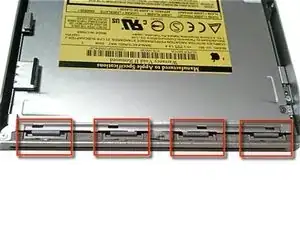
There are four plastic clips above the DVD slot, and another above and to the left of the IR sensor. These clips can be very difficult to disengage without prying. They can also be difficult to re-engage during reassembly.
-
-
-
Disconnect the trackpad and keyboard ribbon cable from the logic board, removing tape as necessary.
-
Remove the upper case.
-
-
-
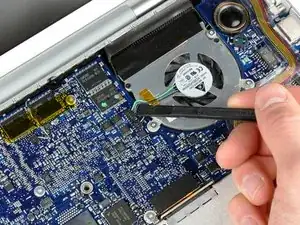
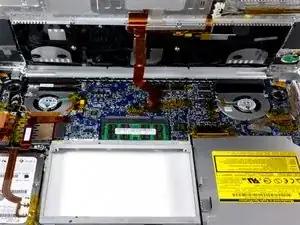
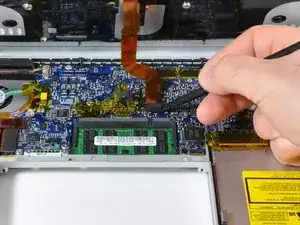
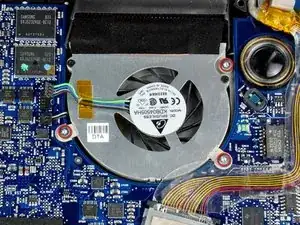
Disconnect the right fan cable from the logic board by placing a spudger beneath the cable and lifting up. Be sure to lift up on the right side as shown.
-
-
-
Remove the three silver T6 Torx screws securing the right fan to the logic board and lower case.
-
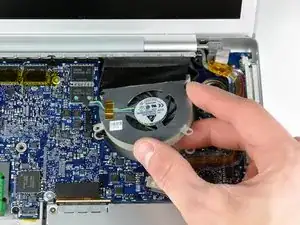
Lift the right fan up and carefully peel up the tape securing the fan to the heat sink as you go.
-
To reassemble your device, follow these instructions in reverse order.

8 comments
Excellent guide and pictures. I took the advise of several others and cleaned and lubed the fans, and had super results.
ok, so i started hearing a grinding noise from my computer and i thought it was just dirty and i went online to out how to do that. i came upon this website and found out that here you can find out about anything when i came to DIY. well the grinding noise was got worse and worse and found out that the right fan was the cause and it was a common issue to this version of the macbook pro. so ig ot the part and just put it in. its so quiet now as it was when i bought it. thank you for being here. i love this website. this is so user friendly and am already recommending this website to all my friends.
Thanks for the awesome feedback, nfleisher! Glad to hear your repair was a success.
Complete success, I downloaded a fan control app after I heard the grinding noise that I think most readers of this guide are familiar with. My fan was dropping into the 200rpm range and I had placed a box fan underneath the computer to keep the thing cool while I waited for the new fan unit to arrive. The guide was straightforward and pointed out a few of the problem areas that I might not have noticed without the prior heads up. The one addition that my IT friend pointed out to me is to make sure not to put the screws into the wrong holes during reassembly of step 5. There are two holes on either side of the DVI port and apparently once you mistakenly drop a screw into one of those holes its gone for good. Thank you so much, I could not have done this without this site.
dan -
Before start, make a clone of your old HD into the new one, if you don't want to initiate a fresh copy. (Carbon Copy software is good).
ColmillodeChile -
Besides using WD 500GB models, are the WD 640GB and WD 750GB (the 9.5mm thickness model) good to go for? I am still considering as I have heard from other websites on the computer does not draw enough power to power up the 640 and 750 as it has the clicking sound and the rainbow keeps appearing. Anyone has install one before yet?
Please advice. Appreciated! Thanks a million to all the Mac gurus out there!
Danny Lim -
What is this about removing the PRAM battery causing a reinitialization of the HDD? For serious?
Adrian -
No, that's nonsense
max damage -
Wait, I misunderstood you. I thought the comment was directed at the PRAM battery removal page. Silly me.
Nevermind. Yes, it is always a good idea to backup one's data before doing stuff like this. I never do, and have never had any problems, but it's still a good idea.
Adrian -
The two screws removed in step 3 should not be mixed with screws in steps 5 through 7. Though similar, they are actually slightly shorter and have a bigger head. If you put the longer screws back in here when reassembling, the button to unlatch the top will not work properly.
Doug -
I think you may have commented on the wrong page. This page only has 3 steps, and the screws are removed in step 2, not 3.
(MacBook Pro 15" Core 2 Duo Models A1226 and A1260 RAM Replacement)
Don -
I'm not sure how the user notes get attached to the various procedures here, but my comment does seem to show up properly when viewing the steps for Hard Drive Replacement. However, the number of the step may be off if viewed as part of another procedure.
Doug -