Introduction

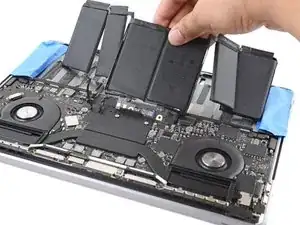
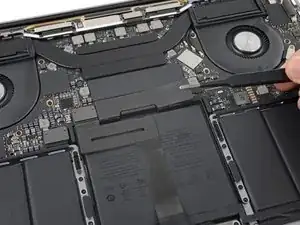
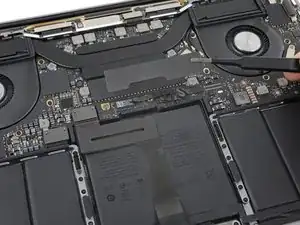
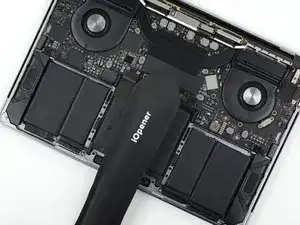
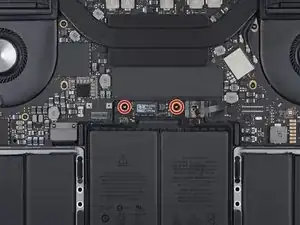
Follow these instructions to replace the glued-in battery in your MacBook Pro using an iFixit kit with adhesive remover. The adhesive remover helps weaken the glue securing the old battery, making it easier to remove.

iFixit adhesive remover is flammable. Follow this procedure in a well-ventilated area, and don’t smoke or work near an open flame.

To minimize risk of damage, turn on your MacBook and allow the battery to fully discharge before starting this procedure. If a charged lithium-ion battery is accidentally punctured, a dangerous and uncontrollable fire may result. If your battery looks puffy or swollen, take extra precautions.

Note: The solvent used to dissolve the battery adhesive can damage certain plastics. Follow all instructions and take care where you apply the adhesive remover.

Some photos in this guide are from a different model and may contain slight visual discrepancies, but they won't affect the guide procedure.

  1. sLGCwxfH5Z1fVqiP
    • Before starting this procedure, you should disable your Mac's Auto Boot feature. Auto Boot powers on your Mac when you open the lid, and may be accidentally triggered during disassembly. Use this guide to disable Auto Boot.

    • If your MacBook is running Big Sur v11.1 or later, disabling Auto Boot may not work. You can proceed normally, but make sure to disconnect the battery as soon as you're inside.

    • Completely power off and unplug your MacBook before you start. Close the display and flip the entire laptop upside-down.

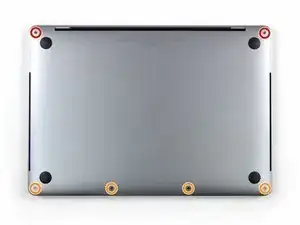
    • Use a P5 Pentalobe driver to remove the six screws securing the lower case:

    • Two 6.7 mm screws

    • Four 3.4 mm screws

    • Throughout this repair, keep track of each screw and make sure it goes back exactly where it came from to avoid damaging your device.

  2. osaHpsUCcqYJ5vkG
    osaHpsUCcqYJ5vkG
    NboVOdHFBNHFOJPr
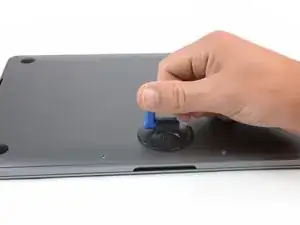
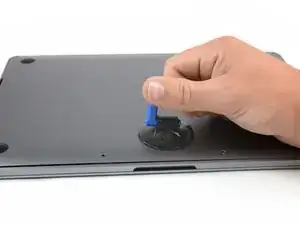
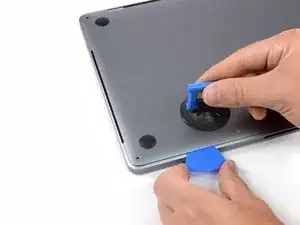
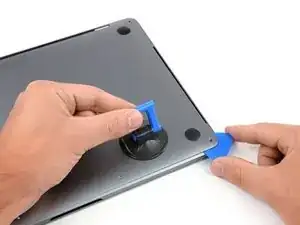
    • Apply a suction handle to the lower case near the front-center area of the MacBook Pro.

    • Lift the suction handle to create a slight gap between the lower case and the chassis.

  3. hAHYIDBFvJ4WNxf2
    hAHYIDBFvJ4WNxf2
    psLt1wKSkYhQNYHd
    UK5yIrxfcfRZGhqX
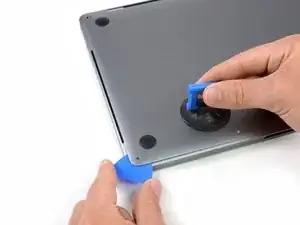
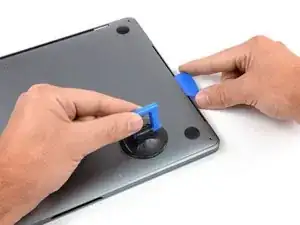
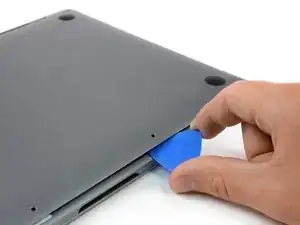
    • Insert one corner of an opening pick into the space between the lower case and the chassis.

    • Slide the opening pick around the nearest corner and halfway up the side of the case.

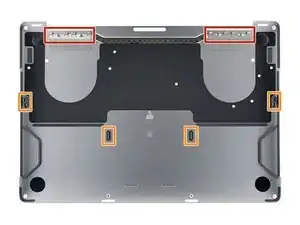
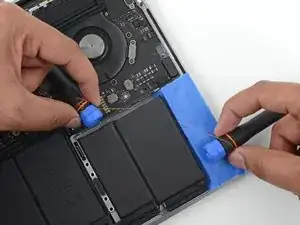
    • This releases the first of the hidden clips securing the lower case to the chassis. You should feel and hear the clip pop free.

  4. ISWfetPgvKBsjOuU
    ISWfetPgvKBsjOuU
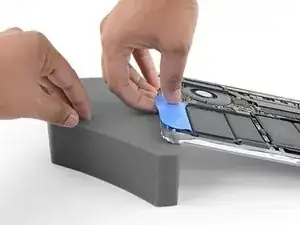
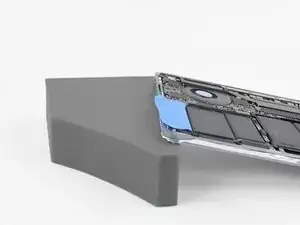
    wUQs1NsoXumTrLUN
    YjPRQuBO3PgmxHZ2
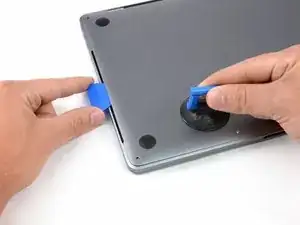
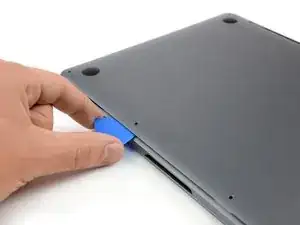
    • Repeat the previous step on the opposite side, sliding your opening pick under the lower case and up the side to pop the second clip free.

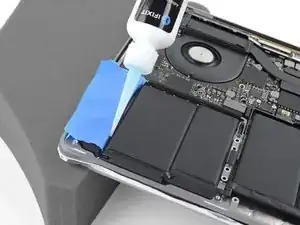
  5. JBYHNMxfrfyDYIAS
    JBYHNMxfrfyDYIAS
    buRCKFSn4k1aNdcQ
    3rpxVUDIFteVN6Gp
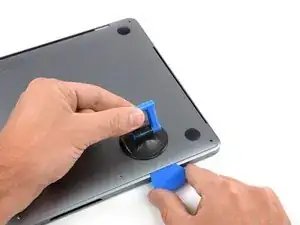
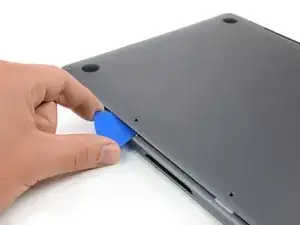
    • Insert your opening pick once again under the front edge of the lower case, near one of the two centermost screw holes.

    • Give the pick a firm twist to pop free the third clip securing the lower case to the chassis.

    • Repeat this procedure near the other of the two centermost screw holes, popping the fourth clip free.

  6. dGMQvsHgheHZuSMs
    dGMQvsHgheHZuSMs
    vtTeKNQv4hK1mfJ5
    UKBDcHJSTtaPlDRT
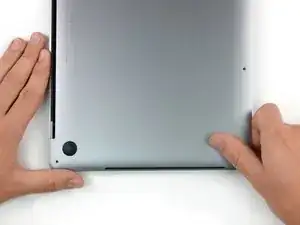
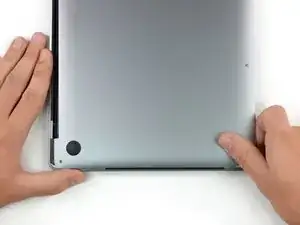
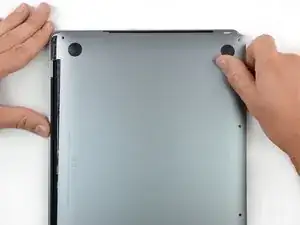
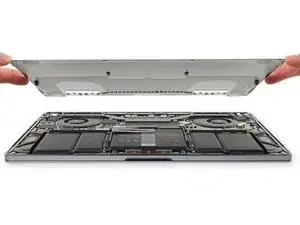
    • Pull the lower case firmly towards the front of the MacBook (away from the hinge area) to separate the last of the clips securing the lower case.

    • Pull first at one corner, then the other.

    • Pull to the side—not up.

    • This can require a lot of force.

    How much force are we talking. I am giving it hell.

    Chris MacCoy -
  7. QE5DDkPTCUxkMojR
    QE5DDkPTCUxkMojR
    IsIJ1d6SwI1DSZq6
    V4ZAwLEAhuHqYWWq
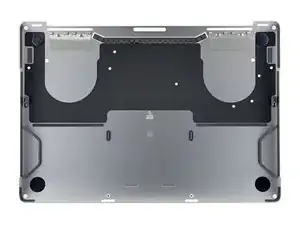
    • Remove the lower case.

    • To reinstall the lower case:

    • Set it in place and align the sliding clips near the display hinge. Press down and slide the cover toward the hinge. It should stop sliding as the clips engage.

    • When the sliding clips are fully engaged and the lower case looks correctly aligned, press down firmly on the lower case to engage the four hidden clips underneath. You should feel and hear them snap into place.

  8. 5HZMhBjrioUj5lL6
    5HZMhBjrioUj5lL6
    EPhIVvuNvBaLRTE6
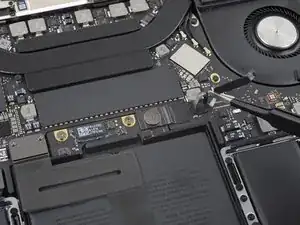
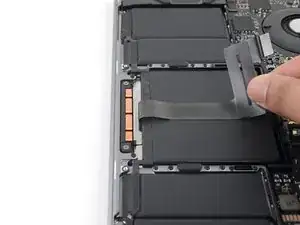
    • Carefully peel up the large piece of tape covering the battery connector, on the edge of the logic board nearest the battery.

    • Remove the tape.

  9. kaRhnoaZYErSUvLf
    kaRhnoaZYErSUvLf
    Nef2wjSqIEPJxaWL
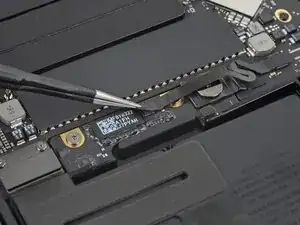
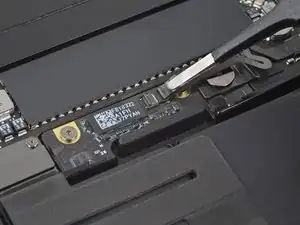
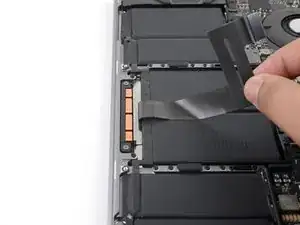
    • Gently peel back the small piece of tape covering the battery board data cable connector.

    • The tape is integrated into the ribbon cable and will not detach completely. Simply peel it back enough to access the connector.

  10. t5QBGUw6LpBCoPHc
    t5QBGUw6LpBCoPHc
    6sjTkPKRATTmNuCM
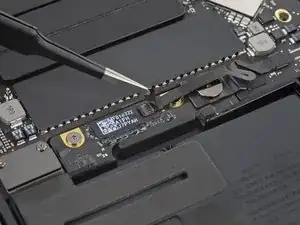
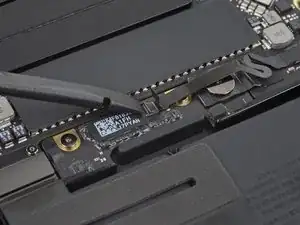
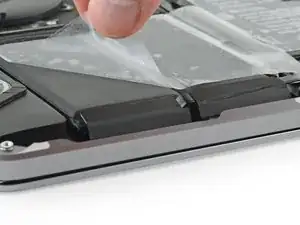
    • Use the tip of a spudger to flip up the small black locking tab securing the cable in its connector.

    Be very careful here. It is easy to break the whole connector off the battery board, which is what I did. Luckily the connector is part of the replacement battery, so you just need to remove the connector from the cable. The pictures here should provide more detail so you can see better what is going on.

    Mark Hayden -
    thanks a lot !!!!! great help :)

    der gute Geist -
  11. 2bersiQZgUKN1NMO
    2bersiQZgUKN1NMO
    5hQYuIWHnCmArPDg
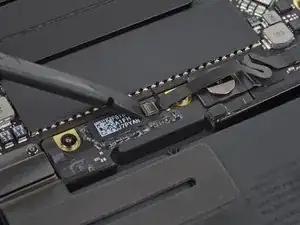
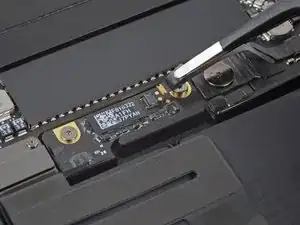
    • Disconnect the battery board data cable by sliding it out from its socket.

    • Slide parallel to the logic board, in the direction of the cable.

    As simple as this step might seem, the golden leads will disapper the moment you remove it as it has some adhesive under the black strip that covers it. Ensure you peel it back enough to display the golden leads after swapping the batteries out.

    Harish Prasanna -

    Your battery may come with this ribbon cable. In that case, disconnect the other end.

    bencottrill -

  12. QcIDoURXUwuHwaPm
    QcIDoURXUwuHwaPm
    ZmvLtlhYsOxYHuLw
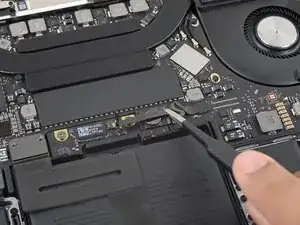
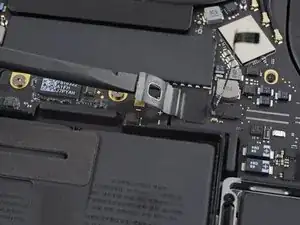
    • Fold the battery board data cable to the side and out of the way.

    I don't recall removing this cable from the laptop. I see that when actually putting the new battery in, the cable is attached already where it was detached and the right end needs to be reconnected.

    durphym -

    unfortunately the instructions to removing this cable are absent and I tried to pry the tab up instead of out and I damaged my board. Now no battery will work but it still functions with only with power cord. So be careful!

    Laloyd -

  13. AeJIpXPThW6iLJfx
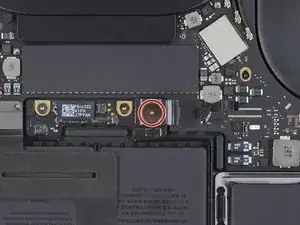
    • Use a T5 Torx driver to remove the 3.7 mm pancake screw securing the battery power connector.

  14. XGJ1kgie42wG3Qx6
    XGJ1kgie42wG3Qx6
    XGaY2hUpcsfZgnQW
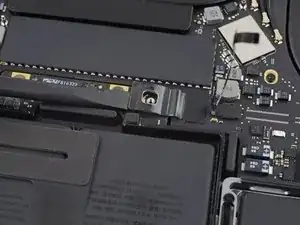
    • Use a spudger to gently lift the battery power connector, disconnecting the battery.

    • Lift the connector high enough so that it stays separated from its socket. If it accidentally makes contact during the course of your repair, it could damage your MacBook Pro.

    To completely avoid accidental contacts I recommend to wrap this connector in a piece of paper and hold it in place with tape.

    Do not put tape directly on the contact underside, as that may leave some glue that would affect the contact conductivity.

    Sergio Ballestrero -

    I put a piece of tape on the underside of the connector (sticky side up) to insure against accidental battery contact. If you put tape on the logic board side of the connection, some insulating padding material might accidentally stick to the tape when the tape is removed during reassembly.

    W. Smith -

  15. 3WX2uOrihd5NYGXY
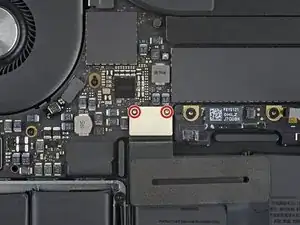
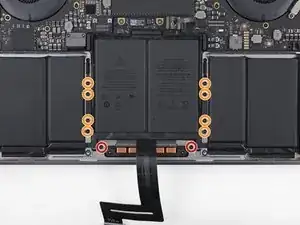
    • Use a T3 Torx driver to remove the two 1.8 mm screws securing the trackpad cable connector bracket.

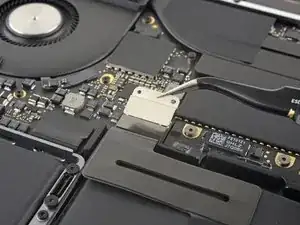
  16. MibqKHJLExVMqxFr
    • Remove the trackpad cable connector bracket with a pair of tweezers.

  17. veHIWFVbeniSBGAL
    veHIWFVbeniSBGAL
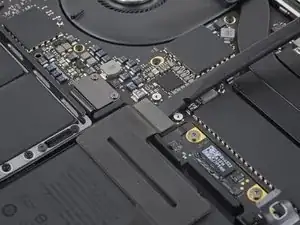
    O5k6FNnLGIK1xLKd
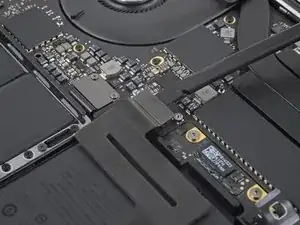
    • Use a spudger to disconnect the trackpad ribbon cable by gently prying its connector straight up from the logic board.

  18. PhmS16LkIHFuPZ4C
    • Prepare an iOpener and lay it on top of the trackpad ribbon cable for about a minute, in order to soften the adhesive securing the trackpad ribbon cable to the top of the battery.

    • If you don't have an iOpener, use a hair dryer to warm up the cable instead. The cable should be warm, but not too hot to touch. Be careful not to overheat the battery.

  19. oruQvodYtCQOI5Rd
    oruQvodYtCQOI5Rd
    UuTr2jtquyofFUQ2
    fQ2AejEg5FHfEdPa
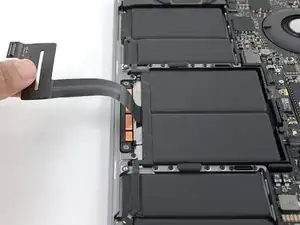
    • Carefully peel the trackpad ribbon cable up off the battery, and push it out of the way.

    • Do not fold or tear the cable.

  20. cobybiydhpj5sjch
    • Use a T5 Torx driver to remove the ten screws securing the trackpad assembly:

    • Two 4.3 mm screws

    • Eight 5.8 mm screws

  21. 4JXL6NSh1N1uno6P
    4JXL6NSh1N1uno6P
    pkLswMnH5VIJBjjG
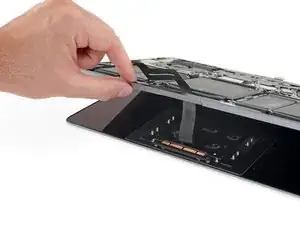
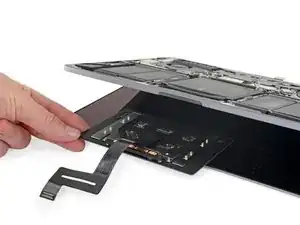
    • Swing the display open slightly to access the trackpad.

    • Carefully thread the trackpad ribbon cable out through the hole in the MacBook Pro's frame.

  22. eANm65sEL16YH5pi
    eANm65sEL16YH5pi
    Pw3CrFOhyuGs12Xw
    qdSUoQfXWJ5RbSGO
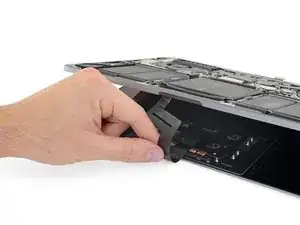
    • Remove the trackpad assembly.

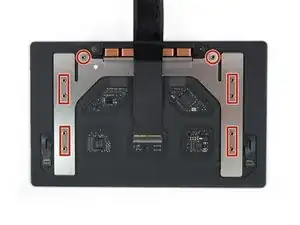
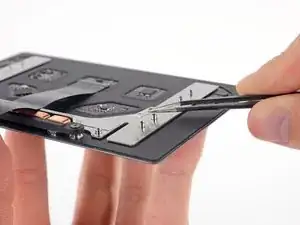
    • Be sure not to lose the six small washers (two circular and four rectangular) resting on the underside of the trackpad.

  23. CgSwwpQXjgyKZKvW
    • Use a T5 Torx driver to remove the two 3.2 mm screws from the battery board.

  24. NdgSpktjddtRsGtH
    NdgSpktjddtRsGtH
    vjT1rCHbOZmbEDgJ
    BBOUXMUNUKHeRWLU
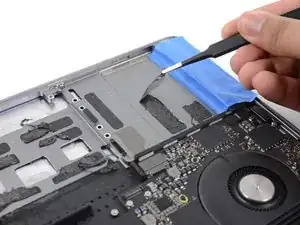
    • The liquid adhesive remover provided in your kit can cause damage if it contacts the MacBook Pro's display or keyboard.

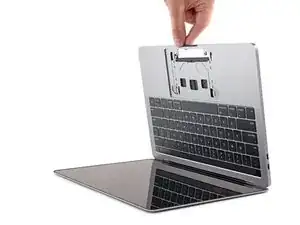
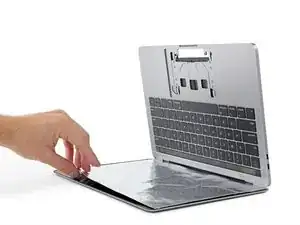
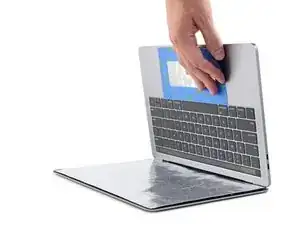
    • To protect your display, place a sheet of aluminum foil between the display and keyboard and leave it there while you work.

    • Additionally, use some tape and/or foil to seal off the area under the trackpad. Optionally, you may also layer an absorbent towel directly underneath the trackpad area to soak up any excess adhesive remover.

    This is an important point. I had missed. I feel a better image with a towel would better emphasize.

    Jeff Brubaker -

  25. CqkaqDsK42wGeotL
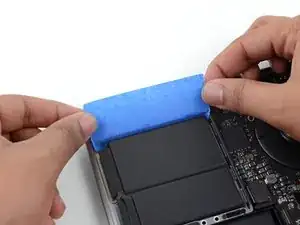
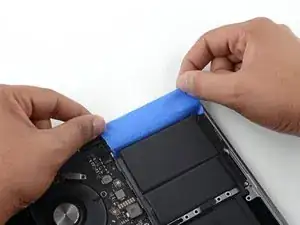
    • Before removing the battery, it's important to protect the speakers on either side. The speakers are glued down just like the battery—so if the liquid adhesive remover gets under the speakers, they may come loose and rattle after your repair.

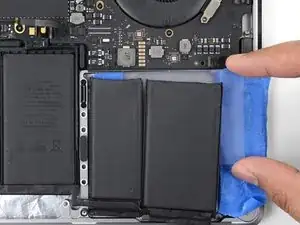
    • Cut a length of packing tape or painter's tape, and slide one edge between the battery and the speaker on the left side.

  26. vwUkNAAluWoG1enR
    vwUkNAAluWoG1enR
    FCK4LNZqhXgvPitS
    khJEtaYb4ZJGuK5K
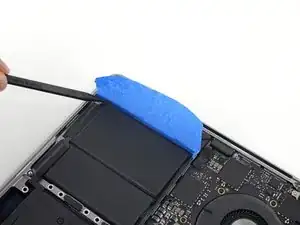
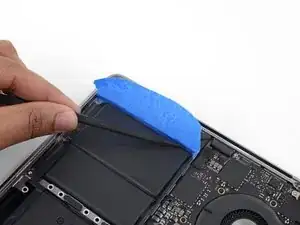
    • Press all along the edge of the tape with your spudger to stick it securely to the MacBook Pro's aluminum case, sealing off the speaker from the battery.

    • Be careful not to poke or puncture the battery.

    • Fold the tape over and lightly adhere it to the speaker to keep it out of the way.

    • The foam bumpers on top of the speaker may tear when peeling the tape off. Don't press the tape directly onto the bumpers.

    The speaker membrane is also relatively delicate. You can put a small piece of paper to protect it, to avoid the tape gluing to it directly.

    Sergio Ballestrero -

  27. bH2qAYVVxn6tMKH4
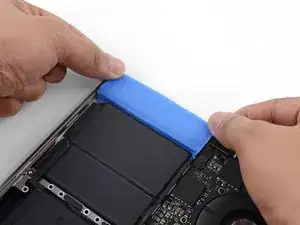
    • Repeat the previous two steps on the opposite side in order to seal off the other speaker from the battery.

  28. 3YFEeDpPMcMSOcdT
    3YFEeDpPMcMSOcdT
    ccgpxO3FPubGBLX2
    efinmWBQC4i5DPVZ
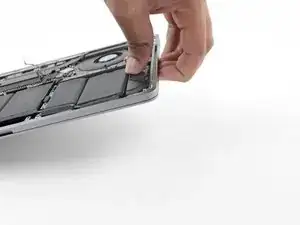
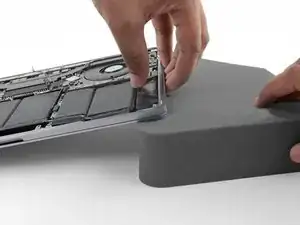
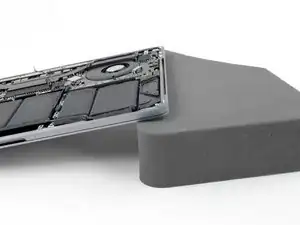
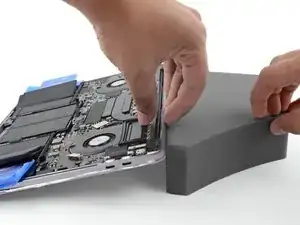
    • To control the flow of adhesive remover and direct it away from the speaker, raise the right edge of your MacBook Pro a few inches using a book or foam block.

  29. TuvRXElexTKHQMTP
    TuvRXElexTKHQMTP
    HYTQ4HQsaXjDTZrX
    • Now that your MacBook Pro is fully prepped, it's time to prep yourself.

    • iFixit adhesive remover contains acetone, a mild skin and eye irritant.

    • Wear eye protection when handling and applying the adhesive remover. (Eye protection is included in your kit.)

    • Do not wear contact lenses without eye protection.

    • Protective gloves are also included in your kit. If you are concerned about possible skin irritation, put your gloves on now.

  30. 56C1AECVnMgVAoMf
    56C1AECVnMgVAoMf
    P4WnRLX4PvRLpvHi
    bqsIlDWMRBaA2yt3
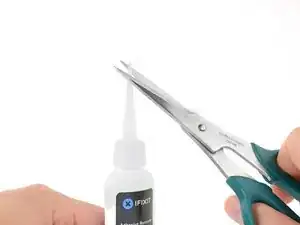
    • Pull off the black rubber stopper from your bottle of adhesive remover.

    • Twist to loosen or remove the bottle cap before you cut the applicator tip.

    • This unseals the bottle and allows the pressure to equalize before you cut the applicator tip. If you skip this step, the adhesive remover may spray out unexpectedly when the tip is cut.

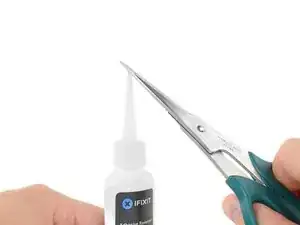
    • Use scissors to cut off the sealed tip of the applicator.

    • Cutting close to the narrow tip will give you better control so you can apply the adhesive remover in small amounts.

    • Twist and close the bottle cap securely before you proceed further.

    Newer kits don’t need to cut the tip

    Daniel -

  31. WxFAm1QvklYQq3Kp
    WxFAm1QvklYQq3Kp
    jPTwC5xtVKiFelbn
    NVUyJVLGH4mHXCyJ
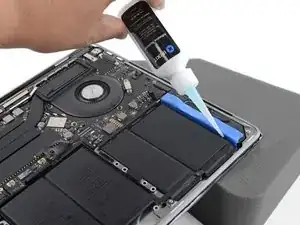
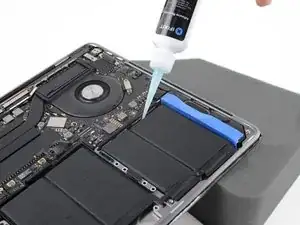
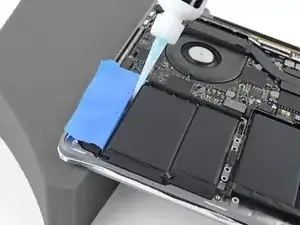
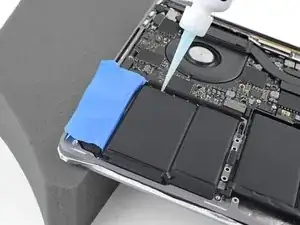
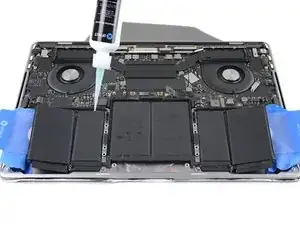
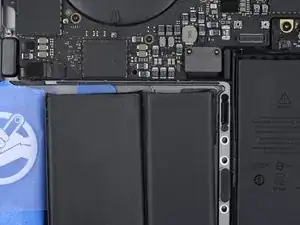
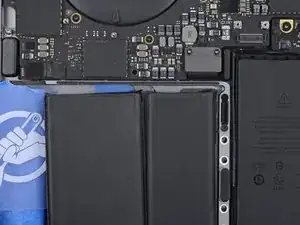
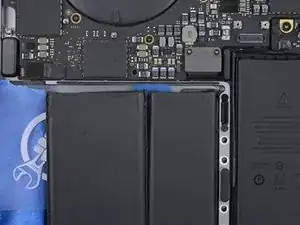
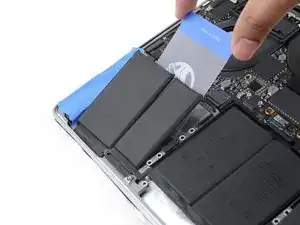
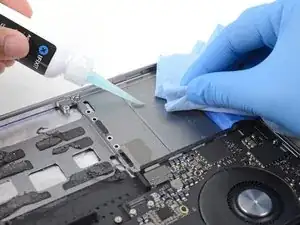
    • Apply a few drops of adhesive remover underneath the far right battery cell.

    • You don't need to use very much—the small bottle contains more than twice the amount of solvent needed to remove all the battery cells.

    • Wait about two minutes for the adhesive remover to penetrate and soften the battery adhesive before you proceed to the next step.

  32. dLalRvGdobkoncr6
    dLalRvGdobkoncr6
    MAYqfsLoaJYbHYKC
    QSSAXd4FBgQG42Db
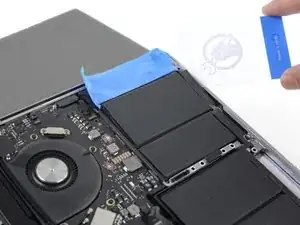
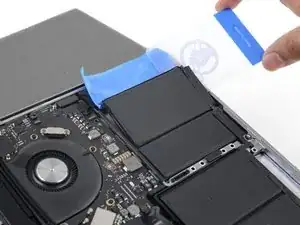
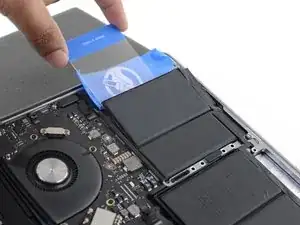
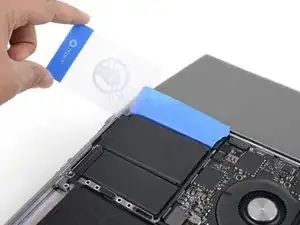
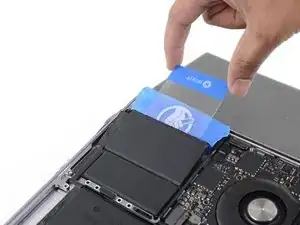
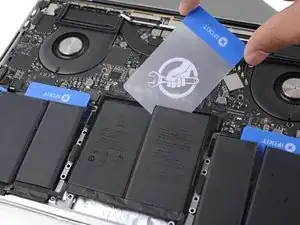
    • After a couple minutes, insert one corner of a plastic card underneath the far right battery cell, starting from the front edge.

    • This shouldn't require much force. If you have trouble, apply more adhesive remover and give it 2-3 additional minutes to penetrate.

    • Try not to deform the battery. A damaged battery can leak dangerous chemicals and/or catch fire.

    • Wiggle the card from side to side and slide it all the way under the battery cell.

    • Lift to fully separate the adhesive, but don't try to remove the battery cell yet.

    • Leave the plastic card temporarily underneath the cell to prevent it from re-adhering while you continue.

  33. vXy3YispuidyXuCP
    • If you have difficulty getting the card underneath any of the battery cells, try working a piece of floss or wire underneath the battery cell. Pull it side-to-side in a sawing motion to separate the adhesive.

    • Wear thick gloves or wrap the floss around a couple of driver handles so as not to hurt your fingers.

  34. UPd3aTEI2My1gTSI
    UPd3aTEI2My1gTSI
    PSdVomELwnkWmCh2
    • Repeat the last few steps to separate the far left battery cell.

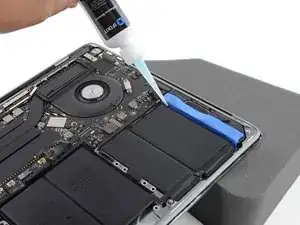
    • Begin by elevating the left side of the MacBook Pro to direct the flow of adhesive remover away from the speaker.

  35. ARIMTeitGuqTTlMh
    ARIMTeitGuqTTlMh
    RbypqgBNEo3BPHDG
    oyq2IphMdwJMfjQZ
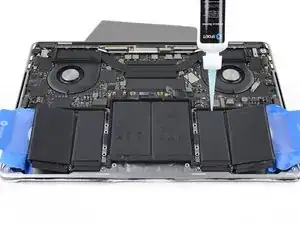
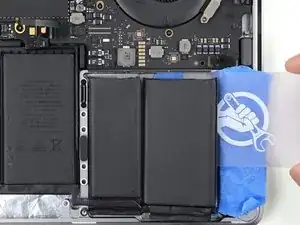
    • Apply a few drops of adhesive remover under the far left battery cell, and wait about two minutes for it to penetrate.

  36. RHHyMlfHFpfSIAFp
    RHHyMlfHFpfSIAFp
    ZkLkdEpPrG1LgsdZ
    • Slide one corner of a plastic card underneath the far left battery cell, and carefully separate the adhesive holding it in place.

    • Leave the plastic card temporarily underneath the cell to prevent it from re-adhering while you continue.

  37. ucIEM3aoluSXo5PG
    • Next, raise the back edge of your MacBook Pro to direct the flow of adhesive remover away from the keyboard/logic board area.

  38. B2NtmvNACuGQqIsS
    B2NtmvNACuGQqIsS
    agybY55IF5G5YvOK
    1Cs1FCgZH6LvMsmT
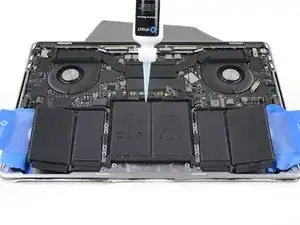
    • Apply a few drops of adhesive remover under each of the remaining three battery cells.

    • There are openings in the aluminum case underneath these cells, so some of the adhesive remover may leak out instead of penetrating underneath the battery.

    • Be mindful of leaks, and apply more adhesive remover in the following steps if needed.

    • Wait about two minutes before you continue.

    I would add a note to be careful with how much adhesive remover you apply under the middle cells, as the top edge is positioned right over the space bar on your keyboard, and some of it can leak in and cause damage.

    Monkey -

  39. nKRo5NHwUhJGJNTg
    nKRo5NHwUhJGJNTg
    sWZOTJ2jTollm1Ih
    IHlLAdbyZu4D22E4
    • The remaining two smaller battery cells each sit on a slightly raised portion of the MacBook's aluminum frame.

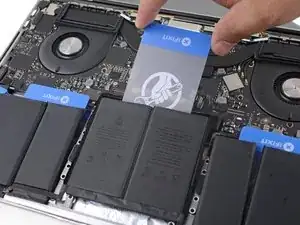
    • Slide a plastic card all the way underneath the far left battery cell—which you already separated in the previous steps—and then insert it carefully between the remaining left-side battery cell and the MacBook Pro's aluminum case.

  40. VPCq2ZqWYMpXDMQf
    VPCq2ZqWYMpXDMQf
    jO4A6oKLtNctKdhA
    • Use your plastic card to fully separate the remaining battery cell on the left side.

    • Take care to not pry against the logic board.

    • Leave your plastic card in place temporarily to prevent the left-side battery cells from re-adhering.

  41. 4UfnP2GYMr2MXh1I
    4UfnP2GYMr2MXh1I
    rflOvCaaSKnZTTHE
    xXopkdTA1KWgSg6J
    • Repeat the previous two steps to separate the remaining battery cell on the right.

  42. tLCPUQ5sEiGpS2Jv
    tLCPUQ5sEiGpS2Jv
    3bc1UWYEFleuOuvV
    KxnwIOOGR65Ztrku
    • The final battery cells can be more difficult to remove. If needed, apply more adhesive remover to make the job easier.

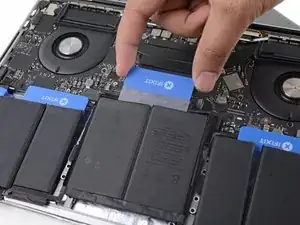
    • Slide the corner of one of your plastic cards underneath the top edge of one of the cells and then work it underneath the other cell.

    • Wiggle the card from side to side and slide it underneath the battery cells to fully separate the adhesive holding them in place.

  43. vKiOAmpVDnEOJY51
    vKiOAmpVDnEOJY51
    hNWPuDdWTHEYU6Xu
    B6hGCUsOeyixINuB
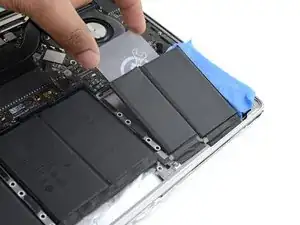
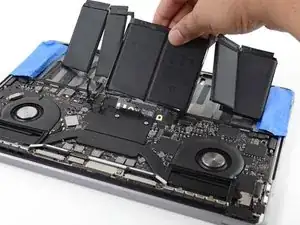
    • Before you remove the battery, ensure that the battery connector is sufficiently raised and not in the way of the battery board.

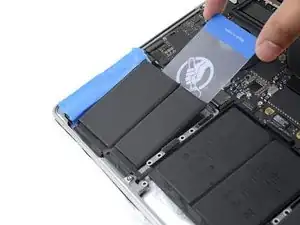
    • Remove the battery.

    • Before installing a new battery, remove all remaining adhesive from the MacBook Pro's case.

    • Peel off any large strips of adhesive using tweezers or gloved fingers.

    • Scrape away any remaining chunks of adhesive with a plastic tool, and clean the underlying areas with adhesive remover or isopropyl alcohol. Wipe in one direction (not back and forth) until the chassis is clean and ready for your new battery.

    • This can take quite a bit of work, so be patient.

    • When you're done, carefully remove the protective tape from the speakers.

  44. rOjPF3FMiSQOQMtb
    rOjPF3FMiSQOQMtb
    vKGSHYWlwWJyPq6U
    E3W5TZMRaPoxMkDU
    • Double-check the fit and alignment of your new battery before sticking it down.

    • Be mindful of the battery data cable and make sure it doesn't get pinched or trapped under the battery board.

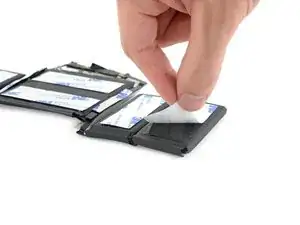
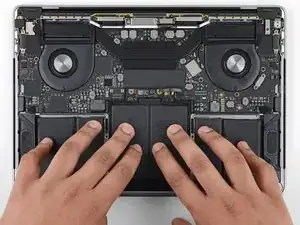
    • If your battery came with adhesive pre-installed on the bottom, flip it over and carefully peel away the liner to expose the adhesive. If your battery did not come with adhesive, apply a thin double-sided adhesive tape such as Tesa 61395 to keep your battery in place.

    • Carefully position the battery and set it into place.

    • Place the battery close to the logic board so the trackpad cable can reach its connector.

    • Press and hold each cell firmly for 5-10 seconds to secure it to the lower case.

    Extremely detailed and easy to follow instructions! I ordered all the tools from ifixit and they worked great. I didn’t use the adhesive remover. I was able to carefully work a plastic card behind each battery section. This took a little more effort but I didn’t feel comfortable using acetone on a macbook.

    Derek Keathley -

    Instead of acetone/alcohol blend adhesive remover I used 91% isopropyl alcohol available at any pharmacy. Acetone will melt many/most plastics, alcohol will not.

    91% isopropyl alcohol and a thin plastic card worked fine, took a little more time and patience but worked.

    While the acetone is better at loosening/removing adhesive, you also increase the risk of damaging plastics around the battery area or worse if it should leak into the keyboard or other area!

    As the instructions note ... DO NOT over apply their adhesive remover!

    Thanks iFixit for providing great tutorials, parts and supplies!

    Happy Customer

    Ken R -

Conclusion

Compare your new replacement part to the original part—you may need to transfer remaining components or remove adhesive backings from the new part before installing.

To reassemble your device, follow the above steps in reverse order.

Take your e-waste to an R2 or e-Stewards certified recycler.

Repair didn’t go as planned? Try some basic troubleshooting or search our Answers community for help.

Carsten Frauenheim

Member since: 10/03/20

110978 Reputation

One comment

Thank you I don’t own this but this repair was easy to understand and well written. Keep up the good work!🤓😆🦆

dan g -