Introduction
This guide will show you how to upgrade or replace the solid state drive (SSD) on your MacBook Air. The SSD is the storage component of your laptop, responsible for long term preservation of your files and operating system. If your computer is crashing frequently or having boot problems, a corrupted SSD may be at fault.
This guide is relevant for all models of MacBook Air containing a user replaceable SSD, which includes machines released between 2010-2017. If your laptop is newer than that, it's likely got a soldered storage component—sorry, we can't help you here.
Before you perform this repair, if at all possible, back up your existing SSD. Then, either familiarize yourself with internet recovery or create a bootable external drive so you’ll be ready to install macOS onto your new drive and migrate your data to the new SSD.
Model specific guides for this device are available if you want to dig into the details. For a better experience, you should navigate to your specific model, whether you've got a MacBook Air 11" or a MacBook Air 13", and find the replacement guide that's relevant to you. If you aren't too particular and just need the basics, continue on for the general process.
You can find the MacBook Air Storage!
Parts
-
-
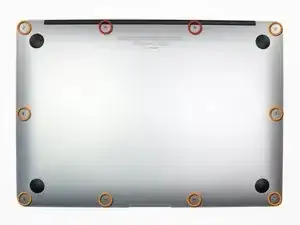
Use a P5 Pentalobe driver to remove ten screws securing the lower case.
-
The two screws on the edge containing the hinge are longer than the others.
-
The eight screws in the corners and remaining edges are shorter.
-
-
-
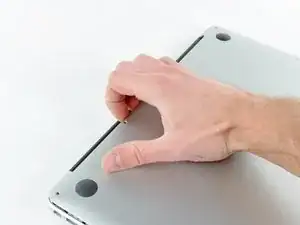
Wedge your fingers between the display and the lower case and pull upward to pop the lower case off the Air.
-
Remove the lower case and set it aside.
-
-
-
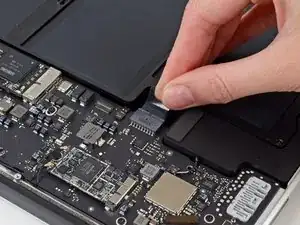
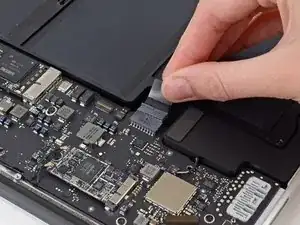
Grab the clear plastic pull tab attached to the battery connector and pull it parallel to the board toward the front edge of the Air.
-
-
-
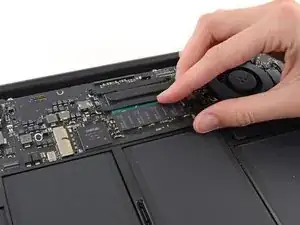
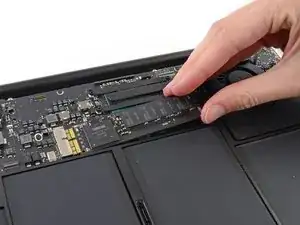
Gently lift the end of the SSD about half an inch and pull it straight out of its socket on the logic board.
-
To reassemble your device, follow these instructions in reverse order.