Introduction

Prereq only.

  1. thx2PRFESOcKGAcF
    thx2PRFESOcKGAcF
    fowEwJDQUHt5gRvN
    YkicYtjklAO35ERL
    • Remove five 5.1 mm T10 Torx screws from around the outer perimeter of the fan assembly.

    You don't have to remove the fan assy to get to the wifi board & card. It can be done with the fan assy still attached.

    Fat Mango -

    Fat Mango is correct. That said. If you do pull the fan assembly note that the screws are all held in with blue Permatex and breaking them free takes a fair amount of effort. Getting a good set of Torx screwdrivers is a must.

    Jim WIlson -

    Hey guys, what would happen if you only replace one card.. I have a D300 but the plan is to upgrade to D500 or D600. So If I can afford and install one instead of the pair would it increase something? or will it cause any conflict? I guess I don’t understand if I the Mac Pro has 2 D300 graphic cards that means each has 1GB? Same as If I would Install 1 D600 that would increase 3GB only? Thanks.

    marcotamayo -

    D300 = 2GB each card. Very few apps uses two cards at the same time.

    Gio Cas -

    The (5) Screws are Apple part number 923-0713

    Steven Gier -

  2. fEANTTnYS4TS3pQD
    fEANTTnYS4TS3pQD
    V2ArmlpPcrPPbGTB
    • The fan assembly is attached to the rest of the computer by two cables on the IO board side.

    • Tilt the assembly up away from the IO board.

    • Do not try to remove the fan assembly yet, as it is still attached by two cables.

  3. lceQ6InRYFH5qg2f
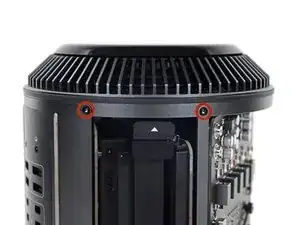
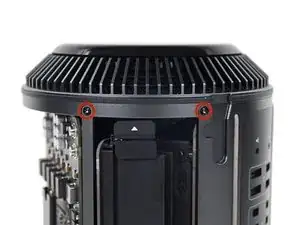
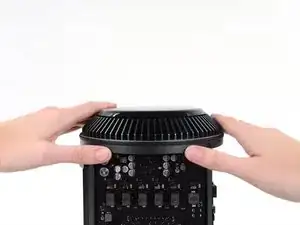
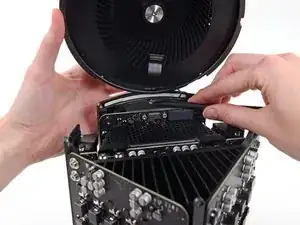
    • While supporting the fan assembly with one hand, loosen the two T8 captive screws in the fan cable bracket.

    • These screws are captive in the Mac Pro. Do not try to remove these screws from your Mac Pro.

    On my Mac Pro (assembled mid-2017) these are T8 screws. In fact, there were no T7 screws anywhere in my machine.

    mark33 -

    There was no bracket on top of the cable at all, so I got a bit confused, so I had to skip step 5 and 6.

    Rakesh -

    On my machine, a TR7 worked to remove them due to the weird angle.

    Wilson Gaberino -

  4. Y6MKDVBUdIumVZuf
    • Use a pair of tweezers to pull the fan cable bracket away from the fan assembly.

  5. JUE2RPF2GwjcP2kr
    JUE2RPF2GwjcP2kr
    oW6DugeJyYrgKGD4
    • Use the flat end of a spudger to disconnect the fan assembly ribbon cable from the IO board.

  6. wMMmqDsn3NjCMRWu
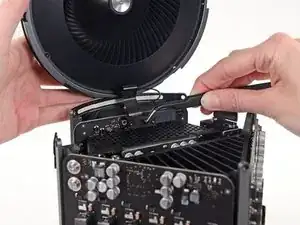
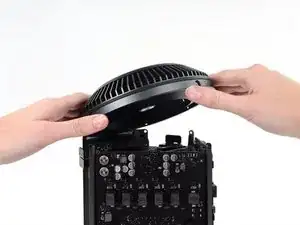
    • Disconnect the fan assembly antenna cable from the IO board.

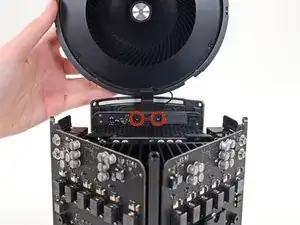
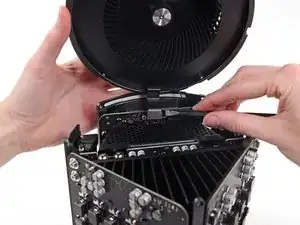
    • Remove the fan assembly from the Mac Pro.

    You don't have to remove the fan assy to do the steps below. They can be done with the fan assy still attached.

    Fat Mango -

Conclusion

To reassemble your device, follow these instructions in reverse order.

Andrew Optimus Goldheart

Member since: 17/10/09

502341 Reputation

0 comments