Introduction

  1. FD5AhZMDKPCou1tR
    • Do not begin until the laptop is unplugged and completely powered off.

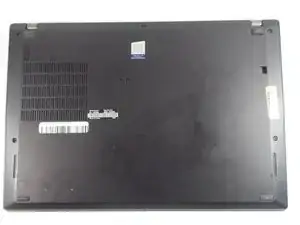
    • Flip the laptop over to reveal the back panel of the laptop.

  2. Mp1NQFa6io1dD1Jj
    Mp1NQFa6io1dD1Jj
    vWCIZnCkOjGIKnRw
    4sNkFaWMq63qwccU
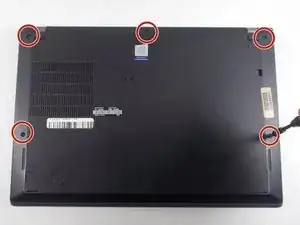
    • Loosen the five 4.0 mm captive screws with a Phillips #1 screwdriver.

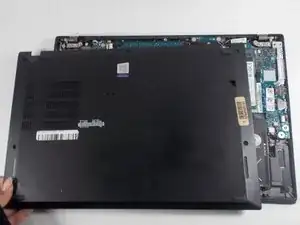
    • The screws will stay attached to the back cover as you lift it off.

  3. h6i2KneREeVi4mJu
    h6i2KneREeVi4mJu
    kZdP1TQYsRmjFBax
    26PJBACdqfTiPLfA
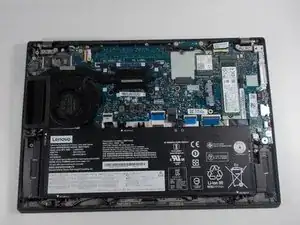
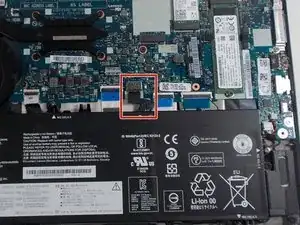
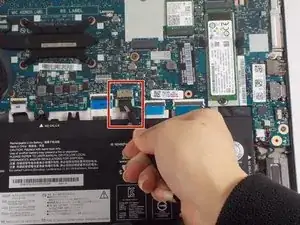
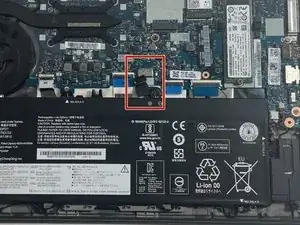
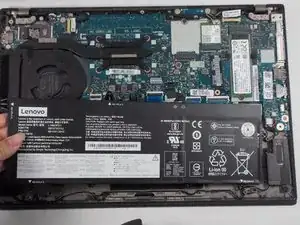
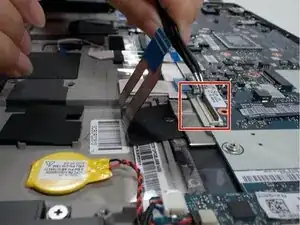
    • Use tweezers to unplug the battery connection from the motherboard.

  4. JjaVFtccWPeP1DOJ
    JjaVFtccWPeP1DOJ
    dCPXkeSWMqHFEp4N
    TPbVcdAkwuZUhq2B
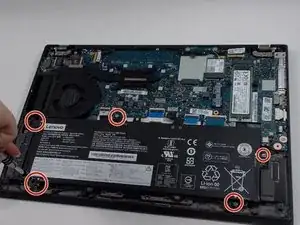
    • Remove the five 4.5 mm screws with a Phillips #1 screwdriver.

    • There are plastic tabs at the bottom of the battery, so pull it slightly forward with your hands, toward the motherboard, before lifting straight up.

  5. OHKVjFZTdQbmnoFY
    OHKVjFZTdQbmnoFY
    SZmqk41ClcTImBKx
    T5UyDApBeUTyLWF6
    • Use a Phillips #1 screwdriver to loosen the four 2.2 mm captive screws from the fan assembly.

    • The screws should stay attached to the fan during removal.

    • Use tweezers to unplug the fan assembly from the motherboard.

    • Lift the fan from the laptop using your hands.

  6. UUMNpJOykw2jPwKv
    UUMNpJOykw2jPwKv
    By6wKLnCuCiVHWdG
    yPaRDvSF5Cyuf3ZZ
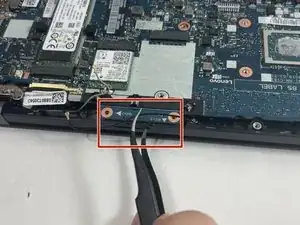
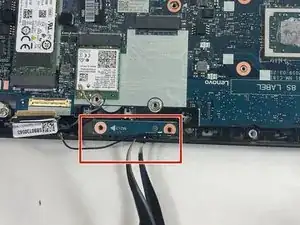
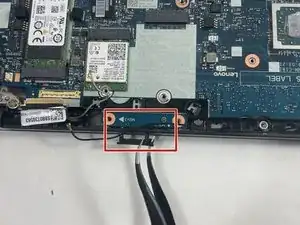
    • Use tweezers to grip the SIM card holder and remove it from the laptop.

  7. AUJcehXllLgFiOtG
    AUJcehXllLgFiOtG
    uZZvNhh43KLjKqK6
    1VsCwd2OKFLf32Zl
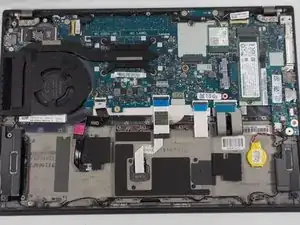
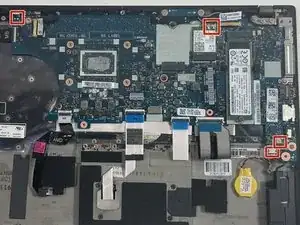
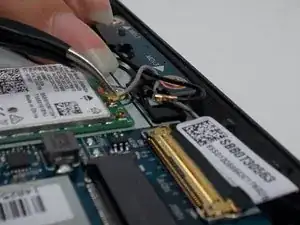
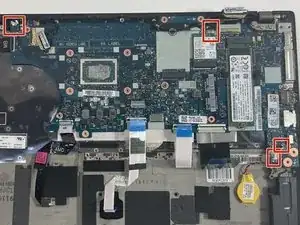
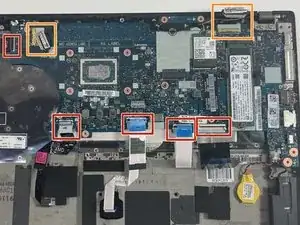
    • Use tweezers to grip and disconnect the four motherboard connections.

  8. T1jOUxGHvkUJWNhQ
    T1jOUxGHvkUJWNhQ
    GCP4P5HIGRoPjSb5
    TyyR5fCPmWZVdH1X
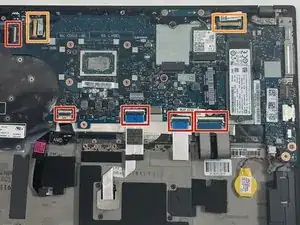
    • Use the iFixit Opening Tool to flip up the small locking flaps on the five ZIF ribbon cable connections attached to the motherboard. The ribbon cables easily release from their sockets with almost no force.

    • ZIF stands for Zero Insertion Force; if you're experiencing any resistance whatsoever during disconnection, double-check that the locking flaps are flipped up.

    • To disconnect the two display cable connectors, gently push the tip of a spudger under the clip. Then, swing the clip over to the other side of the socket, so that it lays flat against the cable.

    • Holding the clip and cable together, gently pull in the direction of the cable to remove the connector from its socket.

  9. YUreRymObfVnakvZ
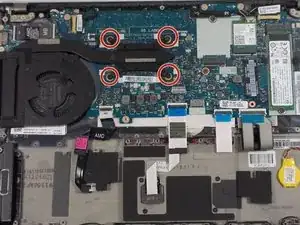
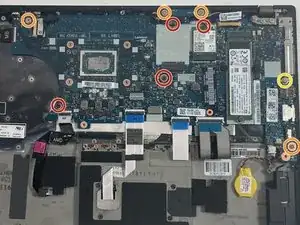
    • Use a Phillips #1 screwdriver to remove the four 2.2 mm screws.

    • Use a Phillips #1 screwdriver to remove the four 3.0 mm screws.

    • Use a Phillips #1 screwdriver to remove one 4.5 mm screw.

  10. boO2LwuOZsUXKynD
    boO2LwuOZsUXKynD
    ldgIG6SqcgecqYQh
    4ieskOQ1hXFwmkrk
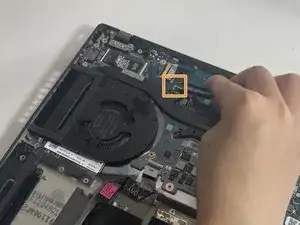
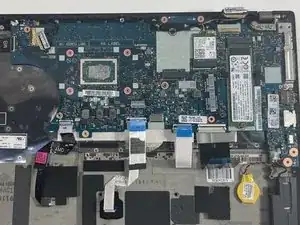
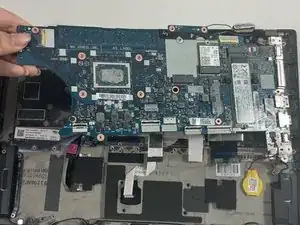
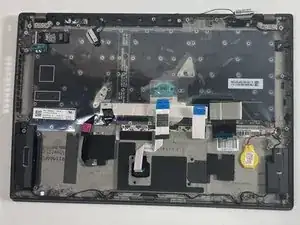
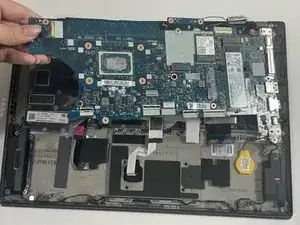
    • Lift the left side of the motherboard up and to the left to remove it from the chassis.

Conclusion

To reassemble your device, follow these instructions in reverse order.
Ijhanne Holder

Member since: 28/03/22

422 Reputation

0 comments