Introduction

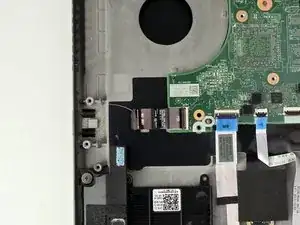
Use this guide to replace the USB card in a Lenovo ThinkPad T480s laptop.

The USB Card is used for extra storage and data backup and transfer. If your laptop does not recognize the USB Card, you might receive an error message and it will fail to load. The USB card may be corrupted. You may need to replace it but first do some troubleshooting.

Make sure to disable the internal battery, power down your device, and disconnect from any external power sources before you begin.

  1. RNt3cWxTIjeD1Mhe
    RNt3cWxTIjeD1Mhe
    haCRyLGBRClsXGrF
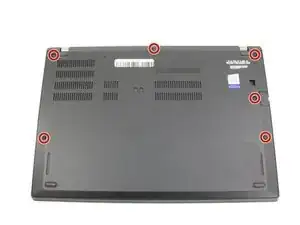
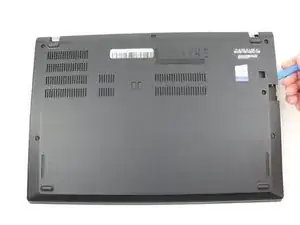
    • Disable the battery, power down the device, and unplug the power adapter from your device before proceeding/beginning the guide.

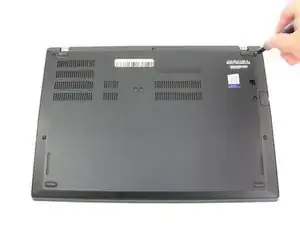
    • Loosen the six captive screws with a Phillips #1 screwdriver.

  2. Vboy5of3qMKgumu1
    Vboy5of3qMKgumu1
    Xg36ebBqZsGYEUXf
    lIwLqVaU1qnjeJil
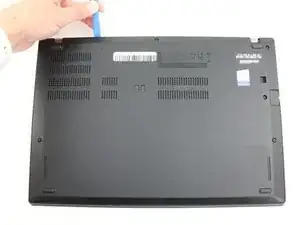
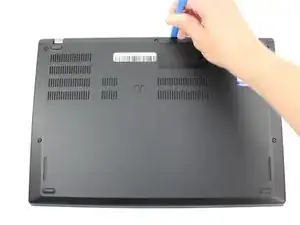
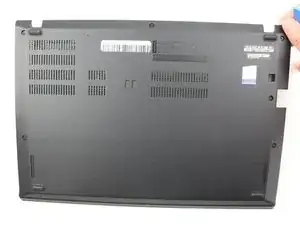
    • Remove the bottom cover with an opening tool.

    • Start from the top edge near the hinge and work your way along the edge until all of the clips are unsnapped.

  3. l4tenwgnMuEBiPRu
    l4tenwgnMuEBiPRu
    OndiEfoacVynMaGD
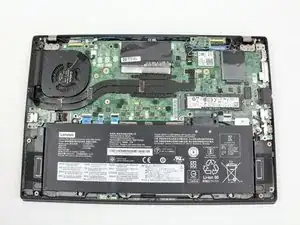
    • Lift the bottom cover off.

  4. 5hlj23cNUOP5RrOm
    5hlj23cNUOP5RrOm
    wSSBwObPvHiGYhIB
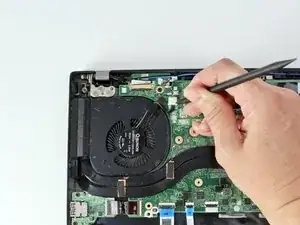
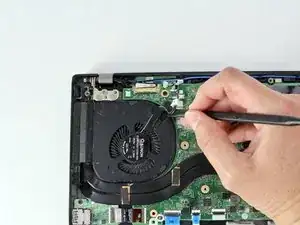
    • Use the spudger to disconnect the fan cable from the motherboard.

  5. 3KAwGECtwmPtbDEv
    3KAwGECtwmPtbDEv
    PDwke4IBtRN2rvHh
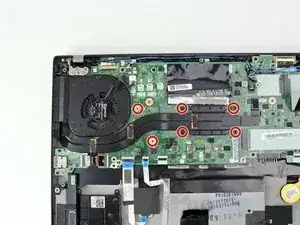
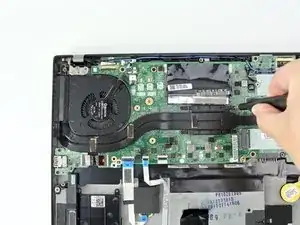
    • Loosen the six captive screws attaching the fan assembly to the motherboard.

    • This system was missing the two screws by the fan but I have highlighted them to show where they are located.

  6. 6DGKTKVyeWXdBOlW
    6DGKTKVyeWXdBOlW
    kVNR6ROfK5MNEq3q
    LoFiCPna2sbdpGqS
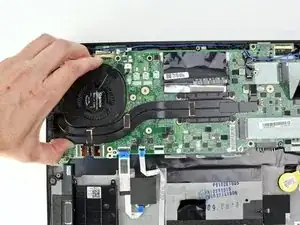
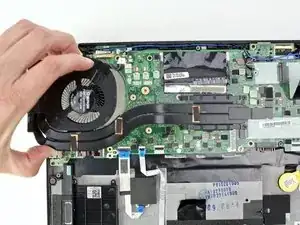
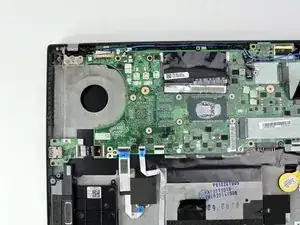
    • Lift the thermal fan assembly from the system and remove it.

    Is it necessary to replace the thermal paste on the CPU?

    gordonzaft -

    Hi gordonzaft, it's a good idea to reapply thermal paste after removing a heatsink or CPU for a repair. You may already know how to apply thermal paste, but if you'd like a refresher or some general instruction, check out the How to Apply Thermal Paste guide. Thanks!

    Sarah Westberg -

  7. EWYYqTx6W23V4djC
    EWYYqTx6W23V4djC
    VTlciPwiRJjgrV11
    WXtUbqjMUM2CYKEs
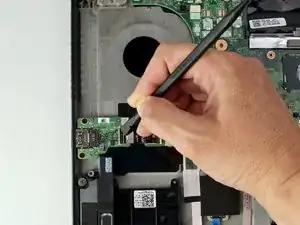
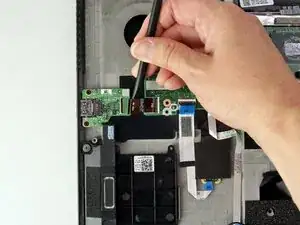
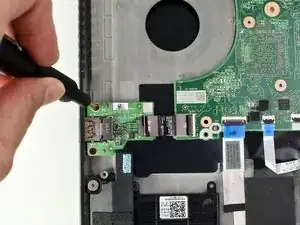
    • Use a spudger to disconnect the cable from the USB card.

  8. QfvxNNFC5NISkpIM
    QfvxNNFC5NISkpIM
    A4vyTLDW4WKXq62i
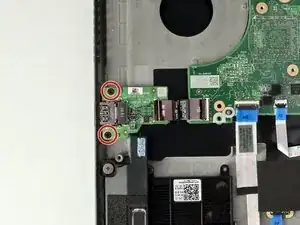
    • Use the Phillips #1 screwdriver to remove two 3 mm screws from the USB card.

  9. KMrcdXkbntkMcslT
    KMrcdXkbntkMcslT
    oZogD2qtvwEWpBXy
    RfUKLD4NhhJ4XXKC
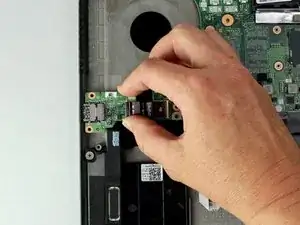
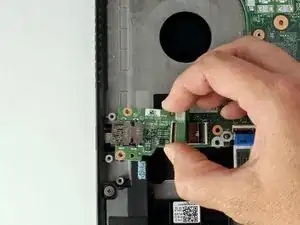
    • With your fingers, lift the USB card from the system.

Conclusion

To reassemble your device, follow these instructions in reverse order.

Take your e-waste to an R2 or e-Stewards certified recycler.

Repair didn’t go as planned? Try some basic troubleshooting, or ask our Answers community for help.
Sarah Westberg

Member since: 11/03/19

22761 Reputation

0 comments