Introduction
Keep your aging Mac from going obsolete by installing a patched version of macOS Mojave.
Please do note that if you install any Mojave update from Apple on your Mac you will "brick" your machine and you will be required to do erase your HDD/SSHD/SSD and start over. '''
Parts
-
-
Once the patch tool has finished downloading, open it the .dmg file and wait for it to mount.
-
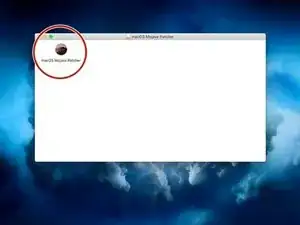
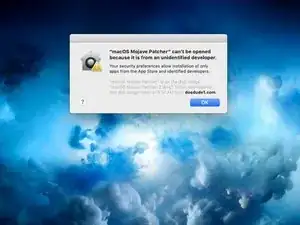
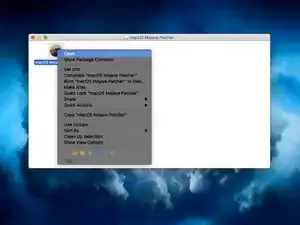
Inside the .dmg file, you will see an application named macOS Mojave Patcher. Double click it to open the application.
-
-
-
Insert your 16 GB or higher USB drive into your Mac.
-
Open Disk Utility
-
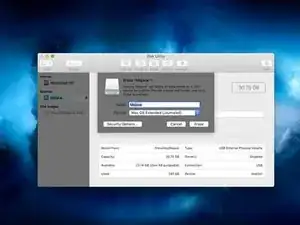
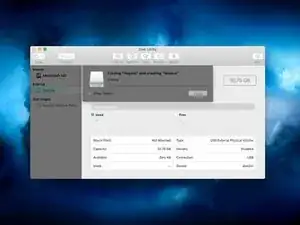
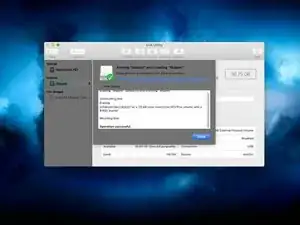
Erase the USB Drive and format it into macOS Extended (Journaled) format. The name of the drive does not matter.
-
-
-
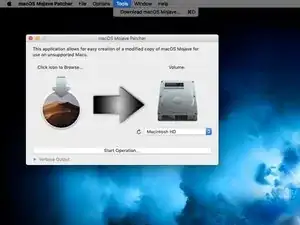
Go back to the patch tool window and go the the menu bar
-
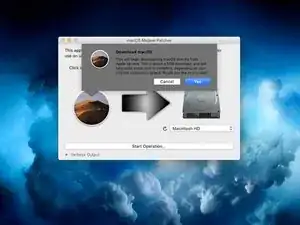
Click "Tools" and then click "Download macOS Mojave" in the dropdown menu when it appears.
-
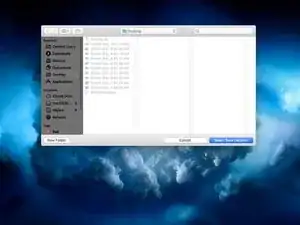
Click continue, and then select where you will save the installer.
-
-
-
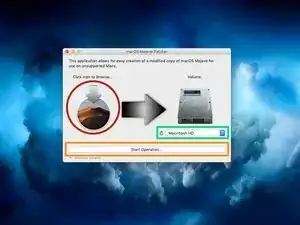
Once the Mojave installer has finished downloading, select the Mojave icon in the macOS Mojave Patcher window.
-
Select your Mojave installer and click open
-
Now, select your volume by clicking the dropdown menu under the picture of a hard drive. You want to select the name of your USB drive.
-
Click start operation. This may take a while to complete based on your drive speed.
-
-
-
Once this process has been completed, eject your USB drive and shut down your Mac.
-
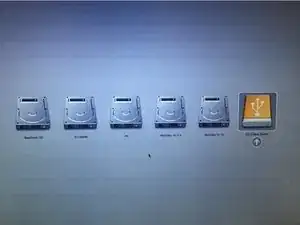
Press the power button on your Mac and hold down the option key on the keyboard as soon as you either see the grey startup screen or the bong.
-
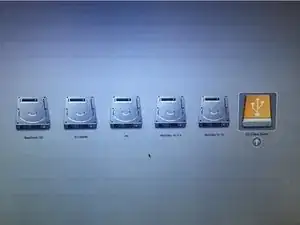
Keep holding the option key down until you see a screen that looks similar to the picture I attached.
-
-
-
Use the arrow keys to move the outlined box over to the yellow box with the USB logo on it. Press enter when you have highlighted that box.
-
-
-
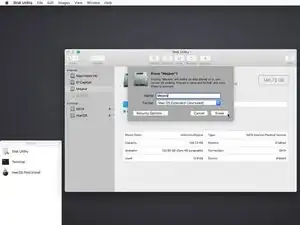
Click on your HDD/SSHD/SSD in the sidebar menu and click erase at the top of the window.
-
Select Mac OS Extended (Journaled) or APFS and name your HDD/SSHD/SSD to whatever name you would like it to have.
-
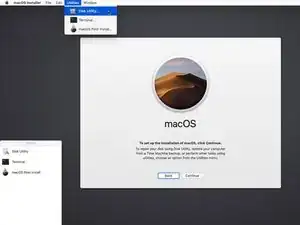
Once you have successfully erased your drive, click the words "disk utility" in the menubar. Click close and Disk Utility should close.
-
-
-
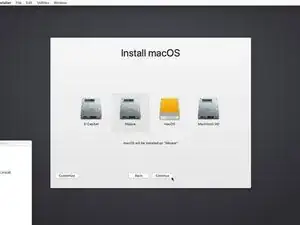
Click your HDD/SSHD/SSD that you want Mojave to be installed onto. Click continue after selecting your drive.
-
-
-
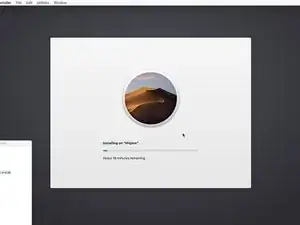
Once the installer is done installing, shut down your computer.
-
Follow step 6 again to reboot onto your Mojave installer drive.
-
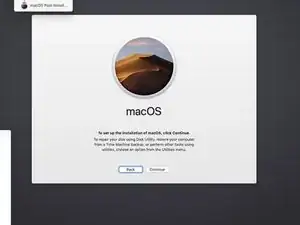
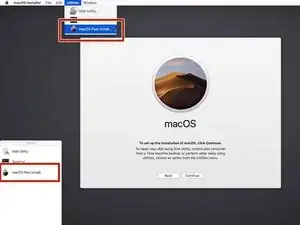
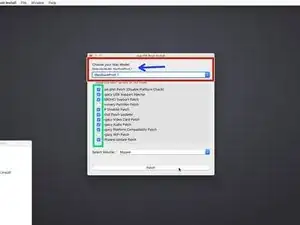
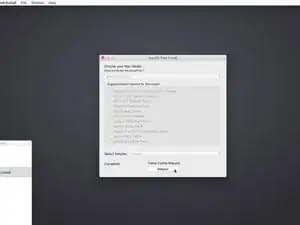
Click macOS Post Install in either the side menu or from the dropdown menu in utilities.
-
-
-
Select your type of Mac in the dropdown menu.
-
The patch tool automatically detects your Mac model and shows what you have here. If you are unsure at all which Mac you have, select the model listed here.
-
My suggestion is that you select ALL of the checkboxes that you can. It does not hurt to do so and it can be helpful later on. Most of the checkboxes are necessary for Mojave to run properly anyways.
-
Choose the drive for the patches (the one where you just installed Mojave). Click patch after doing all of the necessary things above.
-
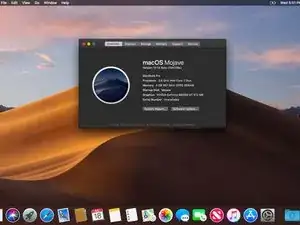
Done!
154 comments
I love how I’m being congratulated with “You’re Finished!”!!!
Peter C -
I have a mid 2009 MacBook Pro. I’ve gone through this process. Everything has worked great, till I reboot. It gets most of the way through then it hangs up. I’ve let it set for hours and nothing. You have any suggestions?
After initial install, the computer cannot complete reboot without the patch “MacOS Post install” (see step 13 above). This will require a hard shut down (hold down the power button if it is stuck) and restart holding down the alt/option key until you can select the installer again. This time, do not reinstall the OS but click on the button on the side (or double click it), or select in the pull down menu.
This will need to be repeated for updates, if new updates also get stuck.
Hope this helps.
I have a Macbook 2008 with 10.7.5 on it and am being told that is the end of the line. Will this work on my Macbook?
If it’s a white MacBook you can hack Mountain Lion and maybe even later with the OS X Hackers tools (which I’ve never used.) If it’s an aluminum 2008 MacBook, it is compatible with the Mojave patcher.
Luke L -
Hi can i know whether Macbook pro late 2008 with el capitian will it work?
Alex -
Replying to my own question. Yes it work . Today I tried. Thing is now after post patch. My keyboard won’t work. Guess I need a original Apple wired keyboard . Tomorrow I go office and try if that is so valuable maybe should buy from my boss
Alex -
my mac got brick after update. i try to reinstall os high sierra. but cant choose the original harddisk. what should i do?
Dennis Hanani Production -
do your disk appear in disk utility ?
Antoine Moreau -
my problem is another one. I bought a new MacBook pro retina in late 2013 that supports Mojave but no way I can install it. app store pushed me only Big Sur since it works on this model but it slows down and don’t need it. Right now I have 10.9.5 macOS and I only get errors where download a Mojave version from the internet. Since its new computer cleans no need for any time machine or backup just a basic Mojave update. How to fix that?
Vlad Movila -
Same thing happened to me. after update. got bricked. having trouble re-installing system.
Iain Cunynghame -
i have another problem and i don’t know if i can solved with this post. i bought a macbook pro 16, 2019, and only this model can’t support Mojave, so i don’t know if i use this Mojave Patched, i can downgrade my IOS form Monterey to Mojave.
Miquel Marquez -