Introduction

Use this guide to open a Logitech G903 for cleaning or repair.

  1. EDUOnJgnFZB3Ki5u
    EDUOnJgnFZB3Ki5u
    YxEKdC63rNDqPYgH
    • Before you begin, flip the mouse's power switch into the red OFF position.

  2. dpwfmyVuYhp3AA2t
    • If you’re planning to reuse your existing mouse feet, note that the adhesive needs to be thoroughly heated to cleanly remove them.

    • Heat an iOpener and apply it to the bottom mouse foot for two minutes.

    • A hair dryer or heat gun may also be used, but be careful not to overheat the mouse—the internal battery is susceptible to heat damage.

  3. Yy6DLWPtFyDf1hsw
    Yy6DLWPtFyDf1hsw
    IuPQTLKVJxWHbgDa
    PuWRTyRlAjTQxCvJ
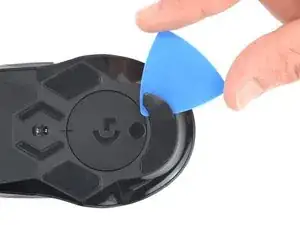
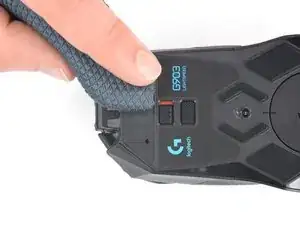
    • Slide an opening pick under an edge of the bottom mouse foot.

    • Go slowly, and make sure the pick is underneath both the foot and its adhesive layer if you want to reuse the foot. It's easy to separate the foot from its adhesive.

    • If the foot feels stuck, apply more heat before continuing.

    • Slide the pick under the rest of the foot until you can lift it off the mouse.
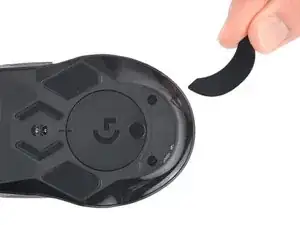
    • Remove the foot.

  4. slgxho4yF5HYNjtA
    slgxho4yF5HYNjtA
    BMHejkNLEXeNmRIk
    6Djfu46upT3YNSHC
    • If the adhesive separated from the foot:

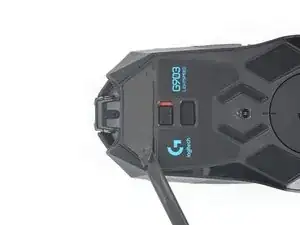
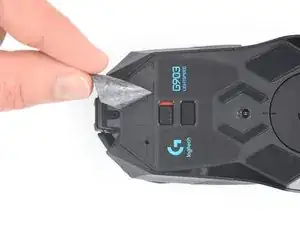
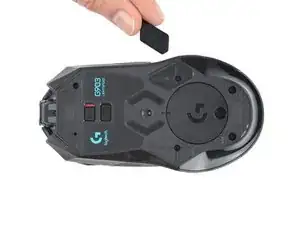
    • Slide the flat end of a spudger under an edge of the adhesive. If the adhesive seems stuck, you may need to heat the adhesive further.

    • Peel the adhesive off.

    • Before installing new feet or reinstalling old ones, wipe away any adhesive residue from the mouse with a lint-free cloth and high-concentration isopropyl alcohol.

  5. c6f4XAfbGExFBZWO
    c6f4XAfbGExFBZWO
    MdMwQbxIl5UUyqw1
    • Repeat the previous mouse feet removal procedure and remove the two pentagonal mouse feet on the left and right side.

  6. xeUfHTxiOOMXow4h
    • The Logitech sticker at the bottom of the mouse is very heat sensitive and crumbles easily. In case you want to keep that sticker intact apply as little heat as possible and remove the sticker carefully.

    • If you don't want to remove the sticker all the way, you can puncture it with a screwdriver where the two screws are located beneath it. Use this picture to make sure you're hitting the right spots.

    • Heat an iOpener and apply it to the Logitech sticker to loosen its adhesive.

  7. oRoIpYRkmvpDXSJu
    oRoIpYRkmvpDXSJu
    UNIjDsw6hngAxLZj
    yAVBngpckhkCma5n
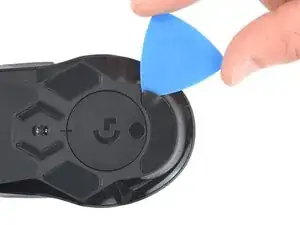
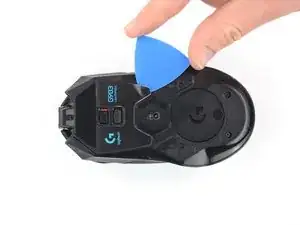
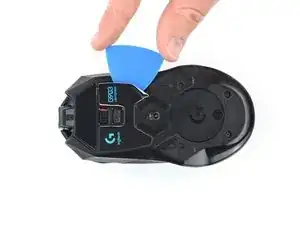
    • Slide an opening pick under an edge of the Logitech sticker.

    • In case you want to reuse the sticker go slowly, and avoid tearing or crumbling the sticker.

    • If the sticker feels stuck, apply a little bit more heat before continuing.

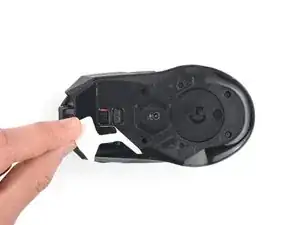
    • Slide the pick under the rest of the sticker until you can peel it off the mouse.

    • Remove the sticker.

    You don't need to fully remove this sticker, all you need to do is flip the thinnest part (like till you reach the part like in the photo above), put the screwdriver in, unscrew the screw, take the screw out and stick the sticker back on. Do the same with the other screw and during the assembly.

    Adam “Mavi” Kroupa -

  8. whivuGMbbFlsXPIq
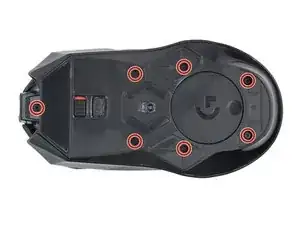
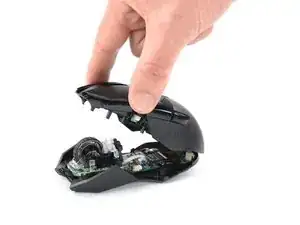
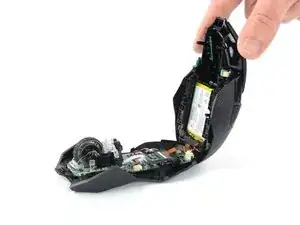
    • Use a Phillips screwdriver to remove the seven 4.5 mm screws securing the two halves of the mouse together.

    • The top middle screw may be a Torx T5.

    You'll need a T5 bit to remove the seventh top screw.

    Olivier Charbonneau -

    It used to be that on the older models, but on the newer one I just opened it had a Philips for that last one too, just like the guide shows.

    Remy Monsen -

  9. oUoN1uISv4BtISuS
    oUoN1uISv4BtISuS
    fZHxr3mGggG2aPZy
    TFUswKsFBafbeSnf
    • Don't completely separate the two halves yet—they're still tethered together by a delicate cable.

    • For better access, open the top half of the mouse in the direction of the rear end.

  10. U3Mc4OEmIQQWNHHF
    U3Mc4OEmIQQWNHHF
    ryoji2P3ExJGWeH1
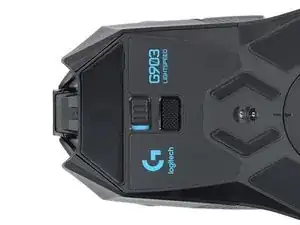
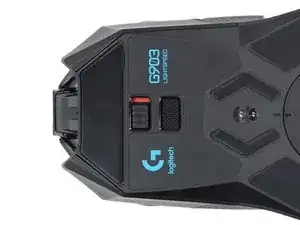
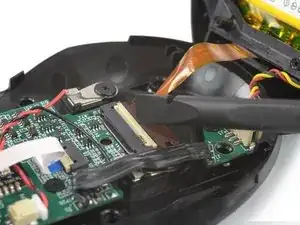
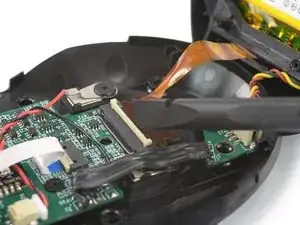
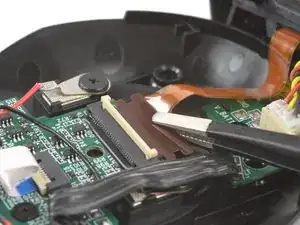
    • Use a spudger, an opening tool, or your fingernail to flip up the small, hinged locking flap on the interconnect cable ZIF connector.

  11. UMGdcHYYwBoUYNx3
    UMGdcHYYwBoUYNx3
    Bf12Iq4qfQkiGxpS
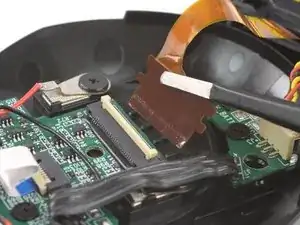
    • Use a pair of blunt nose tweezers or your fingers to slide the interconnect cable out of its socket.

  12. OxJqSSZgcrA2yfSu
    OxJqSSZgcrA2yfSu
    uaWKTNCtVBeyfmVH
    tBoBesyHGHq2jtmY
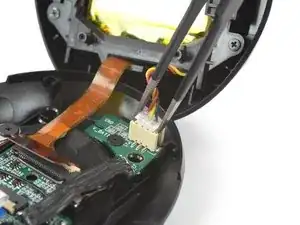
    • Use a pair of blunt tweezers to grasp the sides of the battery connector.

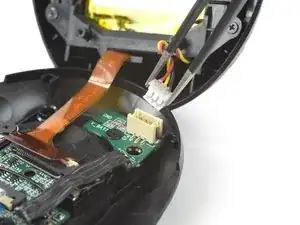
    • Pull the connector up and out of its socket, gently rocking it back and forth to loosen the clips securing it.

  13. rFPNrmjleMqYE5TF
    • Remove the top half of the mouse.

Conclusion

Compare your new replacement part to the original part—you may need to transfer remaining components or remove adhesive backings from the new part before installing.

To reassemble your device, follow the above steps in reverse order.

Take your e-waste to an R2 or e-Stewards certified recycler.

Repair didn’t go as planned? Check out our Answers community for troubleshooting help.

Dominik Schnabelrauch

Member since: 23/11/16

201162 Reputation

0 comments