Introduction

Use this guide to open your Logitech MX Anywhere 3 for Mac mouse.

Open your mouse to clean its internals, troubleshoot mechanical problems, or replace a part.

  1. XEBBVLOg5SsELbRX
    XEBBVLOg5SsELbRX
    RyUFDDkl3MVRCXKC
    • Flip the mouse's power switch into the OFF position, unplug any cables, and flip it over so the feet are facing up.

    • The unique shape of some mice can prevent them from laying flat. If you need to, lay your mouse on a soft towel to prevent wobble.

    • If you're planning to reuse your existing mouse feet, note that the adhesive needs to be thoroughly heated for them to be cleanly removed.

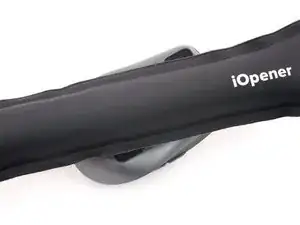
    • Heat an iOpener and apply it to the mouse feet for about two minutes.

    • Alternatively, you can use a hair dryer to soften the mouse feet adhesive.

    • When using a hair dryer, don't heat the feet for more than a couple seconds at a time—anything hotter than just warm to the touch risks melting or warping the plastic lower case.

  2. UAYxW4VMNHwsHtxo
    UAYxW4VMNHwsHtxo
    jQYU6VwSZAvxDHNI
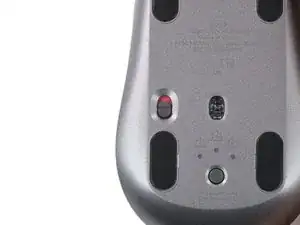
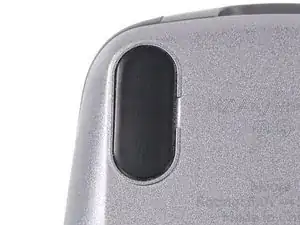
    • There are small gaps in the rims surrounding each foot. This is where to place the tool in the next step.

  3. ScBiFTZdTAXiLrxP
    ScBiFTZdTAXiLrxP
    ERZDn6aI2XlU5aSV
    IdpNqMgXdrEAkWRP
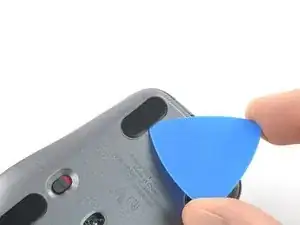
    • Push the tip of an opening pick underneath the mouse foot adhesive, into the gap in the rim.

    • Go slowly, and make sure the pick slides underneath both the foot and its adhesive pad. These layers separate easily.

    • If you plan on reusing your mouse feet, be careful not to crease them or separate them from their adhesive pads.

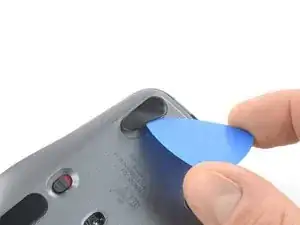
    • Slide your pick under the foot to separate its adhesive until you can grab it with your fingers.

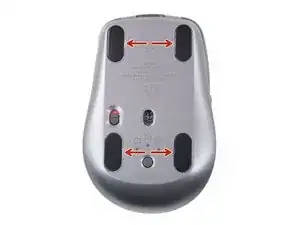
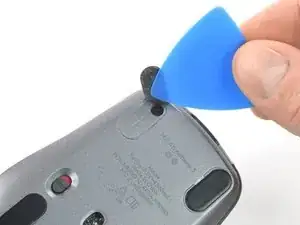
    • Repeat to remove the three remaining mouse feet.

    • For installing new mouse feet or reusing your old ones:

    • Use a pair of tweezers or a spudger to remove any large chunks of leftover adhesive. Thoroughly clean the bottom of the mouse with isopropyl alcohol and a lint-free of microfiber cloth. Allow the surface to dry completely.

    • Peel your new mouse feet away from their adhesive liners and press them firmly into place.

  4. FFHEDKu5kasBCsTQ
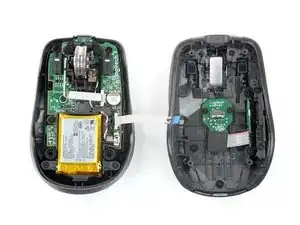
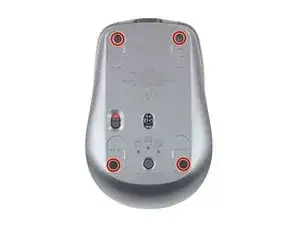
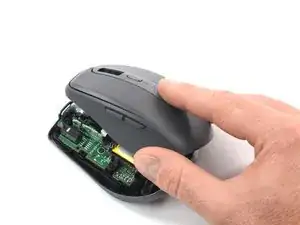
    • Use a Phillips screwdriver to remove the four 4.3 mm-long screws securing the two halves of the mouse together.

  5. wO4ibQaTZKLTSDP4
    wO4ibQaTZKLTSDP4
    ZKIXYOHD1pHTcytE
    WdcNtSP4IXeVFcE3
    • Gently open the top half of the mouse up and flip it over to the right, like a book.

    • Don't try to fully remove the top shell just yet—a cable connects the upper shell to the lower case.

  6. CYKBoIvUiL4AFxEu
    CYKBoIvUiL4AFxEu
    1KoQaOpwAPSyY4oI
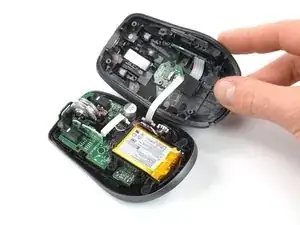
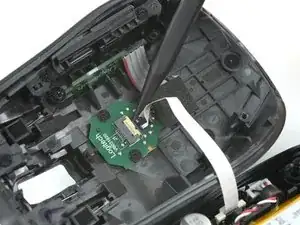
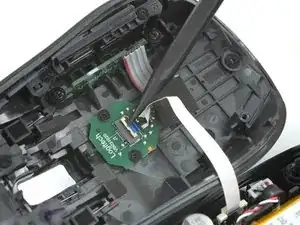
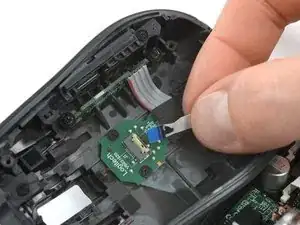
    • Use the tip of a spudger, an opening tool, or your fingernail to flip up the small, hinged locking flap on the interconnect cable's ZIF connector.

  7. CdTEJCl2igglBkNM
    CdTEJCl2igglBkNM
    1ivABlPhbgbdBdXE
    • Pull the cable straight out of its socket.

    • During reassembly, insert the cable with its blue tab facing up, then flip down the locking flap.

    On my MX Anywhere 3, the interconnect cable is also glued to the board on the top half of the mouse. It was much easier to pop up the white top of the connector on the bottom half of the mouse to free the interconnect cable.

    dustin -

  8. 2TWFVkSuT1a5Pm3d
    • Remove the top half of the mouse.

    The switches in this mouse are the Omron D2FC-F-7N and they are very loud. It might also be the plastic chassis that's contributing to the overall clicky sound signature.

    Rad -

Conclusion

To reassemble your device, follow these instructions in reverse order.

Repair didn’t go as planned? Try some basic troubleshooting, or ask our Answers community for help.

Clay Eickemeyer

Member since: 19/09/22

65190 Reputation

0 comments