Introduction

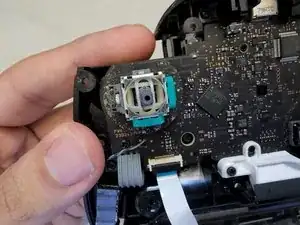
If you've stumbled upon this guide, odds are that your Nintendo Switch Pro controller is acting a bit strange. Maybe it's causing your character to move in a completely different direction from what you wanted. Maybe your character is moving on its own without you even touching the controller! If so, you are experiencing something video game enthusiasts refer to as "joystick drift," which is usually a result of dirt and debris that gets trapped within the joystick.

It's difficult to enjoy a video game when your controller is working against you. You may be tempted to throw away the controller and buy a new one, but a Nintendo Switch Pro Controller has an MSRP of nearly $70.00!

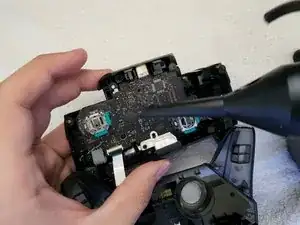
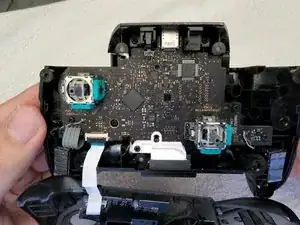
Fortunately, there is a relatively easy fix for joystick drift. The solution involves taking apart the controller to clean the inside of the joysticks. This guide will show you how to do this safely and quickly.

  1. PQMDMbCKB3RjNR1o
    PQMDMbCKB3RjNR1o
    FKLurQr3Jyk46vfk
    6PDcjTh14ojuFELJ
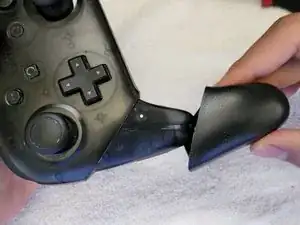
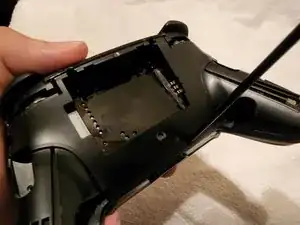
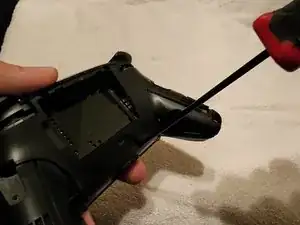
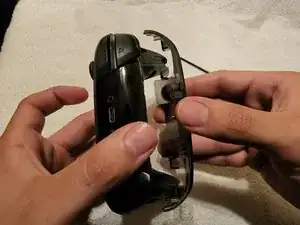
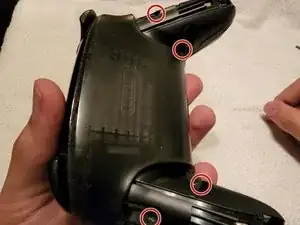
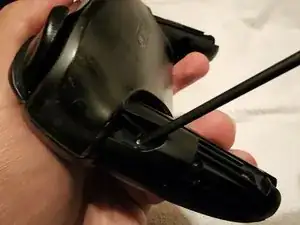
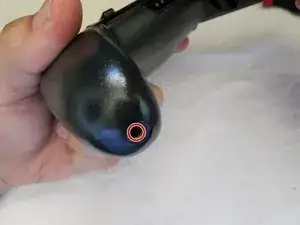
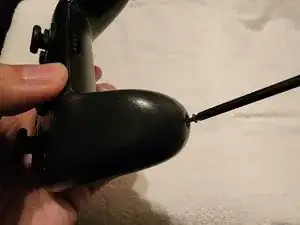
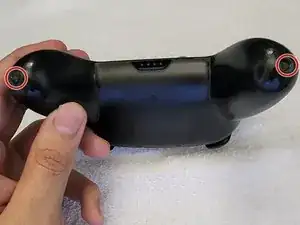
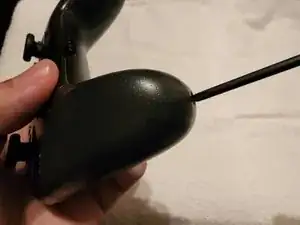
    • Remove the two black screws at the bottom ends of the controller using a Phillips #00 screwdriver.

    • You may be able to carefully remove the screws with a different-sized screwdriver or flathead. However, this can easily "strip" or damage the screws and make them a lot more difficult (or even impossible) to remove next time.

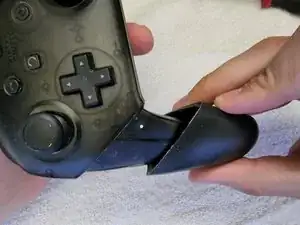
    • Pull the hand grips off the bottom edges of the controller.

    Phillips #0 screwdriver did not fit into the screw and stripped it. #00 worked on the other screw, but now I'm unable to continue the teardown.

    Mitchell Harding -

    The screws are screwed in too tight by the factory that put it together, it can't be undone by hand, because all it did was strip the screw entirely. Need a powered tool to undo the screws.

    Alkaris -

    These are JIS #00 screws! DO NOT USE PHILIPS else you get stripped heads. Like me. Get a JIS screwdriver set for this breakdown.

    Christian Manahan -

    @christianma5187, thanks for the tip! I wish I'd read your comment and understood the difference between phillips and jis before I tried using the ph #00 and completely stripped one of the screws. I couldn't find a screw extractor small enough, and in the end I had to cut off the entire hand grip sleeve and get a new one. I hope nobody else makes the same mistake!

    Mike -

  2. kSFSQThWcrHJOyEp
    kSFSQThWcrHJOyEp
    VxCGFpia1WlDiHEo
    n1fxiCk1bsEWD6xR
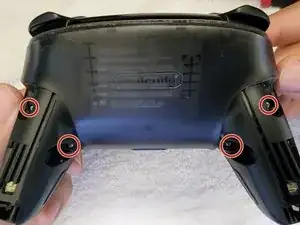
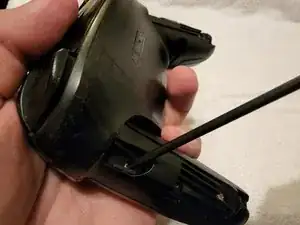
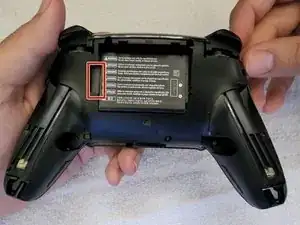
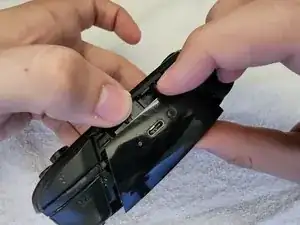
    • Remove the four silver screws from the back of the controller using a Phillips #00 screwdriver.

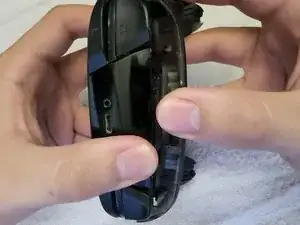
    • Hold the controller as depicted in the third picture with your thumbs placed on the top of the controller. Use your thumbs to pry apart the backplate from the rest of the controller.

    • You may need to use a bit of pressure to remove the backplate.

    When reassembling, don't forget to put the battery back in. I know it seems stupid, but I have taken apart many pro controllers and constantly set the battery to the side, just to forget about and scratch my head and wonder why the controller isn't working.

    Caden Helm -

  3. Bv3DNDWPW2qWYsEq
    Bv3DNDWPW2qWYsEq
    c1sjGtrjdTsAH6QS
    WFvSYJUuJ6RSGXrk
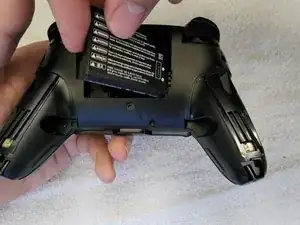
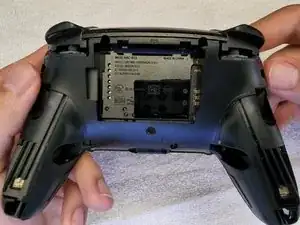
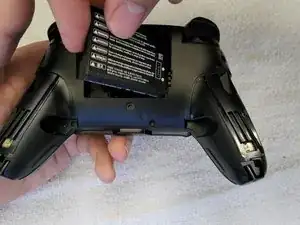
    • Place a finger in the gap to the left of the battery.

    • Use the small tab on the side of the battery to remove the battery from the controller.

  4. BVihF1NFOvjbLbVs
    BVihF1NFOvjbLbVs
    XlpuULN3OHN3MEXw
    KniFs6seORuW4BEO
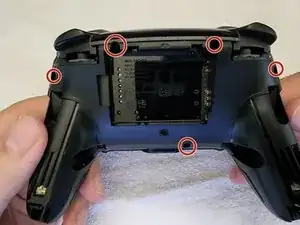
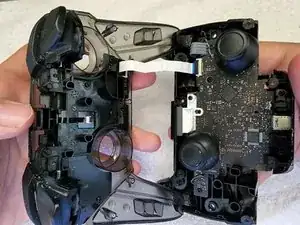
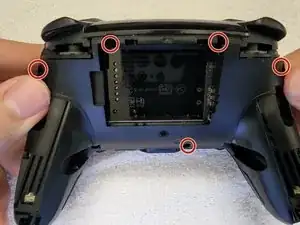
    • Remove the five black screws from the back of the controller using a Phillips #00 screwdriver.

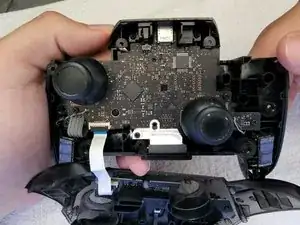
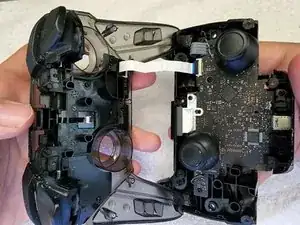
    • Place a finger between the faceplate and the rest of the controller and pull each half of the controller apart to separate them.

    • Don't use too much pressure when prying open the controller as you may damage the white ribbon cable connecting both halves.

    • The iFixit Mako Driver (screwdriver that also comes in the Pro Tech Toolkits) is too thick to properly reach the 2 top-middle screws. The middle top-left screw can only be reached at a slight angle, while the middle top-right is near-impossible to reach without the use of the Flex Extension, or deforming the plastic a little bit.

    Ich besitze das ProTech-Set und hatte keine passende Verlängerung parat. Mir hat geholfen, einfach ein bisschen Taschentuchfetzen zwischen dem Bithalter und dem #00 Kreuz-Bit zu packen. Hat das Problem erstaunlicherweise super gelöst, kann ich empfehlen!

    DafuqRené -

  5. lEurnVGF6PQqv2JS
    lEurnVGF6PQqv2JS
    nVrlEQh5TXKlbhyc
    fEcmKXUXvWCVWBGw
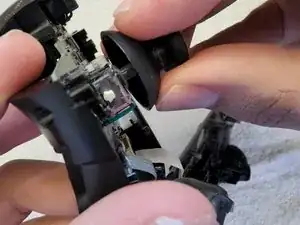
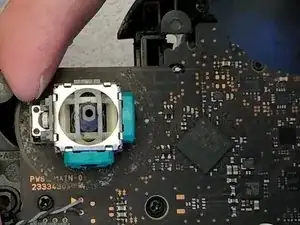
    • Use one hand to grip the back of the controller piece with the joysticks. With the other hand, grip the rubber cap of the joystick and carefully pull it off of the joystick.

    • You may need to apply a bit of pressure to pull off the rubber cap.

  6. SPBd2SdH543UJypj
    SPBd2SdH543UJypj
    FP2HnvdFWmOfTPZZ
    • Spray the can of compressed air inside and around the joysticks to remove any debris.

    • There may be some debris that doesn't come off after blowing with the compressed air. In this case, you can use a paper towel or cotton swab to lessen the build-up and follow up with the compressed air.

    • Be sure to follow the instructions when using the compressed air can. Shaking the can may result in liquid being expelled instead of air. This may damage the controller.

    You may also want to use contact cleaner on the sticks.

    In my case just using compressed air did not fix the drift, I also had to use contact cleaner, after which the drift was completely fixed.

    Ashley Allen -

  7. QtnLKjSUSEm5Y4OK
    QtnLKjSUSEm5Y4OK
    NTQST2LEAFWTI1V4
    fsbi3sVycRtKGHNA
    • Place the rubber caps back on the joysticks by applying a bit of pressure.

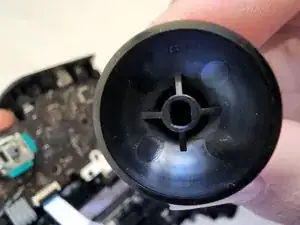
    • The inside of the rubber cap has an oval-shaped socket. Align this socket with the oval-shaped head of the joystick.

  8. WZlPmS4y2VT3X64q
    WZlPmS4y2VT3X64q
    mLdtF1tdCH1HyGMr
    ettJMO1t1tDJOXMN
    • Align both halves of the controller and push them together. They should reattach easily.

    • You may need to position the cable so that it is not poking out from the controller after connecting both halves.

    • Screw in the five black screws on the back of the controller using a Phillips #00 screwdriver.

  9. 2QDEVpBqiFPESS3j
    2QDEVpBqiFPESS3j
    HZsbrx6RIC5JD616
    HWWndK6kBTQJksGt
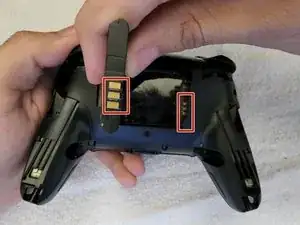
    • Place the battery into the socket by aligning the connectors on the battery with the connectors on the right of the battery socket.

  10. Uv5Dbc51yEOJaojn
    Uv5Dbc51yEOJaojn
    fV64E1BNxUcyLWtc
    lMVlNnpadmdQiEiL
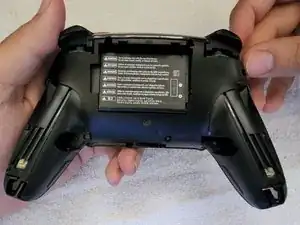
    • Align the backplate of the controller as shown in the picture and snap it on.

    • Screw in the four silver screws in the back of the controller using a Phillips #00 screwdriver.

  11. oeOTQJVDkyMJMX6u
    oeOTQJVDkyMJMX6u
    fEejIFHDYVMKNfmm
    cMpNDsarYiFS1BwZ
    • Reattach the handgrips by sliding them onto the ends of the controller.

    • Screw in the two black screws on the bottom of the handgrips using a Phillips #00 screwdriver.

Conclusion

After following these steps, your controller will be much cleaner now than it was before. Your controller should now be drift-free and function as well as any other $70.00 controller!

If you are still experiencing drift, then there is a physical defect with the joystick. In this case, you can opt to replace the joystick itself. You can find replacement parts online, but you will probably need to learn how to solder in order to install the replacement joystick.

Raul Sanchez

Member since: 22/03/22

1306 Reputation

10 comments

Excellent. Really clear guide. Thank you so much

Darren Townsend -

Worked like a charm! Thank you!

Patrick Meade -

My controller has been having this issue, I've been opening it up and dusting the stick, but that only temporarily fixes this issue. I am considering replacing the stick module, although I am a bit worried that something else is causing drift. Its possible that the shell or upper stick part has worn out or has some sort of opening which is allowing dust and other particles to get into the stick. Any advice?
MikeyLORR -

This is the first thing I have used my iFixit kit to try and fix and it worked perfectly. Thanks for a very helpful and clear to follow guide.

Ben Johnson -

A couple of warnings:
You need a long, thin screwdriver like the one listed under tools, but PH00 instead of PH0. My screwdriver with swappable bits could not fit in the holes for the top two screws in step 4.

Also, be super careful with the black screws as they strip really easily.

Thor -

I was lucky and had a very long ph00 lying around that came with a toy from the dollar store I bought over 15 years ago. My usual repair kit couldn’t reach the deep screws next to the battery, but that screwdriver saved the day. Excellent guide regardless.

Dingleberg -

This was the first time I used Ifixit. It worked perfectly, thanks a lot, saved my money, better repair than buy something new!

Wilfried Kraus -

Merci beaucoup, j'ai pu régler le problème :)

Loïc Ovigne -

My controller has gone from 'almost unusable' to 'most accurate controller I've ever seen'. It's absolutely brand-new again.

Adonis D. Prince -

兄弟, 十分感谢。这个攻略干货十足。

shengquan wang -