Introduction
If your PC is overheating, you may simply have to dust and get rid of lint off the devices fan and heatsink or replacing the fan and heatsink on your HP EliteBook 840 G1
Tools
Parts
-
-
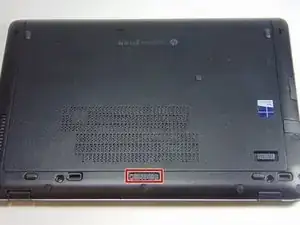
Slide the latch, to the right, away from the lock symbol.
-
Slide the cover away from the latch to remove it.
-
-
-
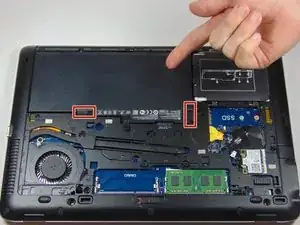
Once the cover is removed you will be able to see the battery and the two latches that hold it in place.
-
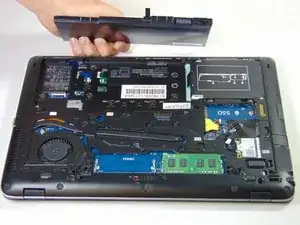
The two latches should be pulled back, one of which is spring loaded and must be held in place in order to remove the battery.
-
-
-
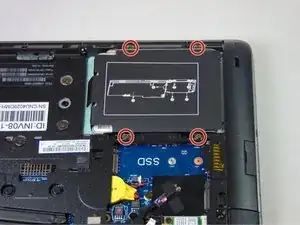
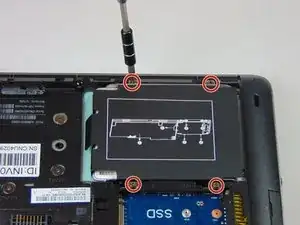
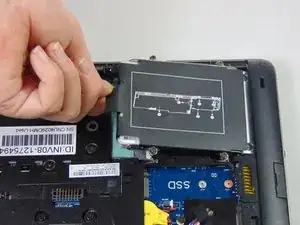
Grab the pull tab on the hard drives plastic casing and pull it out and to the side.
-
Remove the 2.5" hard drive from the plastic bracket.
-
-
-
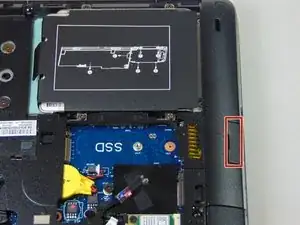
In order to take out the fan and heatsink the plastic cover must first be taken off.
-
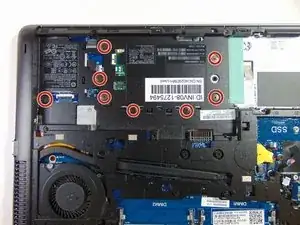
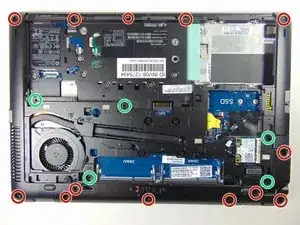
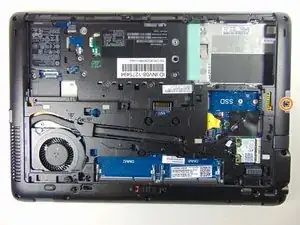
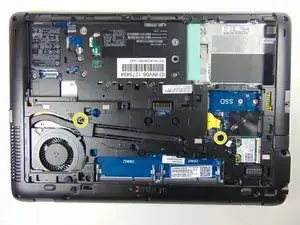
Remove the eight 2 mm Phillips #1 screws.
-
-
-
Remove the thirteen 6 mm Torx T8 screws.
-
Remove the five Torx M2.5x5 screws.
-
Remove the single 7 mm Phillips #1 screw.
-
Loosen the two Phillips #1 screws. These screws will remain captive to the device.
-
-
-
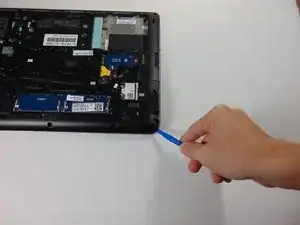
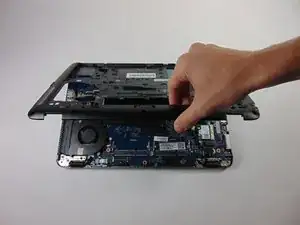
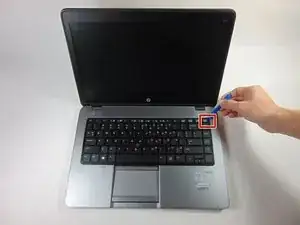
Using the plastic opening tools, remove the plastic cover by beginning at one of the corners and prying it up.
-
-
-
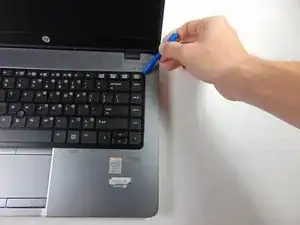
Use the plastic opening tools to remove the keyboard, starting at one of the top corners. You need to lift the top side and then takeing it out moving the keyboard towards the screen.
-
Once the keyboard is removed, detach the ribbons connecting the keyboard to the laptop by prying the small tab and sliding the ribbon out.
-
-
-
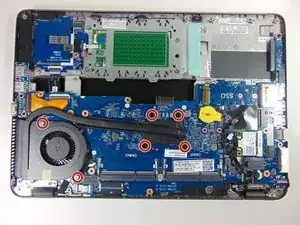
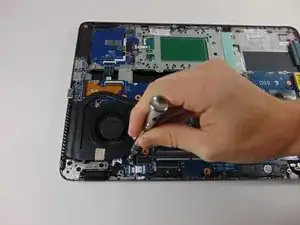
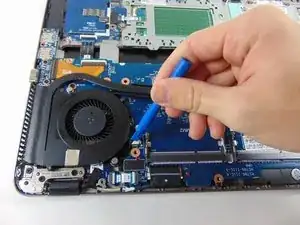
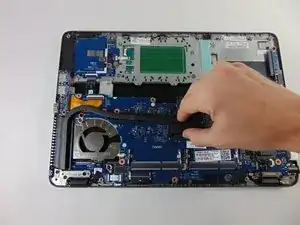
Use the plastic opening tools to remove the tape covering the wires connected from the fan to the motherboard.
-
Disconnect the fan by sliding the wire out.
-
-
-
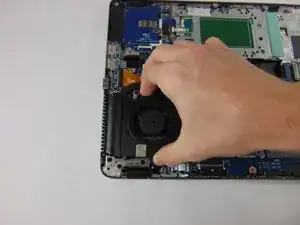
Remove the fan by lifting it up and sliding it out.
-
Remove the heat sink by lifting it up and sliding it out.
-
To reassemble your device, follow these instructions in reverse order.
4 comments
Quality guide. Very logical. Thank you.
perfectly done, thank you!
Do you need to remove the keyboard for replacing the tehmal paste?
You don’t need to remove the keyoard to replace the thermal paste :)
Brendan -
Slide to your "other left", on this screen it would be to the right, to slide open the cover
petunia8107 -
l’expression “Détachez le cache du loquet pour le retirer “ est ambigüe et source d’erreur, elle donne à penser qu’il faut retirer un “cache” qui serait sur le loquet.
Ce qu’il faut c’est détacher le cache (la grande plaque où il y a la logo bleu) de la partie fixe sur laquelle se trouve le loquet. Pour ça il faut glisser une lame fine dans la fente entre le cache et la partie fixe.
merci pour le tutoriel.
Philippe Fayolle -
Bonjour Philippe,
Vous avez bien raison ! J’ai adapté la traduction. Merci pour l’observation ! N’hésitez pas à corriger le texte la prochaine fois. Vous trouverez l’interface de traduction en cliquant sur Traduire en haut à droite de l’étape.
Bonne réparation !
Claire Miesch -