Introduction

Use this guide to replace the Wi-Fi antenna daughterboard in your Fairphone.

  1. mTAxpwLBXBobuY5n
    mTAxpwLBXBobuY5n
    QdfIDMURfi6Vccwb
    bXLQZrIlnEjJ24kZ
    • There is a small indentation in the side of the phone near the bottom of the back cover.

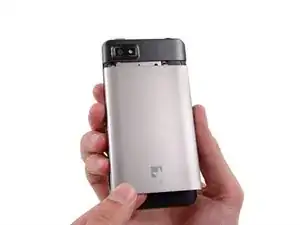
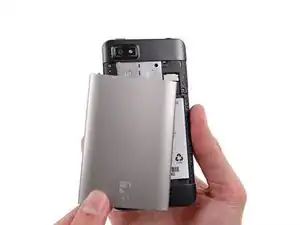
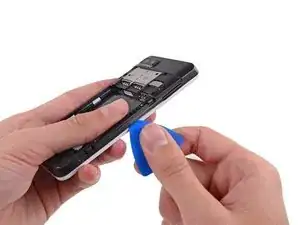
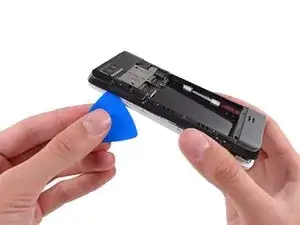
    • With the indentation as leverage, use your fingernail to pry the bottom portion of the back cover from the phone.

  2. RFaJW4GP1UTAdrGJ
    RFaJW4GP1UTAdrGJ
    MGQNn26fTTEkkmVQ
    2DjUSG2snjJ5A6N3
    • Slide the back cover down and remove it from the phone.

  3. d42tJ4wbOSJOXyh1
    d42tJ4wbOSJOXyh1
    Ph5bQmTyD4QCxYYx
    yDi6q24gEXsBA33e
    • There is a small indentation in the back of the phone just below the battery.

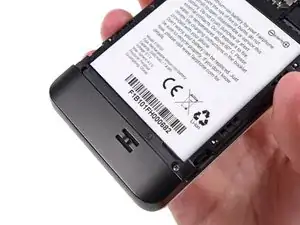
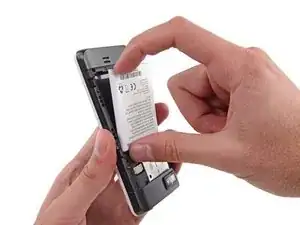
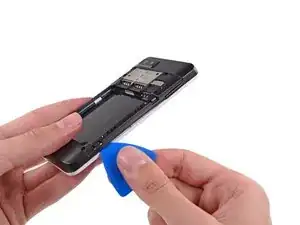
    • Use a fingernail in this indentation to push the battery toward the top of the phone

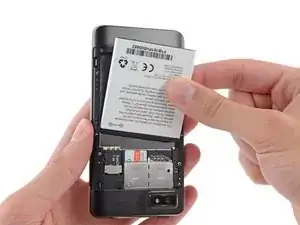
    • Pull the battery out away from the phone.

  4. gsvSJIH1oQuEkJcf
    • Remove the battery from your Fairphone.

  5. TvVTnCTDJyAOmj1Q
    TvVTnCTDJyAOmj1Q
    paHqfqUaXf1qpfXT
    MHq1kfUmppsVq5mw
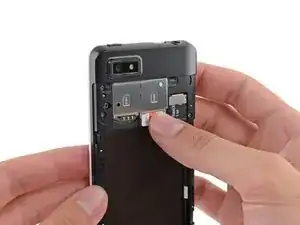
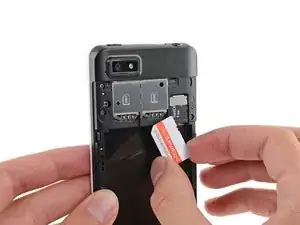
    • Use your finger to slide the SIM card straight down out of its tray.

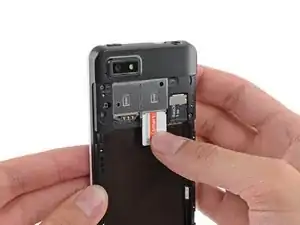
    • Remove the SIM card from your Fairphone.

    • Repeat this procedure if you have a second SIM card.

    • Be sure to remove all SIM cards before servicing your phone.

  6. pwda1yqpKyUAcaPe
    pwda1yqpKyUAcaPe
    WrMnBCKmphyDPbVp
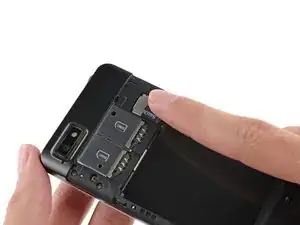
    • If you have a microSD card, use your finger to slide it straight out of its slot.

    • Remove the microSD card from your phone.

  7. MXI4cSWRnfkli2ij
    • Remove the five 3.9 mm Phillips #000 screws securing the midframe to the display assembly.

    The three upper -next to the SIM blocks- screws are a bit longer that the three others. It is important to keep them like this because if not, they will not tight to the whole.

    Jaime Bosque Torrecilla -

    There are only 5 screws. I see none longer than others.

    Viktor Steiner -

    You're right, I've just done it and it's true. Thanks!

    Aiala -

  8. SfKvwtCMthj3SZau
    SfKvwtCMthj3SZau
    PYBEnY1BVnhjVTjH
    uq3jAbPRdjTMYKEB
    • The midframe is secured to the display assembly by several small plastic clips.

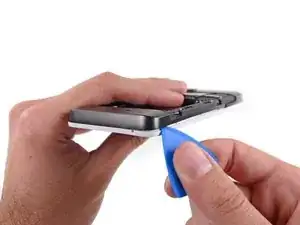
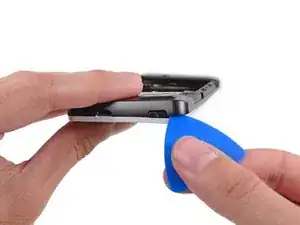
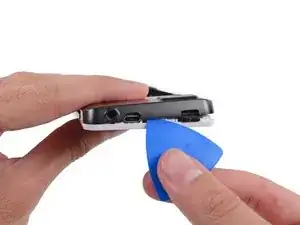
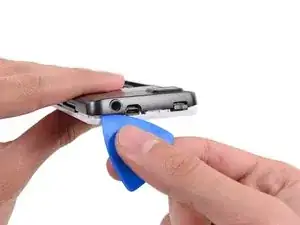
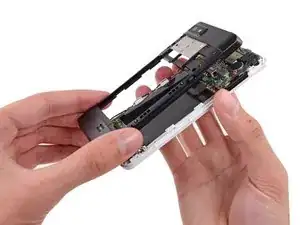
    • Use an opening pick to carefully pry the midframe away from the display assembly.

    • Start just below the volume rocker and work your way down toward the bottom of the phone, freeing the plastic clips along the side.

    No need to be TOO careful. Just remove the whole thing, no stress.

    clem -

    Some stupid person put a sticker on the fifth screw. If you can not find the fifth screw, check if there are any BLACK (yes, black) stickers on top of them. Also, which 'designer' made the first design choice for plastic clips? I WILL FIND YOU. AND KILL YOU. *!&*^#% stupidest way to affirm or secure something!

    maggelo -

    It must be done very carefully: I'd broken both white pieces. Hope has no consequences ...

    Aiala -

    You also can start from the interior (white pieces all around batterie place)

    remy.carl.fr -

  9. ZC5FAkIRnhHSs5aj
    ZC5FAkIRnhHSs5aj
    IumJCLtXZOPQoFWX
    • Carefully round the corner, separating the midframe from the display assembly.

  10. kSWQd6TRSPCIYSKb
    • After rounding the next corner, the midframe should be free along the bottom and the sides.

  11. iQkNQ3HpLP6bLiOM
    iQkNQ3HpLP6bLiOM
    RaHnhIAUHnDmxDYa
    KoXhpQOMed4TogZA
    • Run the opening pick and pry along the top seam.

    • To avoid bending or damaging the opening picks, do not pry near to the power switch, USB port, or headphone jack.

  12. ZC1c2AGOq2ZLF2Nx
    • Separate any remaining clips and remove the midframe from the phone.

  13. xSxRL2PnPVDfB5aE
    • Use the flat end of a spudger to disconnect the antenna cable connector.

    • Be careful to pry on the connector, not the socket.

  14. RYGnxRdOiIGsQ2As
    RYGnxRdOiIGsQ2As
    GhIRtgTXuJuCrgEx
    nEr4yKwkXh1kHdBu
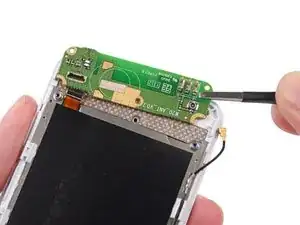
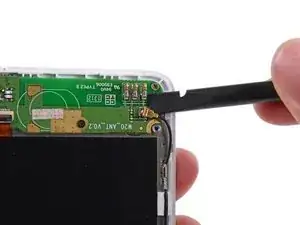
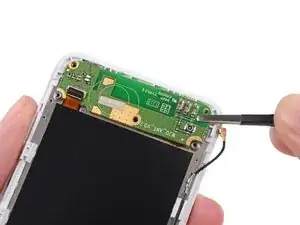
    • Use the tip of a spudger to flip open the tab on the daughterboard data cable ZIF connector.

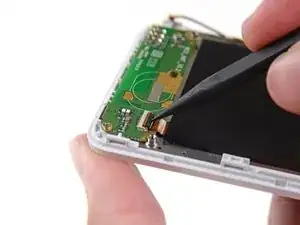
    • Use tweezers to pull the daughterboard data cable away from its socket.

  15. uZUWF6OSXOiGIZV1
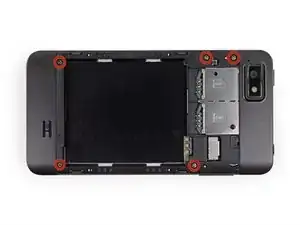
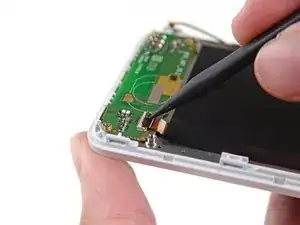
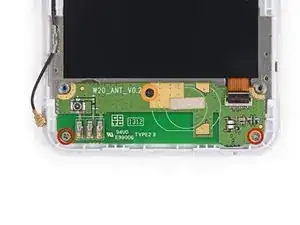
    • Remove the following screws securing the Wi-Fi daughterboard to the display assembly:

    • Two 2.5 mm Phillips #000 screws

    • One 1.6 mm Phillips #000 screw

    No "1.6 mm Phillips #000 screw" in my phone

    Erik Buelinckx -

    No One 1.6 mm Phillips #000 screw in Ynte's Fairphone.

    Inge -

    no one in mine either

    Koen Go -

    Not in mine either...

    Tijs Dekker -

    My Fairphone is also lacking the orange marked screw.

    Jan Boonen -

    Missing in mine too!

    elizabethnorseng -

    missing screw, too.

    [deleted] -

  16. oKGEbEDiqFT2T2Yb
    oKGEbEDiqFT2T2Yb
    T6dUEFhYrQ3Yy4Cr
    • The Wi-Fi antenna daughterboard is held to the front assembly by mild adhesive.

    • Use tweezers to gently pry the board up and remove it from the phone.

Conclusion

To reassemble your device, follow these instructions in reverse order.

Andrew Optimus Goldheart

Member since: 17/10/09

502341 Reputation

One comment

I would suggest to rename the guide to "Fairphone Wi-Fi Antenna and Microphone Daughterboard Replacement", because it is also what you need to do to replace a broken fairphone microphone.

Torsten -