Introduction
Caution: There is a risk of injury if the instructions are not followed properly. Be careful and follow all warnings..
The electrical system of the Dyson is quite simple. Since it is fully insulated, it uses a two-wire cord with no ground wire.
The universal motor runs in the same direction no matter how its 2 terminals are connected. But, because of the order, you should always connect the cable colors as they were.
Tools
-
-
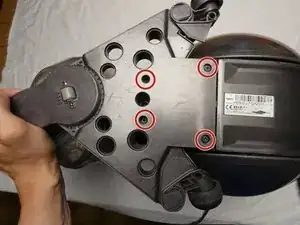
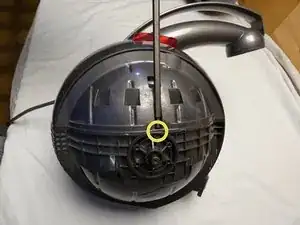
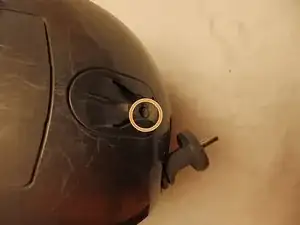
Remove the 8 Torx T15, 22mm pan head screws from the bottom…
-
and the 2 22mm Torx T15 screws from the top.
-
-
-
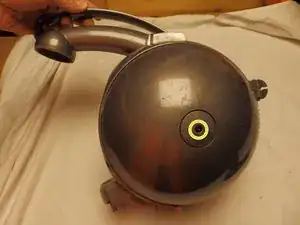
Press the button to release the dust container.
-
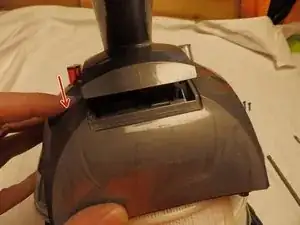
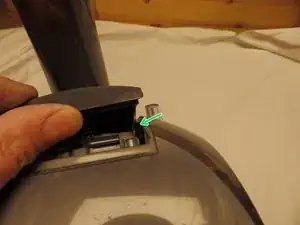
Carefully press the locking lugs inwards with a screwdriver or by hand until the upper part with the suction tube can be folded further upwards.
-
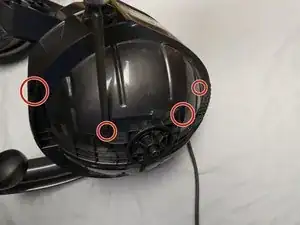
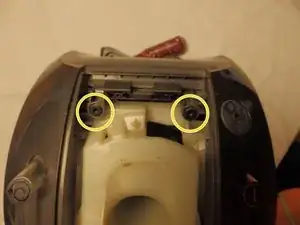
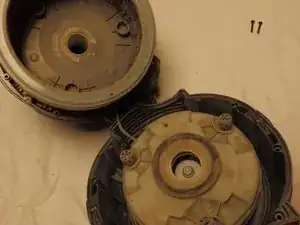
Then another 2 Torx T15, 18 mm cylinder head screws become visible, which are removed (they fasten the cable drum on the inside).
-
-
-
Loosen the one PH2 screw of the intake manifold holder (it fastens the cable drum on the inside).
-
-
-
Carefully pull the case halves apart. You now have the HEPA filter and the cable drum in the upper half and the motor in the motor capsule in the lower half.
-
-
-
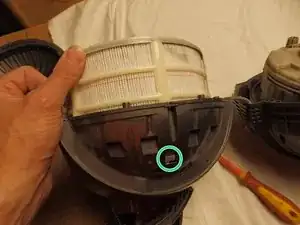
The upper part is clipped into the housing with 2 locking notches. Try to unhook with a screwdriver and some hand wiggling. Don't grab the HEPA filter too tightly as it is made of paper and is easily dented.
-
-
-
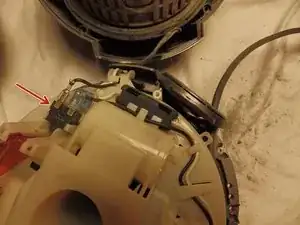
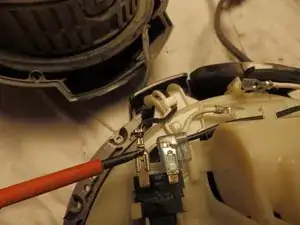
The switch is on the cable drum. The cable is connected to a blade connector which is secured by a fine tab to prevent vibration from loosening it. If you press on the lug with a fine screwdriver, the connection can be released without too much force. Disconnect the black cable.
-
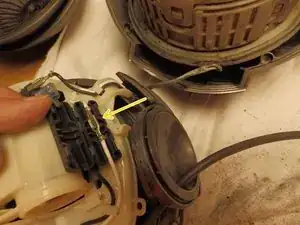
Next to it is a long, black box in which the white cable is plugged. Press the lug with the screwdriver here as well and loosen the plug connection.
-
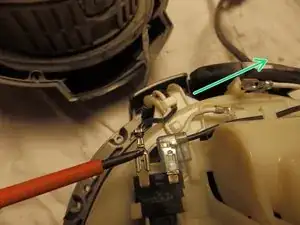
Then carefully pull both cables out of the strain relief on the housing.
-
Now you have mechanically and electrically separated the motor from the cable drum.
-
-
-
To separate the cable reel and the HEPA filter, hold the HEPA filter carefully and turn the cable reel approx. 90° clockwise. Then both parts can be separated.
-
-
-
Done. You have separated the essential main parts.
-
The cable reel, the HEPA filter and the motor can be easily obtained as spare parts on the Internet. The filter is available for around 60 euros, the motor and cable drum for around 80 euros.
-
-
-
During reassembly it can easily happen that the cable drum is stressed. In this case the vacuum works well but the cable will not automatically rewind if you press the button.
-
Therefore you have to assure that the white notches (see step 7) fit in the corresponding openings and not being pushed deeper.
-
Thighten the 2 Torx screws from step 4 and the PH2 screw from step 5 only very little. Always test the rewinding function of the cable. Only at the end if the rewinding works well, tighten these screws and close the lid with the suction tube.
-
-
-
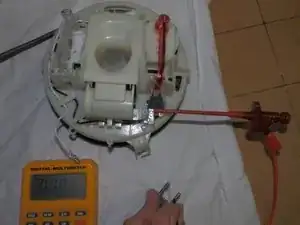
Set the meter to ohms and connect a test probe to the white wire. Use the other test probe to check both poles of the mains plug one after the other
-
If you measure continuity on both, then there is a short circuit. You can verify this again by measuring the resistance between the two poles of the plug. However, it is possible that a short circuit does not occur with the test voltage and that a defective insulation only breaks through at mains voltage.
-
If you measure continuity on one pole, everything is fine. Make a note of which pole the white wire belongs to.
-
If you don't measure continuity anywhere, the conductor in the cable or in the cable drum is broken
-
If the white wire is ok, connect to the black wire (see picture) and the other pole on the plug. There must be continuity.
-
Now connect to the right side of the black switch. It must have continuity when it is switched on, but not when it is switched off.
-
The red foot switch acts on the small button of the actual switch via the lever. This is latching, it remains in position after actuation. If the continuity does not change after pressing the foot switch, check whether the movement arrives at the actual switch. If it's the switch, you can swap it. It is available for about 15 EUR.
-
-
-
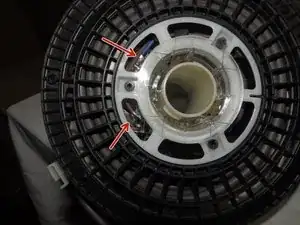
On the back you can see a blue and a brown cable with corresponding terminals. If you use this as a measuring point, you can narrow down the error to the cable itself or the winding mechanism
-
To reassemble your device, follow the instructions in reverse order.
Hier kommt der Extra Long Torx zum Einsatz, die schrauben sind sehr tief versenkt. Danke, Dyson!
Thomas Randau -