Introduction
The Dyson DC52 Cinetic was the first vacuum cleaner that managed completely without consumables such as bags or filters thanks to multi-cyclone technology.
This made this high-priced vacuum cleaner very cheap to run.
Now after the years or when using the vacuum cleaner with too much dust (eg drilling grinding) also much faster, but it comes to the fact that the suction power decreases.
If the vacuum cleaner is then sent for repair, it is often a total economic loss, since 100 - 200 EUR are then due for the disassembly of the device and the replacement of the post-motor filter.
I have already described the disassembly of the device in another manual. You can of course order a post motor filter (part number 922444-02). It costs about 80 EUR including shipping.
Here I show you an EXPERIMENT, in which I try to regenerate a post engine filter by simple washing. Of course, this is not intended by the manufacturer, therefore no guarantee for full performance. But you can always buy a new filter.
One experiment that didn't work was to wash the filter in a laundry bag at 75 °C in the washing machine (without spinning). The supporting plastic crumbled and the filter paper disintegrated.
-
-
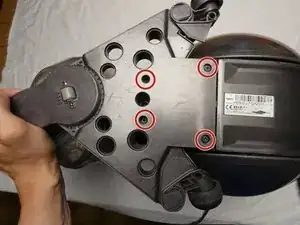
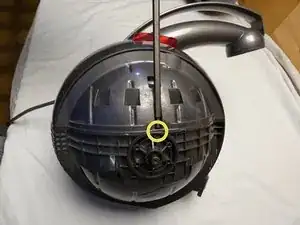
Remove the 8 Torx T15, 22mm pan head screws from the bottom…
-
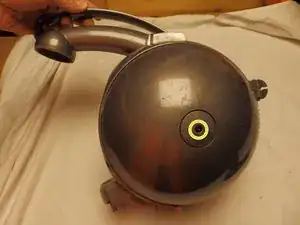
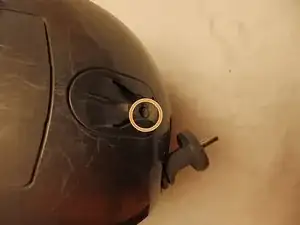
and the 2 22mm Torx T15 screws from the top.
-
-
-
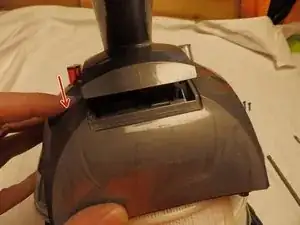
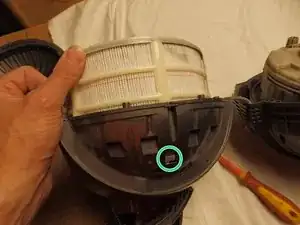
Press the button to release the dust container.
-
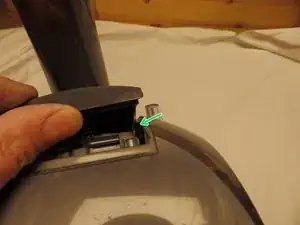
Carefully press the locking lugs inwards with a screwdriver or by hand until the upper part with the suction tube can be folded further upwards.
-
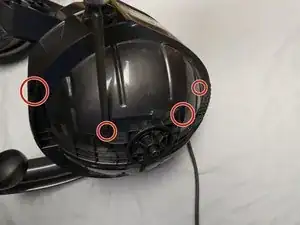
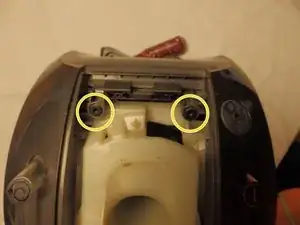
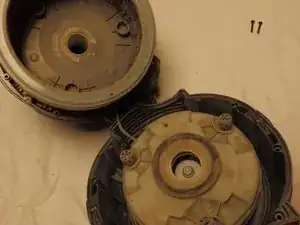
Then another 2 Torx T15, 18 mm cylinder head screws become visible, which are removed (they fasten the cable drum on the inside).
-
-
-
Loosen the one PH2 screw of the intake manifold holder (it fastens the cable drum on the inside).
-
-
-
Carefully pull the case halves apart. You now have the HEPA filter and the cable drum in the upper half and the motor in the motor capsule in the lower half.
-
-
-
The upper part is clipped into the housing with 2 locking notches. Try to unhook with a screwdriver and some hand wiggling. Don't grab the HEPA filter too tightly as it is made of paper and is easily dented.
-
-
-
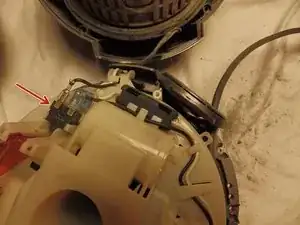
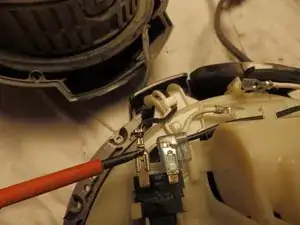
The switch is on the cable drum. The cable is connected to a blade connector which is secured by a fine tab to prevent vibration from loosening it. If you press on the lug with a fine screwdriver, the connection can be released without too much force. Disconnect the black cable.
-
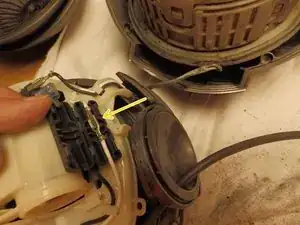
Next to it is a long, black box in which the white cable is plugged. Press the lug with the screwdriver here as well and loosen the plug connection.
-
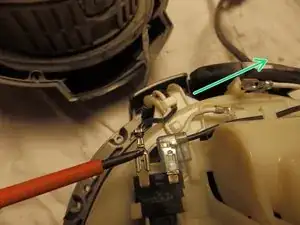
Then carefully pull both cables out of the strain relief on the housing.
-
Now you have mechanically and electrically separated the motor from the cable drum.
-
-
-
To separate the cable reel and the HEPA filter, hold the HEPA filter carefully and turn the cable reel approx. 90° clockwise. Then both parts can be separated.
-
-
-
Done. You have separated the essential main parts.
-
The cable reel, the HEPA filter and the motor can be easily obtained as spare parts on the Internet. The filter is available for around 60 euros, the motor and cable drum for around 80 euros.
-
-
-
During reassembly it can easily happen that the cable drum is stressed. In this case the vacuum works well but the cable will not automatically rewind if you press the button.
-
Therefore you have to assure that the white notches (see step 7) fit in the corresponding openings and not being pushed deeper.
-
Thighten the 2 Torx screws from step 4 and the PH2 screw from step 5 only very little. Always test the rewinding function of the cable. Only at the end if the rewinding works well, tighten these screws and close the lid with the suction tube.
-
-
-
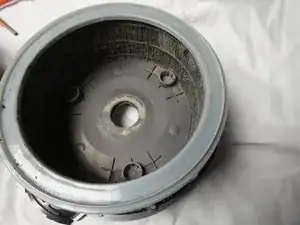
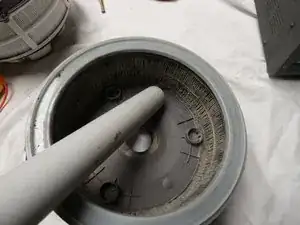
There is an astonishing amount of dirt in the post-engine filter. Remove dirt and hair with another vacuum cleaner.
-
The filter is a folded paper membrane, be very careful when handling it to avoid holes, otherwise the filter effect would then be gone.
-
-
-
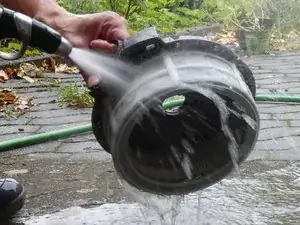
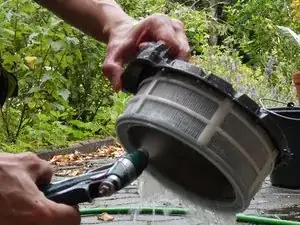
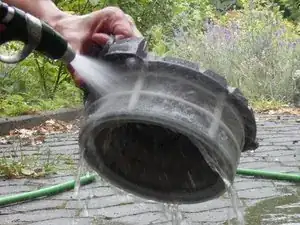
Position a garden hose on a fanned jet.
-
Spray the outside from above, turn the filter so that it gets wet all around.
-
Use a few drops of dish soap or all-purpose cleaner to facilitate the procedure.
-
-
-
Now spray the dirty inside from below and hold the filter so that dirty water drains downward and does not get to the clean outside.
-
Turn the filter and water jet so that the entire surface is rinsed off.
-
Switch to the outside and back again several times.
-
You are done when the water easily penetrates through the filter from the outside and the water draining inside is clean.
-
Dry the filter on a clothesline, for example. Never install it wet.
-
3 comments
Mit Wasser und Saugerstaub hab ich leider die Erfahrung gemacht, dass dem abgelagerten Staub nicht wirklich beizukommen ist und letztlich der nassgewordene Staub sich "betonhaft" verhärtet! Ich habe den Behälter eines DC 52 zu spülen versucht, dann aber das Teil doch komplett gestrippt und dabei den Betoneffekt feststellen müssen. Da die Behälterteile allerdings nahezu komplett stripbar sind ging es unter Zuhilfenahme eines Borstenpinsels und etwas Spülmittel einigermassen sauber, nur in ganz engen Ritzen ist nach dem Trocknen doch noch Staub sichtbar, was aber die Saugkraft nicht wirklich negativ beeinflusst!
B. t. w. meine Schrauben sind komplett Torx 8, die Radschrauben Torx10....musste erst einen 8er lang besorgen- am besten 15cm, die Gehäuseschrauben aussen sind mind. 10cm versenkt!
Keep up the good work
Suicide -
Hab' gestern meinen Dyson aufgemacht und den Filter mit einer Zahnbürste gereinigt + vorsichtiges Klopfen von von der Außenseite. Das ergibt kein perfektes Ergebnis, aber ist besser als vorher und der Filter bleibt ganz. ; )
Ich wusste gar nicht, dass da ein Filter drin ist. Wenn man einen Weg hat, wie man Luft mit einem ähnlichen Druck von der Anderen Richtung einbläst müsste man ein sehr gutes Ergebnis erzielen. Aber bitte nur draußen und mit Sicherheitsabstand!
Oder einen zweiten Sauger an das Ansaugloch "stöpseln". Zur Not mit Panzertape abdichten.
Deine Anleitung hat mir sehr geholfen meinen Filter und Motor zu reinigen.
Ich habe auch den Fehler gemacht das ich Bohrstaub und Sägespähne gestaubt habe.
Doch bei Punkt 2 hast du 2 Schrauben vergessen.
Wenn das Rad ab ist, kommt an der Räderaufnahme eine Schraube auf jeder Seite zum Vorschein.
Ansonsten ist es eine top Anleitung
