Introduction

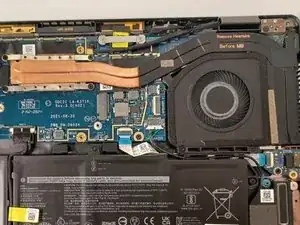
If your laptop keeps overheating, you may need to replace the fans and heat sink. Your Dell Latitude 7420 laptop may overheat due to dirty or dusty vents or fans. This can often be fixed by cleaning out the vents or fan with a dust blower. If that doesn't fix the issue, checking the thermal paste under the heat sink is a good idea because it may need to be replaced too.

Before starting, please ensure the device is turned off and disconnected from any adaptors or charging cables.

Likewise, use an anti-static band or mat when opening computers or handling components.

If the thermal paste in the Dell Latitude 7420 needs to be replaced, an in-depth application guide can be found here.

  1. 1KDyNXBW1w3HDOLO
    1KDyNXBW1w3HDOLO
    E3fRXYbafmRh3dYQ
    AFLwF3dBCAXqJeT2
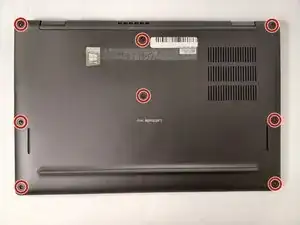
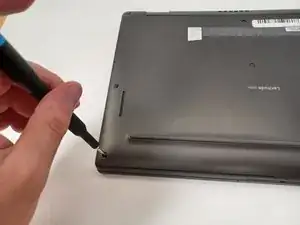
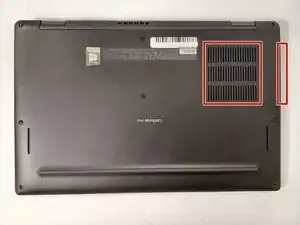
    • Remove the eight, 7 mm screws from the back case using a Phillips #0 screwdriver.

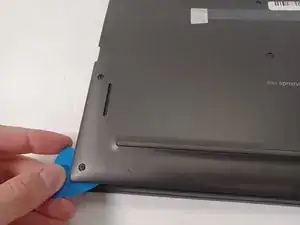
    • Use an opening pick or opening tool and work your way around the periphery of the base cover to separate it from the chassis.

  2. Juir1diG2wQDTWJM
    Juir1diG2wQDTWJM
    NSEcS1A6AMkSBqVS
    • Be sure to use an anti-static band or mat from this point onward.

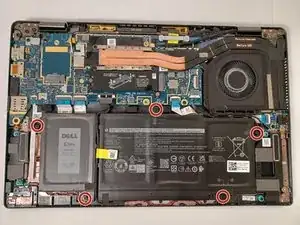
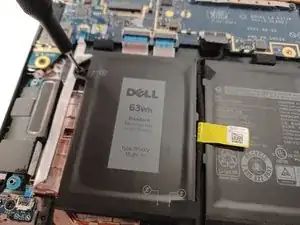
    • Using the Phillips #1 screwdriver, remove the five 5 mm screws securing the battery to the motherboard.

  3. KJHeXZfIMuGUDe6V
    KJHeXZfIMuGUDe6V
    FxG1QchUJsCtmjeu
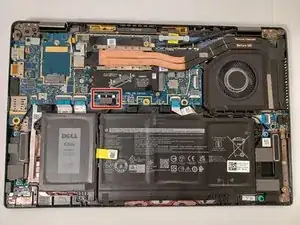
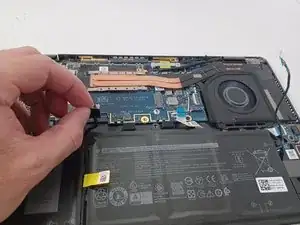
    • Use a spudger to pry up each side. Then, lift the connector straight up from its socket.

    • To reinstall, carefully position the connector, and then press it straight down until it snaps into its socket. Finger pressure is all that is required. If it won't snap home it'll be because it isn't correctly positioned. Sometimes it can take a little patience to find exactly the right position.

  4. lirMJJusnRDPiCOd
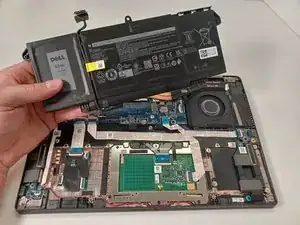
    • Gently remove the battery from its housing.

  5. i62f1pEIFZUgCxY3
    i62f1pEIFZUgCxY3
    ieOaxXGSWVJqyAK1
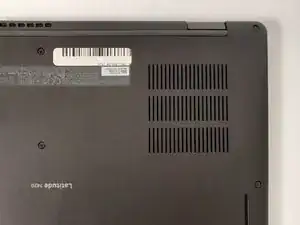
    • Keeping the vents on the case of the laptop clean of dust or debris and clear of obstruction is important for the device to maintain its temperature.

    • Use a cloth and dust blower to clean the vents.

    • It's best to clean the vent when the back case has been removed from the device.

  6. twZCgGvhwLZVCDel
    twZCgGvhwLZVCDel
    TfL2cCW2GJSVGMlx
    J41h1BJeHK2isFWX
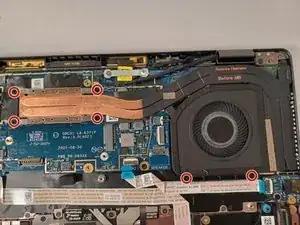
    • If the fan is dusty, a soft cloth can be used to gently clean it.

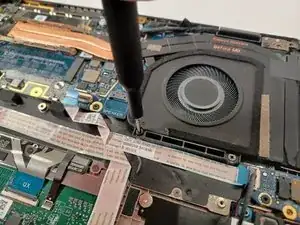
    • Use a Phillips #00 screwdriver to remove the six 2.5 mm screws securing the fan assembly.

  7. vN3d5cvEZpfLwZI3
    vN3d5cvEZpfLwZI3
    fBo2nXJ6G2YE5utW
    ZjGNHUkoBLcr1QRg
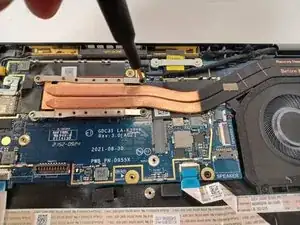
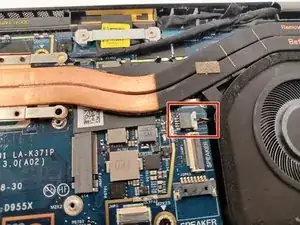
    • Use the pointed tip of a spudger to carefully push on each side of the connector and remove it from the socket.

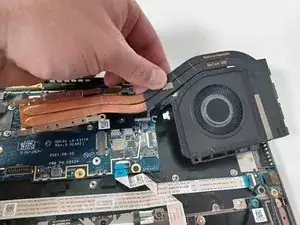
    • Remove the fan assembly.

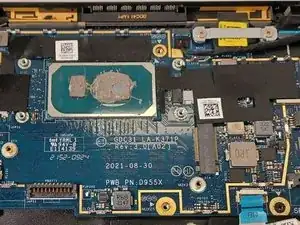
    • When replacing the fan assembly, make sure there is thermal paste under the heat sink. Follow this guide for more information.

Conclusion

To reassemble your device, follow these instructions in reverse order.
Nick B.

Member since: 25/08/22

563 Reputation

0 comments