Introduction
If your motherboard is faulty, you will need to replace it. This guide will show you how to replace the whole motherboard from the Dell Inspiron 16 7610.
Before you begin the repair, power off your laptop and disconnect it from the AC adaptor.
-
-
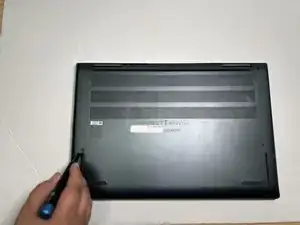
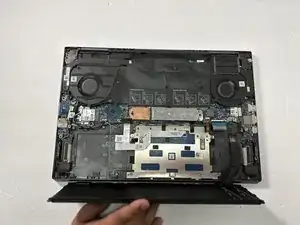
Flip the device over, so the backside is facing up.
-
Use a Phillips #00 screwdriver to remove seven 4.00 mm screws.
-
Use the Phillips #00 screwdriver to unscrew or loosen two captive screws at the right and left corner near the hinges.
-
-
-
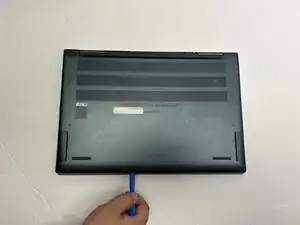
-Use the opening tool between the seams of the top and bottom case to pry the back case off of the laptop.
-
Undo the clips gently as you pry the back of the device to avoid breaking them when removing the back case.
-
Remove the back case from the device.
-
-
-
Use a Phillips #00 to remove the five screws securing the battery to the laptop.
-
Pull the bundled cable away from the connector in the same direction as the wires are running.
-
Use both hands to life the battery up and remove it from the laptop.
-
-
-
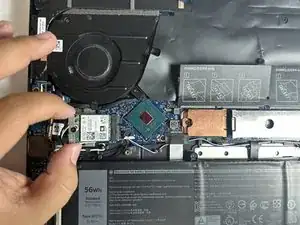
Use a Phillips #00 screwdriver to remove the screw that secures the Wi-Fi card bracket to the system board.
-
Lift the Wi-Fi card bracket off of the Wi-Fi card.
-
-
-
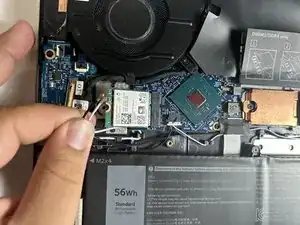
Slide a thin, ESD-safe pry tool or tweezers under the wire until it's snug against the connector, and pry straight up from the board to disconnect the coaxial cables from the Wi-Fi card.
-
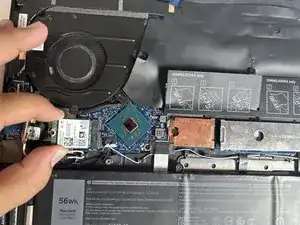
Slide the Wi-Fi card from the slot to remove it from the device.
-
-
-
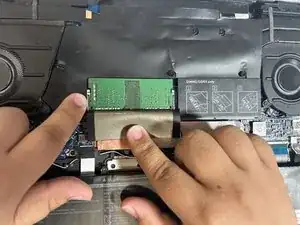
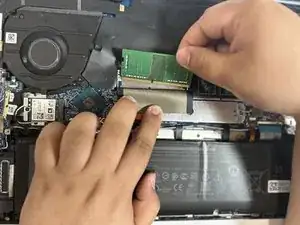
Flip the plastic cover over to reveal the RAM stick. Do not pull the plastic cover off.
-
Pull the two RAM retaining arms away from the center of the RAM stick.
-
Pull the RAM stick out of the socket. Repeat for each of the RAM sticks you are replacing.
-
-
-
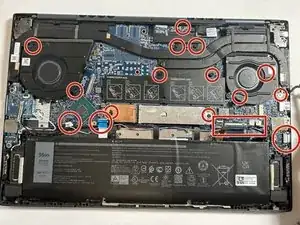
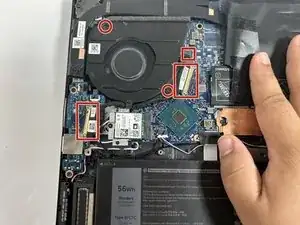
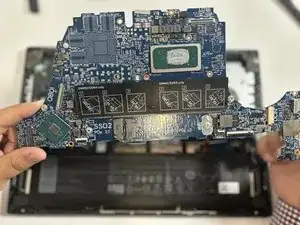
Double check that every component is removed from the motherboard.
-
Disconnect all the pin and ribbon cables from the motherboard.
-
Locate and remove all the screws that are holding the motherboard in place.
-
-
-
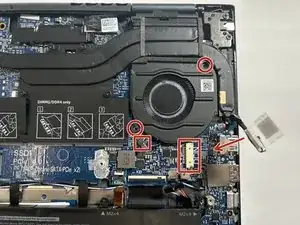
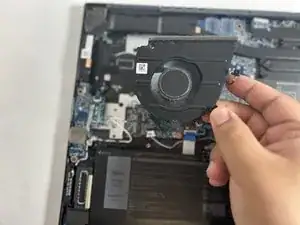
Remove the screws and cables connecting the fans to the motherboard.
-
Lift the fans off of the board to remove.
-
-
-
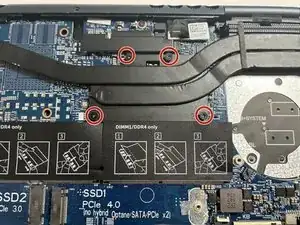
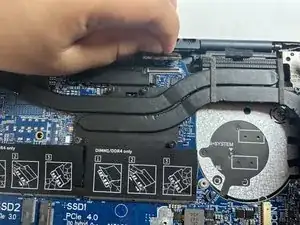
Use the Phillips #00 screwdriver to loosen the four screws from the heat sink.
-
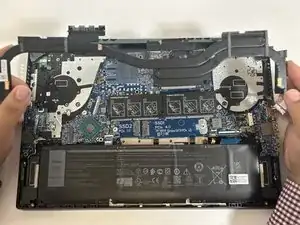
Use both hands to gently lift the heatsink up.
-
-
-
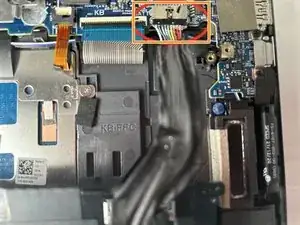
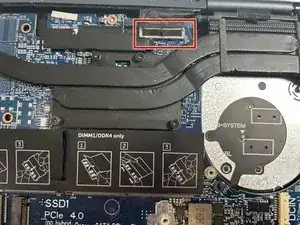
Use a spudger to pry up on each side of the press-fit connector, then lift the connector straight up to disconnect it from the motherboard.
-


To reassemble your device, follow these instructions in reverse order.

Only 6 screws have to be removed - the central one on the hinge area can remain.
Bob Irving -