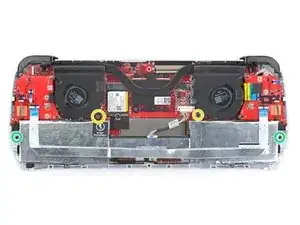
Introduction

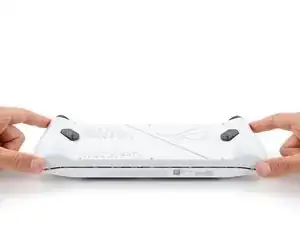
Follow this guide to replace a dead or malfunctioning battery in your Asus ROG Ally.

Lithium-ion batteries have a limited lifespan. If your device doesn't hold a charge or dies unexpectedly, it might be time to replace the battery.

  1. vqjOL4ArFHFYnWRd
    vqjOL4ArFHFYnWRd
    R35152aPXbWqJyIE
    RNWYTLOLBduXfPut
    • Let your device's battery drain below 25% before starting this repair—a charged lithium‑ion battery may catch fire if damaged.

    • Completely power off your device and unplug all cables.

    • Consider laying your device on a soft cloth to prevent scratching or damaging the screen during your repair.

  2. IIaUFJ63RLGmQ4Ui
    IIaUFJ63RLGmQ4Ui
    G1oNRVqSWLPJQuue
    • Throughout this repair, keep track of each screw and make sure it goes back exactly where it came from.

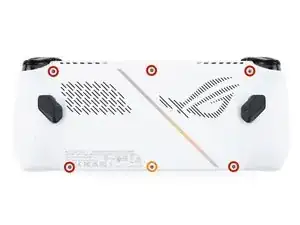
    • Use a Phillips #0 screwdriver to remove the five 17.2 mm‑long screws securing the top edge and bottom corners of the back cover.

    • Use a Phillips #0 screwdriver to fully loosen the remaining captive screw at the center of the bottom edge. This should create a small gap between the back cover and chassis.

    • Don't try to remove this screw.

  3. huPyGW1EUkBGsSTE
    huPyGW1EUkBGsSTE
    M6IvvHetKHCpTy4U
    qi5vI6QX1xftg3B1
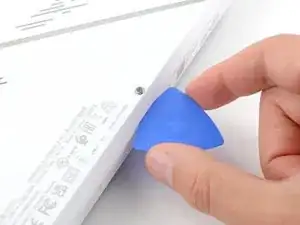
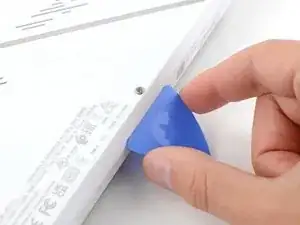
    • Insert the flat edge of an opening pick between the bottom edge of the back cover and chassis, near the captive screw.

    • Angle the pick upward and push it under the back cover.

  4. fFjsjRQ13SIhxyu3
    fFjsjRQ13SIhxyu3
    lY53VEwZPpoX4qpK
    q2nIrM1nNHBw6RmS
    • Plastic clips secure the perimeter of the back cover. You should feel and hear them release during this step.

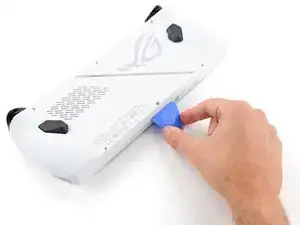
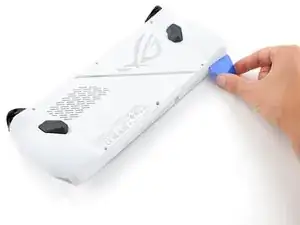
    • Slide the opening pick along the bottom edge and around the corners of the back cover to release the clips securing it.

    • Keep the pick at an upward angle under the back cover to help release the clips.

  5. ahsmjIA4qJNspYWG
    ahsmjIA4qJNspYWG
    B5LPMX4LkZDJYRC3
    TZXfUcBeqUFOe1ZG
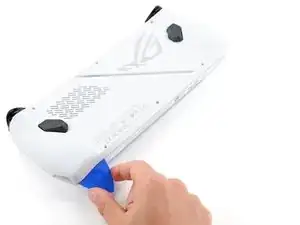
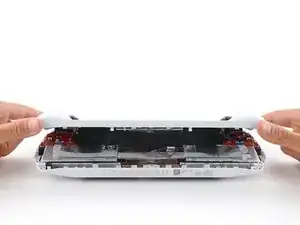
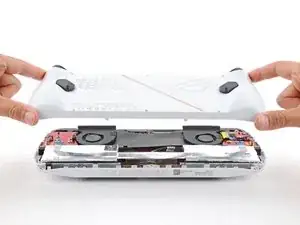
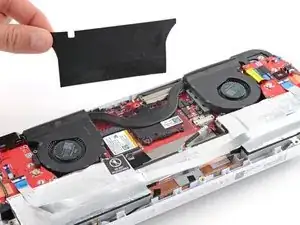
    • Lift the bottom edge of the back cover off the chassis to release the remaining clips.

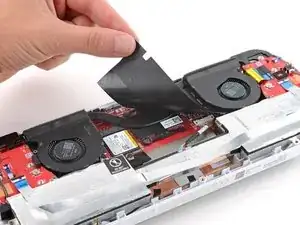
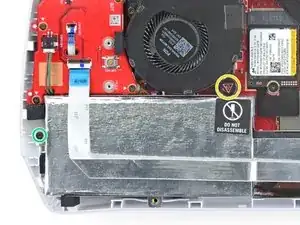
    • Remove the back cover.

    • During reassembly, lay the back cover onto your device and firmly push down around the perimeter to engage the clips.

  6. jQPeBj2BVKbLBN1V
    jQPeBj2BVKbLBN1V
    Y2sVM6bPZY5DAexF
    KpdHtIuZHElCKIhY
    • Use your fingers to peel up and remove the black plastic cover between the fans.

    • Put the cover aside—you'll use it during reassembly.

  7. ywTPiJrPDp4C6LFv
    ywTPiJrPDp4C6LFv
    5Imk2CG6LxgBGjXQ
    jQW5Ksl6jsM5MwFV
    • A metal locking bar secures the top edge of the battery connector

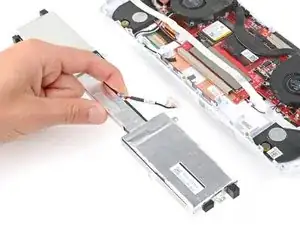
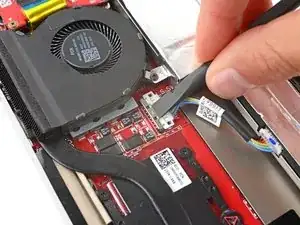
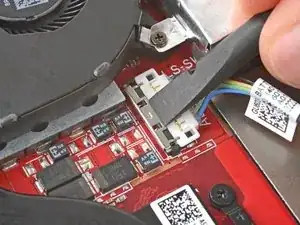
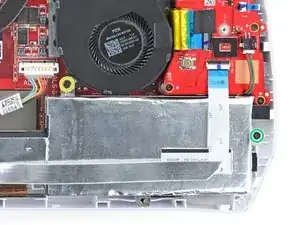
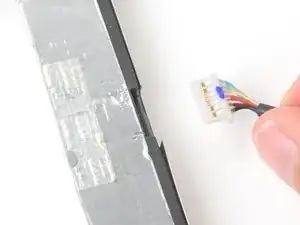
    • Use the flat end of a spudger to gently push the locking bar away from the connector to unlatch it.

  8. PTJH4CBci1dIii3b
    PTJH4CBci1dIii3b
    ykPZfc1YrAbFXKyf
    B4Ai3WpAhwyLZIPB
    • Make sure the locking bar is not covering the battery connector at all, or you may damage the socket and the locking bar.

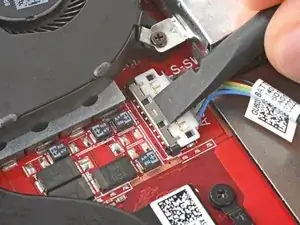
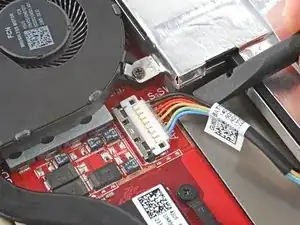
    • Insert the flat end of a spudger under the center of the battery connector.

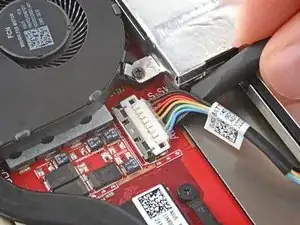
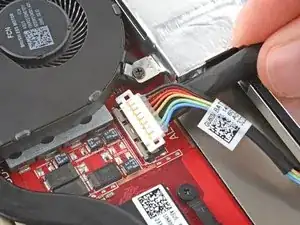
    • Lift the connector straight up and out of its socket to disconnect the battery.

    • During reassembly, use your fingers or the flat end of a spudger to firmly push the connector onto its socket until it clicks into place.

  9. GAhlNecdVOaHrC1M
    GAhlNecdVOaHrC1M
    uTAjNQewJWZl1GiM
    FVPF3iFLUDFbHoEk
    • Use a Phillips #00 screwdriver to remove the four screws securing the battery:

    • Two 9.6 mm‑long screws near the center of the top edge

    • The screw near the left speaker has a warning sticker on it. Pierce through it with your screwdriver or use tweezers to remove it.

    • Two 3.4 mm‑long screws at the left and right edges

  10. wPtq4WaTaJ312EYv
    wPtq4WaTaJ312EYv
    wOdBU5qilYbTDoMZ
    ar5TBqWdOlsQXohT
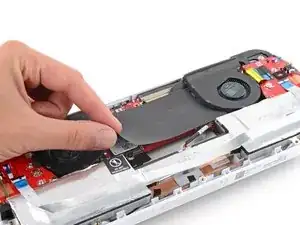
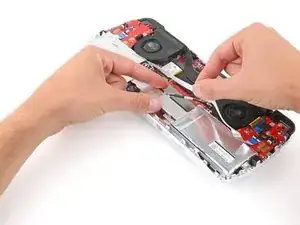
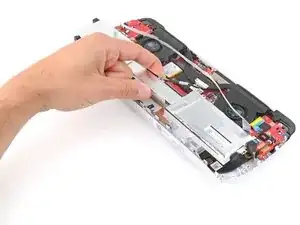
    • With one hand, hold the ribbon cable that runs along the top of the battery out of the way.

    • With your free hand, lift the battery straight up and remove it.

  11. EY1gehy1KJbPjNlM
    EY1gehy1KJbPjNlM
    UsDY3YwZ4X6alsMU
    lOnNmTAFSmjps3Wf
    • If your replacement battery doesn't come with a cable installed, follow this step to remove and transfer the old one.

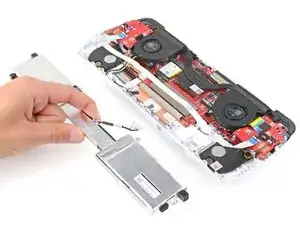
    • With one hand, firmly secure the outer battery cells.

    • With your free hand, use the point of a spudger to push on alternating sides of the battery connector to walk it out of its socket.

    • To install the cable:

    • Gently push the connector partially into its socket.

    • Use a spudger to push in the outer edges of the connector until it slides fully into its socket.

    • Do not push on the cables themselves, as this can easily damage them.

Conclusion

To reassemble your device, follow these instructions in reverse order.

Take your e-waste to an R2 or e-Stewards certified recycler.

For optimal performance, calibrate your newly installed battery after completing this guide.

Repair didn’t go as planned? Try some basic troubleshooting, or ask our Answers community for help.

Spencer Day

Member since: 14/09/22

49372 Reputation

0 comments