Introduction

This guide shows how to detach the screen from your Apple Watch Series 9.

  1. vCdrIDIQlv1XIlmC
    vCdrIDIQlv1XIlmC
    C3pxxX6BdcMGRnEG
    • Before starting this repair, remove your watch from the charger and let its battery drain completely—the watch should shut down from low battery. A charged lithium‑ion battery may catch fire if damaged.

    • Letting the battery drain completely also prevents accidentally turning your watch back on when gripping it during repair.

  2. 6xLdS3IZ1ODrGa2r
    6xLdS3IZ1ODrGa2r
    GrXeZaQSoySJ2TPa
    BJa2cVReAhQDKhiv
    • Throughout the rest of your repair:

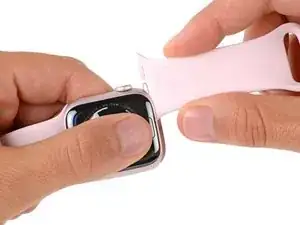
    • Attach and remove the watch bands as needed to get a better grip or stabilize your watch.

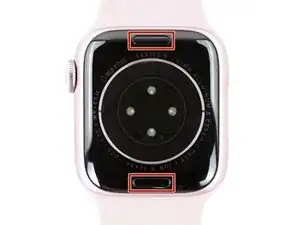
    • To remove a band, firmly press in the small, oval button on the underside of the watch and slide the band out of its groove.

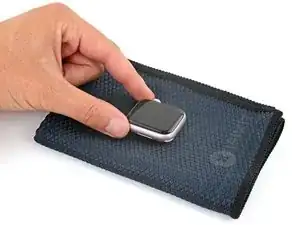
    • Consider placing your watch on something soft like a clean cloth to help stabilize it and prevent damage.

  3. FoTVJE6HLFQJuoIh
    FoTVJE6HLFQJuoIh
    ZwPfvNUXtfdYUXPG
    W5XLQyXXVZZDlIRo
    • If inserted too far, an opening pick can damage your watch. Follow this step to mark your pick and prevent damage.

    • Measure 3 mm from the tip and mark the opening pick with a permanent marker.

    • Alternatively, tape a coin to a pick 3 mm from the tip.

  4. Wp6sv2hOnrnsFiX2
    • Strong adhesive secures the perimeter of the screen to the frame. Heating the screen softens the adhesive, making it easier to separate.

    • Heat an iOpener and lay it on the screen for two minutes to soften its adhesive.

    • Alternatively, you can use a hair dryer or heat gun—but be careful as extreme heat can damage the screen and/or battery.

  5. HxlMWqZhifgrHrGY
    HxlMWqZhifgrHrGY
    JgGMlIBiyDlR2uR2
    TXE1frBBR6AOmM5c
    • The gap between the screen and frame is extremely small. You'll need a thin tool such as an iFlex to create an initial gap.

    • Don't grip the iFlex or similar metal tools by the edges—they're very sharp. Consider wearing gloves to protect your hands.

    • Insert the iFlex at a downward angle between the bottom edge of the screen and frame.

  6. B5ua1ZkJZN6YbCCi
    B5ua1ZkJZN6YbCCi
    SCiTjpBLUJSLpclX
    • Prying up the screen may take multiple attempts. If you're having trouble, apply more heat and try again.

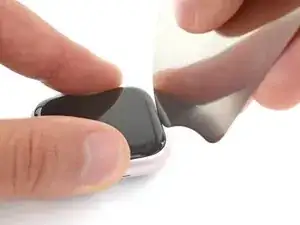
    • With one hand, push down firmly on the watch's frame to secure it in place.

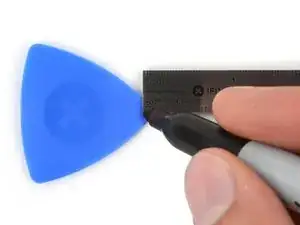
    • With your free hand, hold the iFlex and push the edges up to make it more rigid.

    • The iFlex should be slightly "U" shaped.

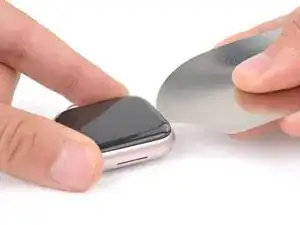
    • Pry up the screen enough for the iFlex to lay flat on its own.

    • The iFlex doesn't need to be inserted far, as it can easily damage the screen cables near the bottom right corner of the watch.

    • Leave the iFlex inserted under the screen.

  7. ELSDtUnOKfljB1wi
    ELSDtUnOKfljB1wi
    SoAKYpCrbyF3FYny
    CxH4SoOEsZmYqMEl
    • Do not insert your opening pick more than 3 mm under the screen when separating the adhesive, as you risk damaging your watches internals.

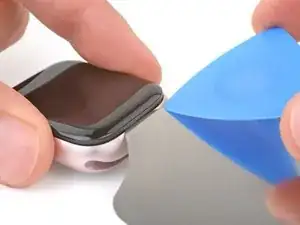
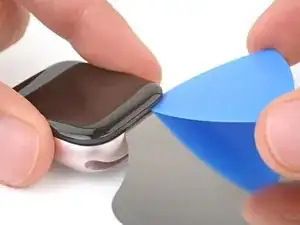
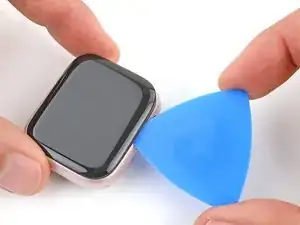
    • Keep the iFlex flat to maintain a gap between the screen and frame while inserting an opening pick.

    • Insert an opening pick between the screen and iFlex.
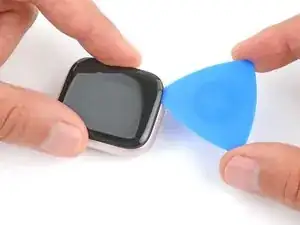
    • Remove the iFlex.

  8. CBWYKZT51JbZwq4A
    CBWYKZT51JbZwq4A
    aXZAOVu1AVTvTLYr
    • Slide the opening pick along the bottom edge to separate the adhesive securing it.

  9. dsSEU1kUCsLJFIZN
    dsSEU1kUCsLJFIZN
    U5ffmaSXrsJUa5Tq
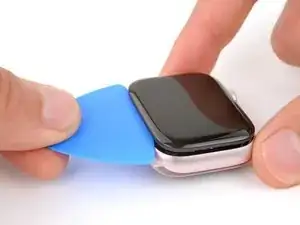
    • Slide the opening pick around the bottom left corner and up the left edge to separate the adhesive.

  10. 65nRjtNQRi6biYOX
    65nRjtNQRi6biYOX
    FUWEAHjxqxUubK5I
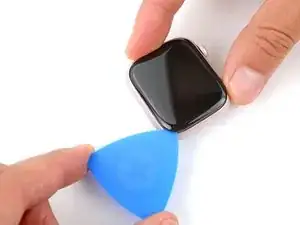
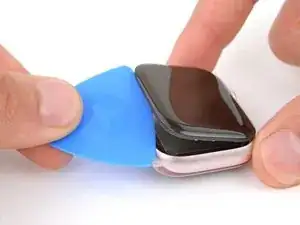
    • Slide the opening pick around the top left corner and along the top edge to separate the adhesive.

  11. eOCy3BwOBoImNhPT
    eOCy3BwOBoImNhPT
    v2jLFv5QJXKTpSCF
    • Slide the opening pick around the top right corner and stop at the top of the side button.

    • Don't slide your pick past the side button—you risk damage to the screen cables.

  12. DDG1dcBDZQbVX5Cp
    DDG1dcBDZQbVX5Cp
    i3qCOsRmJNcKZKvo
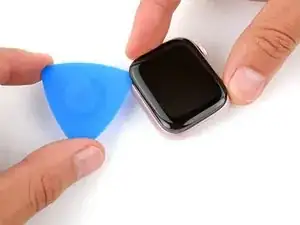
    • Insert the long edge of an opening pick between the left edge of the screen and frame.

    • Twist the pick to lift the screen and separate any remaining adhesive.

Conclusion

To reassemble your device, follow these instructions in reverse order.

Spencer Day

Member since: 14/09/22

49372 Reputation

0 comments