Introduction

Use this guide to replace a worn-out or dead battery in your Apple TV 4K 2021 Siri Remote. The charging port and the battery of the Siri Remote are connected as one assembly.

  1. rcaxy6nLUP6jLCOF
    rcaxy6nLUP6jLCOF
    pJ35PQvpaEdfoeYB
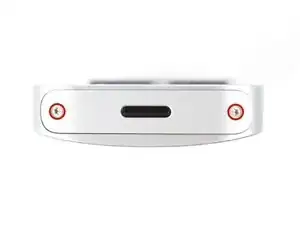
    • Use a P2 Pentalope screwdriver to remove the two 6.1 mm-long screws securing the bottom cover.

    • Remove the bottom aluminium cover.

    These screws seem larger than a P2. My P2 keeps slipping on the screws.

    prplecake -

  2. oejDhRsQlImTItBB
    oejDhRsQlImTItBB
    NidDLaoXStWENXIF
    yQsfDqGDULRqA3qY
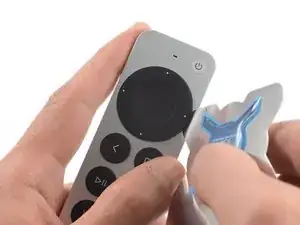
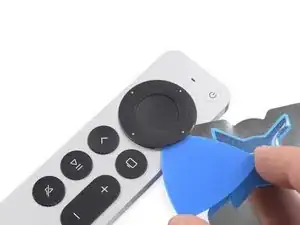
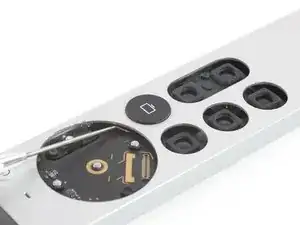
    • Insert an iFlex into the gap on the right side of the circular clickpad.

    • Insert the iFlex about 3 mm.

    • Use the iFlex to create a gap by prying the circular clickpad upwards.

  3. MBBfULhYrhOWZGTy
    MBBfULhYrhOWZGTy
    cMgV33xD1PgiSAmp
    eA5QbTDh5aZ2tH2w
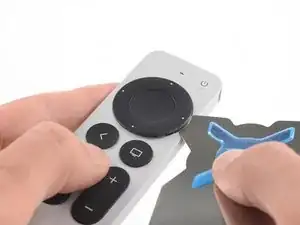
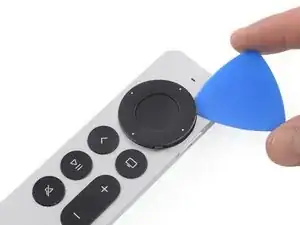
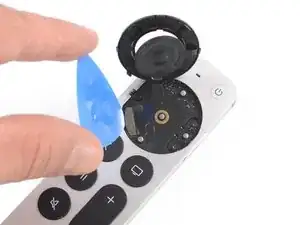
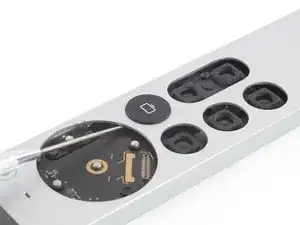
    • Insert an opening pick into the gap. Remove the iFlex after inserting the opening pick.

    • Slide the opening pick around the top half of the clickpad.

    • Avoid sliding the opening pick to the bottom half of the clickpad. A flex cable runs there!

  4. EjGIpVCUhWoH3BDN
    EjGIpVCUhWoH3BDN
    NSPrRjxQVRnjOUjF
    hPAOEtWo2jJ3NZkQ
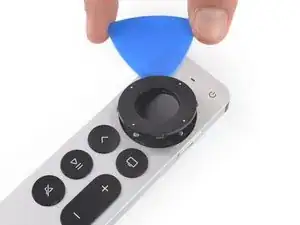
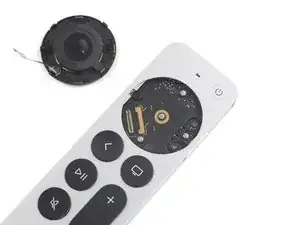
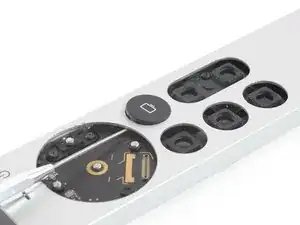
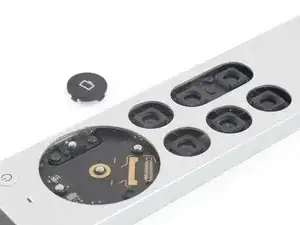
    • Lift the clickpad from the lower right side to access the press connector.

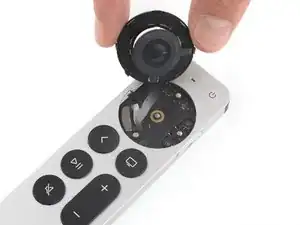
    • Use an opening pick to pry up the clickpad connector to disconnect it.

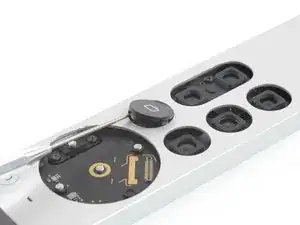
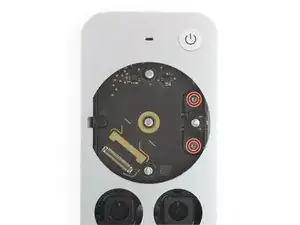
    • Remove the clickpad.

    Why doesn't iFixit sell replacement clickpads? This component is the most likely to fail on these remotes, and it is one of the easier things to replace.

    BitingChaos -

  5. aEXDdF2Gtv6CWPdg
    aEXDdF2Gtv6CWPdg
    2OnRwcMCPEVgYUXT
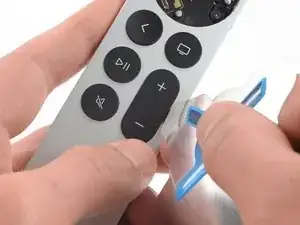
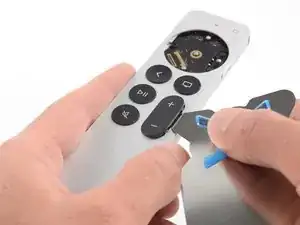
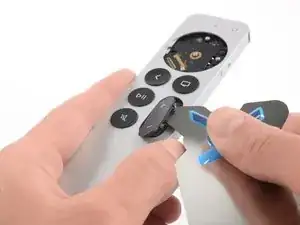
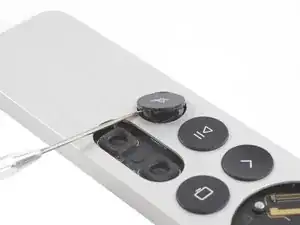
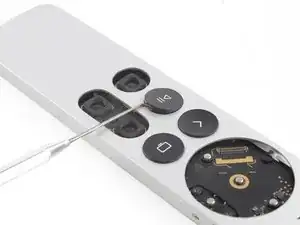
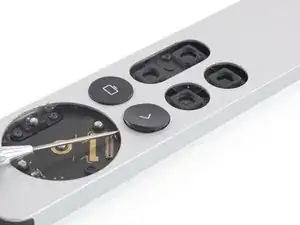
    • Insert the iFlex into the gap on the right edge of the volume button.

    • Insert the iFlex about 3 mm.

  6. N2kBUVUYBKpDtGFF
    N2kBUVUYBKpDtGFF
    SuTWkmHLMsW5D3rZ
    liUO5t5CAxaSwVdD
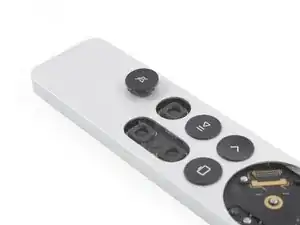
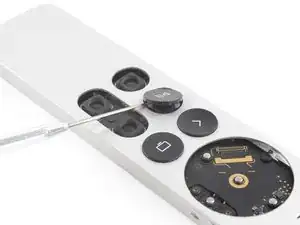
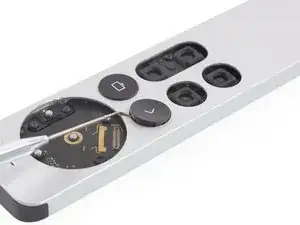
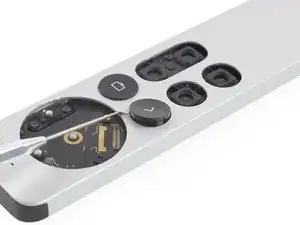
    • Use the iFlex to pry up the volume button to unhinge the plastic clips which keep the button in place.

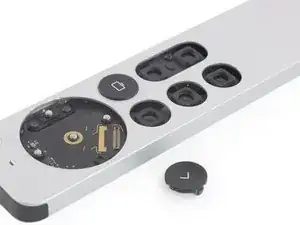
    • Remove the volume button.

  7. ke2PD3alBwklFAD2
    ke2PD3alBwklFAD2
    jYZJvdQEeAjT3RI2
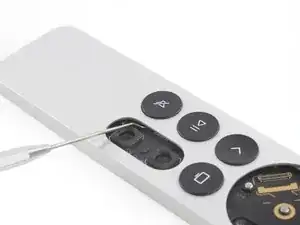
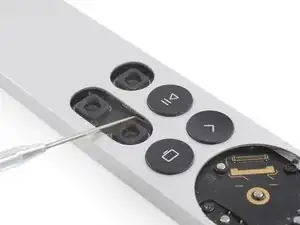
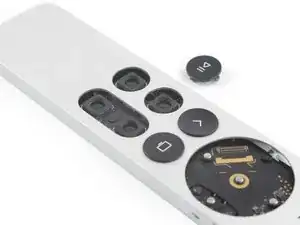
    • Insert an angled probe into the housing to release the right plastic clip of the mute button.

    • Carefully push against the buttons clip from the inside.

    • Make sure that the probe doesn't hit any components on the mainboard and is inserted horizontally.

    Getting the power button aligned when reassembling is very tough.

    Tracey -

  8. ZJsdb41ZZacf6awG
    ZJsdb41ZZacf6awG
    YVaOTRVxrYK2XTHi
    42UDGP42OlcyjLL4
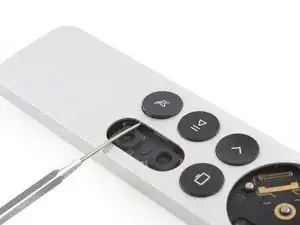
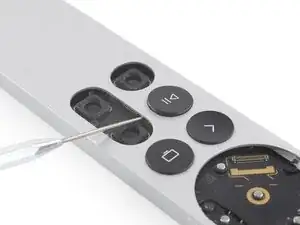
    • Insert the probe into the gap on the surface of the mute button.

    • Use the probe to pry up the mute button and unhinge the remaining plastic clips.

    • Remove the mute button

  9. YpgA2nfpGFBlMSw6
    YpgA2nfpGFBlMSw6
    KyjoML6ps5vtsX4S
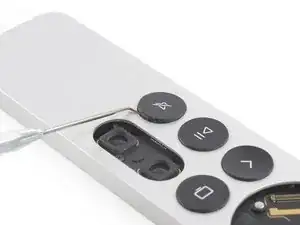
    • Insert a probe into the case to release the right plastic clip of the play/pause button.

    • Gently press against the clip from the inside.

    • Make sure that the probe doesn't hit any components on the mainboard and is inserted horizontally.

  10. TO626cgl2ZbfGPIc
    TO626cgl2ZbfGPIc
    Sch2j3e1dHAV11KQ
    qP3jganrUGV4m16j
    • Insert the probe into the gap on the surface of the play/pause button.

    • Use the probe to pry up the play/pause button and unhinge the remaining plastic clips.

    • Remove the play/pause button.

  11. xvXIpXcMyrXGvQEG
    xvXIpXcMyrXGvQEG
    wm1bemBrSbbFLj2A
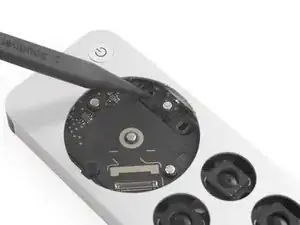
    • Insert the probe into the housing where the clickpad was previously to release the upper plastic clip of the back button.

    • Carefully press against the clip from the inside.

    • Make sure that the probe doesn't hit any components on the mainboard and is inserted horizontally.

  12. qmJGiOxqTFUOUCqx
    qmJGiOxqTFUOUCqx
    rTSMaAAXDr2CbMIy
    f3Bl2ftZrNm3L1Kc
    • Insert the probe into the gap on the surface of the back button.

    • Use the probe to pry up the back button and unhinge the remaining plastic clips.

    • Remove the back button.

  13. eHFKQYQwQwwdiAOa
    eHFKQYQwQwwdiAOa
    Op2wpQTTeisYJy1a
    J1lp4WkaIsLvEyE1
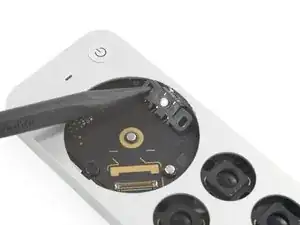
    • Insert the probe into the inner housing where the clickpad used to be to release the upper plastic clip of the TV button.

    • Carefully press against the clip from the inside.

    • Make sure that the probe doesn't hit any components on the mainboard and is inserted horizontally.

  14. UQBLKg4l36CZNOKs
    UQBLKg4l36CZNOKs
    1sVhpw4eoBNNTK6n
    tsFMFJk3HvOIyPob
    • Insert the probe into the gap on the surface of the TV button.

    • Use the probe to pry up the TV button and unhinge the remaining plastic clips.

    • Remove the TV button.

  15. SblBsrokLoiRnHyi
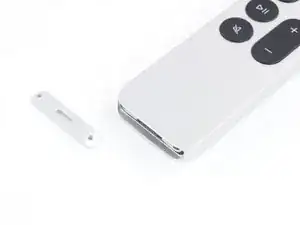
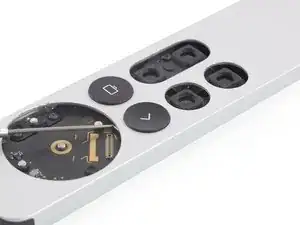
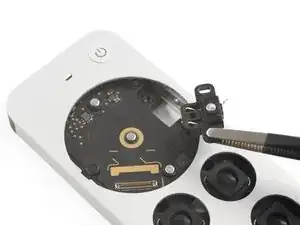
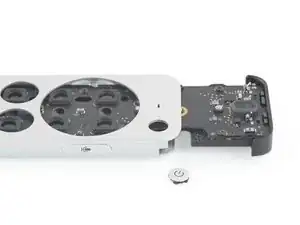
    • Use a T3 Torx screwdriver to remove the two 4.7 mm-long screws securing the Siri button on the right edge of the remote.

  16. kotaTbayqfBU4lXT
    kotaTbayqfBU4lXT
    bCyHOHJcxWZDaH5K
    YJYCQKPF2m2GgAG4
    • Use the pointed end of a spudger or a pair of tweezers to lift the Siri button up and out of the remote.

    • Remove the Siri button.

  17. xKMqVCRpCGQxCKPH
    xKMqVCRpCGQxCKPH
    XAFYMIOwg5jcPETo
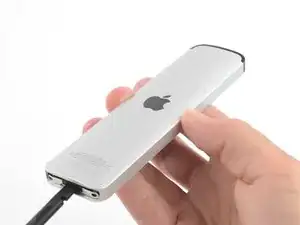
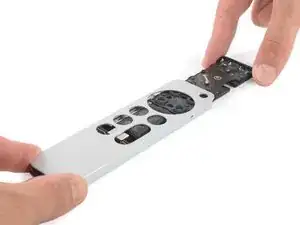
    • Turn the remote upside down.

    • This will avoid the power button falling into the case and getting jammed.

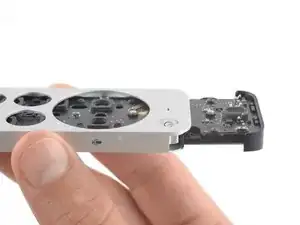
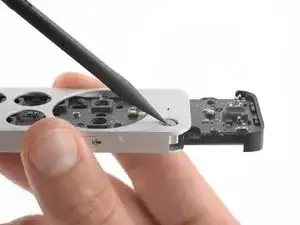
    • Insert the flat end of a spudger into the charging port.

    • Don't worry! This won't damage the port.

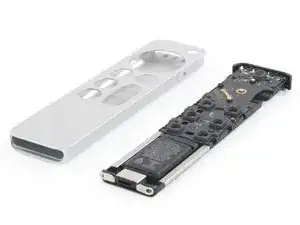
    • Push the spudger in to slide the insides of the remote out about 1 inch (2.5 cm).

    • Don't try to push it all out yet! The power button needs to be removed first.

  18. pwLWXuHXdgPtmVtW
    pwLWXuHXdgPtmVtW
    5bOVpeoICDbjjuLk
    KGVpBPO4M55QQojw
    • Turn the remote back over and make sure that the recess of the inner frame aligns with the power button.

    • Use the pointed end of a spudger to press the power button into the recess of the inner frame (if it didn’t already fall in by itself).

    • Remove the power button.

    Someone picked the power button off from the front and broke two of the four little black clips that hold the power button in place.

    Where does one get a new power button, or maybe just the black plastic piece on the back?

    Cuepawn -

  19. iAfRBABeFIgyeMFr
    iAfRBABeFIgyeMFr
    qu1ZFX1PD3E2x4v3
    • Pull the inner frame out of its aluminum housing.

    • There is a slight resistance when pulling out.

  20. mVuekUNPBMAmfPCy
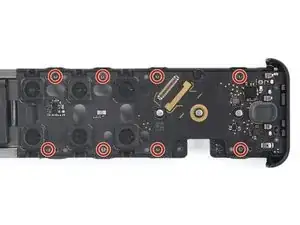
    • Use a Torx T3 screwdriver to remove the eight 4.7 mm-long screws securing the mainboard to the frame.

    • Don't try remove the mainboard all the way yet. It's still connected to the battery!

  21. dSCLvopHKgLORS1J
    dSCLvopHKgLORS1J
    xOpY5KU31vRDYJWw
    • Turn over the frame.

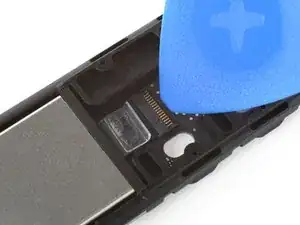
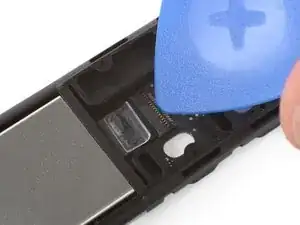
    • Use an opening pick to lift up the small locking flap on the trackpad cable's ZIF connector.

  22. MDIUgRPAi6Exh2Qy
    MDIUgRPAi6Exh2Qy
    QuZbBoDD6LSVRTWa
    PgXYsIcDkGeQDahA
    • Lift the mainboard up and away from the battery to remove it.

  23. JhVLxbrMcUUdyYCW
    JhVLxbrMcUUdyYCW
    BTsOvIPYktjGQtNK
    u4BlTVXrjatPMeik
    • The battery is held down by mild adhesive.

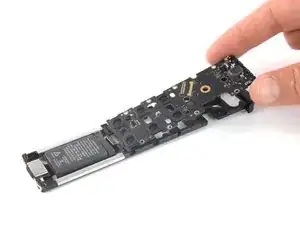
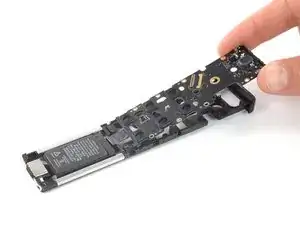
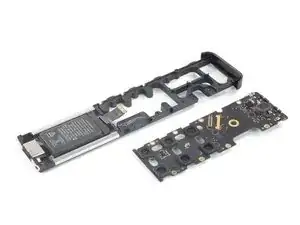
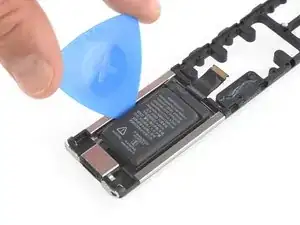
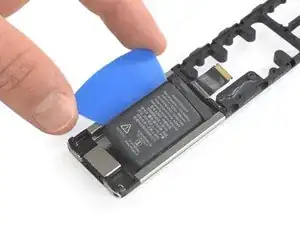
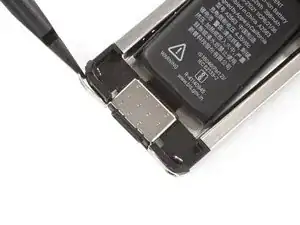
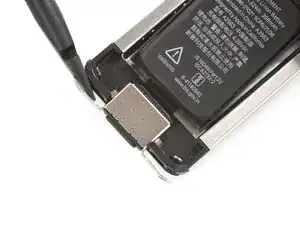
    • Insert an opening pick on either side of the battery and pry up to lift it away from its recess.

    • Make sure you push underneath the battery and not into it. Don't bend or deform the battery

    • Don't try to remove the battery all the way yet! The charging port is still entangled with the frame.

  24. GWQj4plRkyYZFS6Z
    GWQj4plRkyYZFS6Z
    EUhWrJrtI15yEBB4
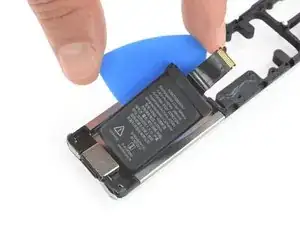
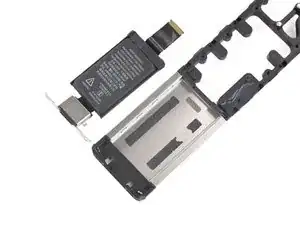
    • Use the flat end of a spudger to shift the battery port assembly towards the bottom of the frame to free the metal clips holding it in place.

  25. PaC6WHmwgevMMQas
    • Remove the battery and charging port assembly.

    What is the replacement battery assembly part and where can I purchase it?

    Martin Basil -

Conclusion

Compare your new replacement part to the original part—you may need to transfer remaining components or remove adhesive backings from the new part before installing.

To reassemble your device, follow the above steps in reverse order.

Take your e-waste to an R2 or e-Stewards certified recycler.

Repair didn’t go as planned? Check out our Answers community for help.

Adriana Zwink

Member since: 18/12/19

47683 Reputation

2 comments

FWIW, I don’t like having a “non-replacable” battery remote control. I idid find that my old AppleTV remote works with the new device, so if my battery ever dies I will just use my old remote with the button battery.

Phil -

Here here, heartily agree.

Brian Crawford -