Introduction

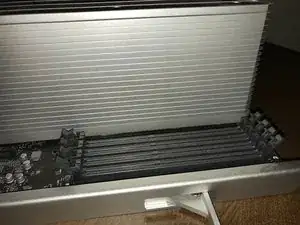
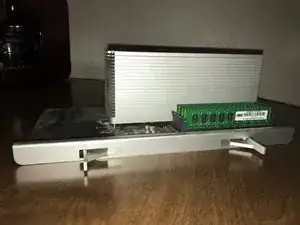
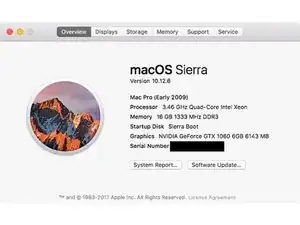
Replacing the CPU in your 2009-2012 Mac Pro is an excellent way to add both performance and to get more life out of your Mac Pro. If you have a 2009 model as I do in the guide, you'll need to make sure you update the firmware first so you can use a wider variety of CPU upgrades, which are not only faster but also more efficient and can allow your RAM to work more quickly as well.

A list of compatible CPU upgrades can be found in this MacRumors thread.

  1. wmuLgZDISKSV2fdg
    wmuLgZDISKSV2fdg
    HxZYgniYUmPXXMLF
    cj1tEK4NOS4wsdQ5
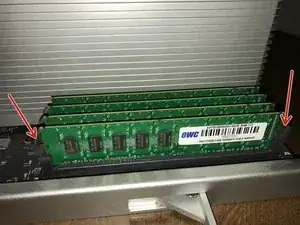
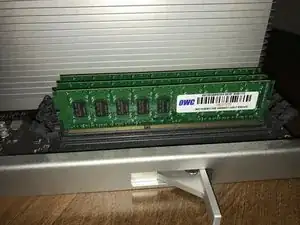
    • While removing the RAM is not entirely necessary, it is a good idea so that you do not damage any of your chips while dealing with the heat sink.

    • Pop the tabs on the side and remove each chip individually.

    • Both the tabs and sticks may be stiff; be patient and use care.

  2. PjIF3ulAXeyAfP12
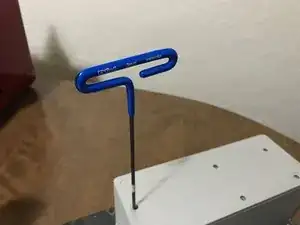
    • Position your wrench in one of the screw holes and start to unscrew each bolt.

    • IMPORTANT: You must unscrew each screw an equal amount so you are removing the heatsink vertically and not at an angle. You could accidentally damage many of the components underneath the heatsink if you are not careful.

    • It may help to count off a number of turns as you're going to ensure that you apply even pressure in removing the heatsink.

    • I sharpied a line onto the one side of the handle of my hex key so I could more easily keep track of revolution count.

    • It took me about 17 turns on each screw to fully disconnect it, but your count may vary.

    • The screws are captive to the heatsink, so do not worry about removing them from the block.

    • You should hear a click as the screw pops out of the socket, as the screws are spring loaded.

    • On the 2009 models the CPU will come up with the heat sink, In this case skip step 5

    Some models will have all Torx bolts (probably a T-15) or a mix of Torx and hex holding down the heatsink.

    John Verne -

  3. vbl31X4A2UUeIAKx
    vbl31X4A2UUeIAKx
    qJCYSsqiRQ6mQCHr
    GNNbqBI15YLbycfy
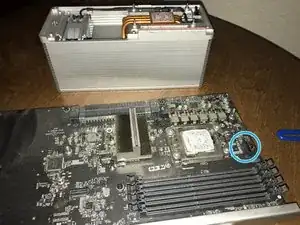
    • Take care to pull the heatsink up straight off the tray, as there is a fan connector to the right of the CPU and you will need to take care not to bend it.

    • The connector is seen in blue in the first picture.

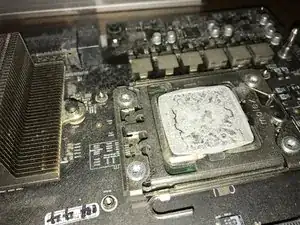
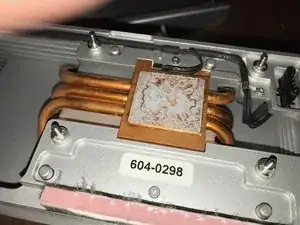
    • You will see the old thermal paste on both the CPU and the heatsink; we will remove the old paste before reassembling the tray.

    • This is also a great time to dust the tray if you have a can of compressed air. I was surprised just how much dust was present in my heatsink alone!

  4. QF2XpRYmFdE3ZZHD
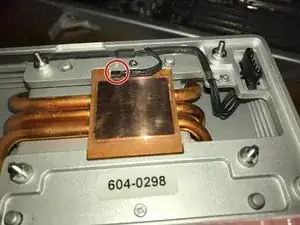
    • Using a lint free cloth (such as a coffee filter) and high percentage isopropyl alcohol, clean the bottom of the heatpad on the heat sink. It should have a bright sheen to it once you have finished.

    • Take care not to bump the thermal sensor (shown in red)

    • You can also clean the paste from the old processor if you are planning on keeping it- just be very careful not to damage the underside of the CPU where the contacts are.

  5. pYWwxgchCFQwwIcy
    pYWwxgchCFQwwIcy
    pnBMiOpVOOCyRfFk
    hAfYVFBOTDpJ3Zpy
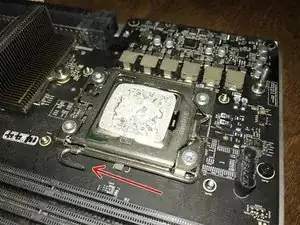
    • Carefully lift the arm on the side of the processor and lift it up to release the tray mechanism.

    • Remove the old processor carefully by the edges (I had on a pair of latex gloves just as an extra precaution)

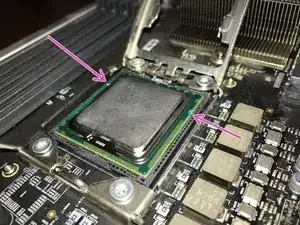
    • Replace the new processor, taking care to line up the notches, which should go towards the hinge on the CPU cover. The pink arrows in the second image show the placement of the notches.

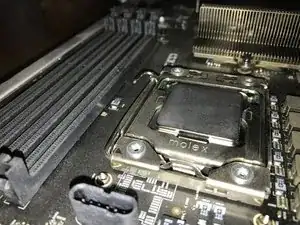
    • Carefully lower the cover and replace the arm. You will feel a bit of spring tension, but it should come down with relative ease.

  6. mCGALXjCDgVmsJ25
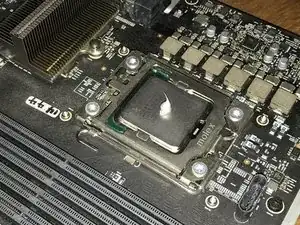
    • You'll need to re-apply thermal paste to the new processor. There are many schools of thought on the best way to do this, but I prefer to place a pea-sized dot in the middle of the CPU and let the heatsink spread it out for me.

  7. lOiDcNJTog2OkULr
    • Carefully replace the heatsink on top of the processor, taking care to ensure the fan connector is properly connected.

    • Begin to screw down the bolts again. You'll want to tighten in the same back and forth pattern to apply equal pressure across the processor.

    • DO NOT OVERTIGHTEN! It is very important to pay attention to the torque on the screws. Once a screw no longer wants to tighten with ease, back off.

  8. dQPKFiasRSXyiDC2
    • Replace the RAM and make sure to seat each stick firmly in its slot

  9. SElcHMQxfBJXaSWM
    • Replace the tray into your Mac Pro and fire it up! If you've done everything correctly, you should see your new processor listed in the About this Mac window.

    • If you experience high RPM fans, use a tool like iStat Menus to check the thermal temperatures and sensors. You may need to reset the PRAM or reseat the heatsink. I had no issues booting with mine, but your milage may vary.

Josh Calvetti

Member since: 04/12/09

8790 Reputation

18 comments

Mar 31, 2018

Maybe you can help. I did this upgrade on MacPro 4, 1-Did the firmware upgrade to 5,1. Complete the hardware install as listed above with 3.33 ghz processor. Started it up and only one of the Ram in working. Red LEDS on next to the back 3 ram slots. Switched around the Ram (although they are all the same for both the 4,1 & 5,1 models) to no avail. So I have only the #1 Ram slot working. Did the Pram reset a number of times. Did I screw up the board plane? Is that possible? I was extremely careful. Any thoughts on this would be appreciated.

Paolo Alberto -

Does it still boot to macOS like normal, minus those three slots? Which CPU did you upgrade it to? I would ask in the Answers forum, as you’ll likely get more responses there.

Josh Calvetti -

I have mac pro 2009, Mac 4.1 but i install properties - system i see processes intel xeon E5520 2.27GHz. I want upgrade cpu and buy intel xeon x5680 update but not working after I upgrade firmware Mac become 5.1 “ i see in mac os”

let me know what CPU i can upgrade?

Tuan -

I just put an X5690 (6x3.46GHz) in my single-processor 2009 Mac Pro after updating the firmware. It was super easy and everything seems to be working great. Just wanted to say thanks for this helpful guide!

tclash -

Hi, I’m trying to do the same thing but after I put everything back up and turn it on, the mac chimes, then shows the apple logo and the loading bar, which only goes up halfway before restarting, in a loop. Did you have by chance similar symptoms?

Steve -
I stick to the Hansen stand up racks for regular sockets and all specialties are single rail / racks / trays that match that set. Mostly the mechanics time saver plastic one with the magnetic bottom strip (now called Magna Caddy). The latest few specialty sets from SO came in nice magnetic trays, which are nice and the magnet is strong, but the base is wide / eats up floor space in the drawer.I did recently pick up one those SO locking / slider type trays with all 3 drive sizes, but haven't been able to organize it to be usable. Having all 3 sizes, but only so many in each row, is either too little of this or too much of that - might be better if the whole tray where one drive size....but maybe just too much hassle.....

montecristo999 -

WOW! Are there instructions like this for a 2006 Mac Pro 1,1 anywhere??

Jeremy Williamson -

Thanks for the post!! I just upgraded my Mac Pro 2009 ( a.k.a MacPro4,1) with X5680.

The most incredible $40 upgrade to a computer ever. 12 Threads and now Docker runs with VT-x unrestricted mode.

With NVMe ssd that kicks at 1300MB/s, god knows how many more years of service life this beast has.

However, for the benefit of whomever left to try adding to this 10 years old machine,

may I point out that the screws are DEFINITELY NOT 3mm HEX like everyone says.

It is “Torx T15”.

You may get lucky but if you are unlucky like me, you’ll be left with ONE SCREW stuck in there you can’t turn with 3mm hex.

HAVE T15 ready before you start.

Also, DON’T USE anything with such big handle like the original poster. User something with shorter spin handle to avoid accidentally over tightening it.

Thanks. I’ll be enjoying this Mac Pro that was literary destined for a dustbin once in our office, for years to come.

Taiyo Nakashima -

I had the same memory problem. I removed all the sticks. Blew compressed air in the slots. Some dust bunnies somehow got in even though I was careful in my original memory stick install. Rebooted and all memory registered. Bottom line is even a little dust in the memory slot can prevent all of them from registering. Also recommend cleaning all contact points of the memory sticks with denatured alcohol and cotton swab. Make sure you are and remain grounded whenever working with memory. VERY important.

Samantha -

Can anyone confirm if it is 3mm Hex or Torx T15? It is very important as I’m considering doing the upgrade. Thank you in advance!

Ming Yeung Cheung -

I think it must depend — I mine today and it was in fact a 3mm hex but based on some of the emphatic comments above, I suspect Apple changed at some point. If you simply shut the computer down and remove the CPU/Memory daughter card, you should be able to shine a light in the side of the heatsink and see the screw head.

thomaswillson -

Fantastic set of instructions, very clear showing all possible problems and how to avoid them. Worked a treat. Only difference for me was the number of rotations when unscrewing and reattaching the heat sink. I was counting full rotations of the Allen key and it was nine on my Mac Pro 4,1. But like this guide says, when you feel the resistance on the screw when tightening……stop! Many thanks.

humstrumbangtwang -

PART ONE

Following these instructions I flashed my 2009 Mac Pro 4,1 - 2.66 Quad-core core to 5,1 - then swapped the CPU to a 3.46 6 core.SUCCESS!

Before attempting the CPU replacement read up on static electricity discharge - I simply grounded myself by touching the computer’s metal case several times during the installation with the computer plugged into a socket BUT with the power OFF!

Before removing the heatsink I made a diagram of the screw pattern : 0 (single extreme LHS); 1 (Upper LHS); 2 (Upper RHS); 3(Lower LHS) and

4 (Lower RHS) so I would not forget how many turns and in the correct sequence being 0, 1, 4, 2, 3.

In my case sequence One was 5 turns each, then Sequence Two was around 4 turns.(Nine turns in all per screw.)

The screws have a small ‘give’ when finally undone.

Matt_T_B -

PART TWO

The heatsink lifted off easily - I was suprised how light it felt (looks heavier).

First clean the heatsink’s thermal plate as directed but do the CPU swap out as quickly as you can to prevent socket contamination.

Gently reseat the heatsink and repeat in reverse the sequence of the tightening of the screws to a soft hand tighten.

Leave the side cover off and boot up your MacPro - keep an eye out for continual flashing red LED’s on the LHS of the heatsink’ board

- an indication of thermal overload. No LED’s flashing means a successful installation.

Matt_T_B -

Just upgraded my Mac Pro 2012 3.2 GHz, four cores to a 3.46 GHz, six cores. Very good improvement: Geekbench 5 average score went from 2255 to 3316, with better results in every single performance. It even runs cooler than the original one: maybe the new thermal paste helps.

Couldn’t be happier, thanks for the guide :-)

rubecube -

I have a 2009 Mac Pro flashed to 5,1. I upgraded my single W3250 with a X5690 off of ebay. The issue that came up is this: on powering on it chimes, shows the apple logo loading screen, goes up about halfway the progress bar and then restarts. I already reseated CPU and RAM (tried both a set of 24 GB @1333 and the original 6 GB 1066 ecc), reset the NVRAM (multiple times), tried with both the original Radeon HD4870 and my Radeon rx560, tried recovery mode and booting from a Catalina installer, then downgraded to Mojave and tried with that installer; i also tried removing the hdd, ssd, and expansion cards, leaving in only the absolute necessary fot it to boot at least in recovery mode. It shouldn't be a compatibility problem, right? The machine worked perfectly before. It could really be a faulty processor at this point, but it seems weird to me judging by the symptoms.

Steve -

Have come to this late in the day, but notice that for an early 2009 cMP the machine featured already has lidded CPUs installed. Early 2009 models were 4,1s which had custom Apple-specific de-lidded CPUs factory installed. Replacing original de-lidded CPUs with lidded x56xx CPUs (like the ones shown here) requires important modifications, otherwise trouble will ensue. So please take care to identify properly before proceeding. Firmware upgrading a 4,1 to a 5,1 does not get around this. More info here: https://everymac.com/systems/apple/mac_p...

David Gordon -

this is a good point- it's been a while since I looked at the details, but from what I remember it was only the dual processor 2009 models that had the delidded CPUs. The single processor was just a normal Xeon, and I believe the 2010/2012 model used standard Xeons as well. But yes, that's a good point for the dual models.

Josh Calvetti -