Taylor Hobson
Taylor Hobson is an English company founded in 1886 and located in Leicester, England. Originally a manufacturer of still camera and cine lenses, the company now manufactures precision metrology instruments—in particular, profilometers for the analysis of surface textures and forms.
Taylor Hobson is now part of Ametek's Ultra Precision Technologies Group.[1]
History
Early history of the company
- 1886 – Company founded by Thomas Smithies Taylor, an optician, and his brother Herbert William Taylor, an engineer, to make lenses.[2] The company was initially based in Slate Street but subsequently moved to Stoughton Street Works in Leicester.
- 1887 – W.S.H Hobson joins the company as the sales face of Taylor, Taylor & Hobson ("TTH").
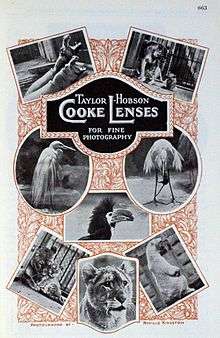
- 1893 – The company produces its first Cooke lens. The name Cooke came to TTH after an agreement with Cooke of York, who licensed some of their designs to TTH.
- 1902 – A third brother, J. Ronald Taylor opens a branch in New York, with the principal customer being the Eastman Kodak Company.
- 1914 – The company is reported as manufacturers of "Photographic Lenses and other Optical Goods, Engraving Machinery and other Fine Tools, Golf Ball Moulds", and "Timerecording Clocks".[3]

- 1914–1918 – The Aviar lenses, developed for aerial photography, contributed to the Allied air force in World War I.[4] The company designed and manufactured machines for the accurate polishing of lenses, making it possible to produce large numbers of such lenses for binoculars. William Taylor devised new methods of lens manufacture for aerial photography and produced lenses for range finders, gun sights, rifle bores, and telescopes.[5]
- 1919 – William Taylor was awarded an OBE. The King visited the Stoughton Street Works on 10 June 1919.[6]
- 1932 – TTH produced the first Cooke zoom lens for cinematography. William Taylor was nominated as President of the Institute of Mechanical Engineers.
- 1936 – William Taylor was nominated as Honorary Life Member of the Institute of Mechanical Engineers.
- 1937 – William Taylor died.
- 1938 – Thomas Smithies Taylor resigned as director.
- 1939 – Taylor Hobson supplied over 80% of the world's lenses for film studios.
How surface texture analysis was invented

William Taylor was convinced that to be a leader in optical lenses, he needed to have the best understanding and control of the surface quality of his lenses. As a result, he started to design instruments capable of helping him evaluate surface texture and roundness. After other manufacturers in various domains became aware of this, they requested to purchase these instruments. He refused, as the invented instruments were crucial to Taylor Hobson's optical lenses supremacy. After the company decided to market the instruments, Taylor Hobson became the major instrument manufacturer.
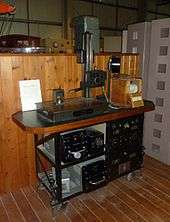
- 1941 – Taylor Hobson creates the first true surface texture measuring instrument, the Talysurf 1 opening the way to surface finish analysis.
- 1946 – Taylor Hobson becomes part of the Rank Organisation.
- 1949 – Taylor Hobson invents the world's first roundness measuring instrument, the Talyrond 1.
Surface texture analysis becomes industrial matter
- 1951 – Taylor Hobson invents a micro-alignment telescope.
- 1965 – Taylor Hobson introduces the Surtronic range, a hand held roughness meter that is easier to use on the shop floor, thanks to a skid pick-up. The skid pick-up loses the large waves of the surface texture (waviness and form) as the skid follows the general form of the surface, but has the major advantage of allowing the easy assessment of roughness without requiring spending time levelling a datum line to set the sensor in range.
- 1966 – Taylor Hobson introduced the TalyStep, that has been a reference during about two decades for the ultra-precise, low contact force measurement of step height with applications in the then raising semiconductor industry.
- 1969 – Taylor Hobson acquired the optical company Hilger and Watts.
- 1984 – Taylor Hobson introduces the Form Talysurf, that associates a range of several millimetres to a nanometric resolution, opening the way of measuring both roughness and form at the same time.
- 1992 – Taylor Hobson receives the Queen's award for technological achievement from the hands of Lord Lieutenant of Leicestershire during an official ceremony.
- 1995 – The TalyScan looking like a computer mouse (not to be confused with the TalyScan 150 and 250 introduced later, of a more classical design using slides to move the component and a fix sensor) introduced an original small 3D texture, and contact scanner.
- 1996 – The Form TalySurf PGI introduced sub-nanometer accuracy using a phase grating interferometer as the height sensor principle as an alternative to inductive pick-ups, but still on a contact pick-up touching the surface, and hence independent of the optical properties of the measured surface (as demonstrates the company's early history, this surface can for instance be an optical lens).
- 1996 – Schroeder Ventures acquired Taylor Hobson from the Rank Organisation.
- 1996 – Taylor Hobson is the first metrology manufacturer to adopt the Mountains software technology from Digital Surf that associates a desk top publishing tool to metrology results issued by instruments. The collaboration allowed Taylor Hobson to introduce the TalyMap 3D surface texture analysis software as an option to the TalySurf profilers and the TalyProfile 2D surface texture analysis software as an option to the Surtronic roughness testers.
- 1998 – The historical activity of the company, Cooke lenses, leave Taylor Hobson as part of a buy out that creates the company Cooke Optics.[7]
- 2003 – Taylor Hobson introduces their first optical field profiler (i.e. based on a microscope), the TalySurf CCI as a complement to their existing scanning 3D profilometers based on styli or non-contact single-point sensors.
- 2004 – Taylor Hobson became part of Ametek's ultra precision technologies group.
- 2007 – The TalyRond 395, a fully automated roundness and cylindricity instrument, introduced a new trend of automated, multiple measurements (such as surface texture and roundness) on the same instrument.
- 2008 – Talysurf CCI Lite launched, Ultra Precision Benchtop 3D Optical Profiler Talyrond 290 with motorised gauge arm.
- 2009 – Talymaster launched. IT is a brand new inspection concept combining roughness, roundness and contour on a fully automated inspection system.
- 2010 – CCI MP, CCI HD launched.
- 2011 – Surtronic R50-R80, Surtronic R100 series launched. A range of roundness products robust enough for the shop floor but accurate enough for any inspection room.
References
- The Taylor Hobson Story on Taylor Hobson official website Archived 12 October 2013 at the Wayback Machine
- Astronomy in Leicester, Cooke Lenses – Taylor, Taylor and Hobson
- http://www.gracesguide.co.uk/1914_Who's_Who_in_Business:_Company_T
- Cooke Optics 1890s history on the Company's web site
- http://www.imeche.org/about-us/imeche-engineering-history/presidents
- Jess Jenkins, 'Taylor, Taylor and Hobson Ltd. – Leicester's contribution to precision engineering', http://www.members.westnet.com.au/banbury/myfamily/MyFamilySS2Eng-o/p23.htm#i428
- Cooke Optics 2000s history on the Company's web site