Battle of Rorke's Drift
The Battle of Rorke's Drift, also known as the Defence of Rorke's Drift, was an engagement in the Anglo-Zulu War. The successful British defence of the mission station of Rorke's Drift, under the command of Lieutenants John Chard of the Royal Engineers and Gonville Bromhead, began when a large contingent of Zulu warriors broke off from their main force during the final hour of the British defeat at the day-long Battle of Isandlwana on 22 January 1879, diverting 6 miles (9.7 km) to attack Rorke's Drift later that day and continuing into the following day.
| Battle of Rorke's Drift | |||||||
|---|---|---|---|---|---|---|---|
| Part of the Anglo-Zulu War | |||||||
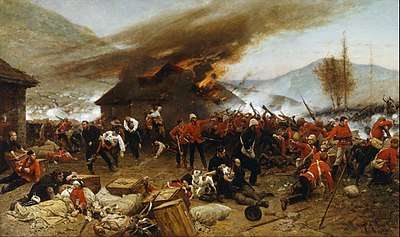 The Defence of Rorke's Drift, by Alphonse de Neuville (1880) | |||||||
| |||||||
| Belligerents | |||||||
|
| Zulu Kingdom | ||||||
| Commanders and leaders | |||||||
| Prince Dabulamanzi kaMpande | ||||||
| Strength | |||||||
|
3,000–4,000 Zulus:[4]
| ||||||
| Casualties and losses | |||||||
|
351 confirmed killed[7] about 500 wounded[8] | ||||||
Just over 150 British and colonial troops defended the station against attacks by 3,000 to 4,000 Zulu warriors. The massive but piecemeal attacks by the Zulu on Rorke's Drift came very close to defeating the much smaller garrison, but were consistently repelled.[9] Eleven Victoria Crosses were awarded to the defenders, along with a number of other decorations and honours.
Prelude
Rorke's Drift, known as kwaJimu[10] ("Jim's Land") in the Zulu language, was a mission station and the former trading post of James Rorke, an Irish merchant. It was located near a drift, or ford, on the Buffalo (Mzinyathi) River, which at the time formed the border between the British colony of Natal and the Zulu Kingdom. On 9 January 1879, the British No. 3 (Centre) Column, under Lord Chelmsford, arrived and encamped at the drift.
On 11 January, the day after the British ultimatum to the Zulus expired, the column crossed the river and encamped on the Zulu bank. A small force consisting of B Company, 2nd Battalion, 24th (2nd Warwickshire) Regiment of Foot (2nd/24th) under Lieutenant Gonville Bromhead was detailed to garrison the post, which had been turned into a supply depot and hospital under the overall command of Brevet Major Henry Spalding, 104th Foot, a member of Chelmsford's staff.
On 20 January, after reconnaissance patrolling and building of a track for its wagons, Chelmsford's column marched to Isandlwana, approximately 6 miles (9.7 km) to the east, leaving behind the small garrison. A large company of the 2nd/3rd Natal Native Contingent (NNC) under Captain William Stevenson was ordered to remain at the post to strengthen the garrison.[11] This company numbered between 100 and 350 men.[12]
Captain Thomas Rainforth's G Company of the 1st/24th Foot was ordered to move up from its station at Helpmekaar, 10 miles (16 km) to the southeast, after its own relief arrived, to further reinforce the position.[13] Later that evening a portion of the No. 2 Column under Brevet Colonel Anthony Durnford, late of the Royal Engineers, arrived at the drift and camped on the Zulu bank, where it remained through the next day.

Late on the evening of 21 January, Durnford was ordered to Isandlwana, as was a small detachment of No. 5 Field Company, Royal Engineers, commanded by Lieutenant John Chard, which had arrived on the 19th to repair the pontoons that bridged the Buffalo. Chard rode ahead of his detachment to Isandlwana on the morning of 22 January to clarify his orders, but was sent back to Rorke's Drift with only his wagon and its driver to construct defensive positions for the expected reinforcement company, passing Durnford's column en route in the opposite direction.
Sometime around noon on the 22nd, Major Spalding left the station for Helpmekaar to ascertain the whereabouts of Rainforth's G Company, which was now overdue. He left Chard in temporary command. Chard rode down to the drift itself where the engineers' camp was located. Soon thereafter, two survivors from Isandlwana – Lieutenant Gert Adendorff of the 1st/3rd NNC and a trooper from the Natal Carbineers – arrived bearing the news of the defeat and that a part of the Zulu impi was approaching the station.
Upon hearing this news, Chard, Bromhead, and another of the station's officers, Acting Assistant Commissary James Dalton (of the Commissariat and Transport Department), held a quick meeting to decide the best course of action – whether to attempt a retreat to Helpmekaar or to defend their current position. Dalton pointed out that a small column, travelling in open country and burdened with carts full of hospital patients, would be easily overtaken and defeated by a numerically superior Zulu force, and so it was soon agreed that the only acceptable course was to remain and fight.[14]
Defensive preparations
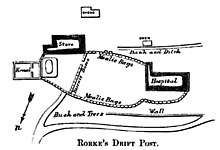
Once the British officers decided to stay, Chard and Bromhead directed their men to make preparations to defend the station. With the garrison's some 400 men[15] working quickly, a defensive perimeter was constructed out of mealie bags. This perimeter incorporated the storehouse, the hospital, and a stout stone kraal. The buildings were fortified, with loopholes (firing holes) knocked through the external walls and the external doors barricaded with furniture.
At about 3:30 pm, a mixed troop of about 100 Natal Native Horse (NNH) under Lieutenant Alfred Henderson arrived at the station after having retreated in good order from Isandlwana. They volunteered to picket the far side of the Oscarberg (Shiyane), the large hill that overlooked the station and from behind which the Zulus were expected to approach.[16]
With the defences nearing completion and battle approaching, Chard had several hundred men available to him: Bromhead's B Company, Stevenson's large NNC company, Henderson's NNH troop, and various others (most of them hospital patients, but 'walking wounded') drawn from various British and colonial units. Adendorff also stayed, while the trooper who had ridden in with him galloped on to warn the garrison at Helpmekaar.[17]
The force was sufficient, in Chard's estimation, to fend off the Zulus. Chard posted the British soldiers around the perimeter, adding some of the more able patients, the 'casuals' and civilians, and those of the NNC who possessed firearms along the barricade. The rest of the NNC, armed only with spears, were posted outside the mealie bag and biscuit box barricade within the stone-walled cattle kraal.[17]
The approaching Zulu force was vastly larger; the uDloko, uThulwana, inDlondo amabutho (regiments) of married men aged in their 30s and 40s and the inDlu-yengwe ibutho of young unmarried men mustered 3,000 to 4,000 warriors, none of them engaged during the battle at Isandlwana.[18] This Zulu force was the 'loins' or reserve of the army at Isandlwana and is often referred to as the Undi Corps. It was directed to swing wide of the British left flank and pass west and south of Isandlwana hill itself, in order to position itself across the line of communication and retreat of the British and their colonial allies in order to prevent their escape back into Natal by way of the Buffalo River ford leading to Rorke's Drift.
By the time the Undi Corps reached Rorke's Drift at 4:30 pm, they had fast-marched some 20 miles (32 km) from the morning encampment they had left at around 8 am, and they would spend almost the next eleven and a half hours continuously storming the British fortifications at Rorke's Drift.
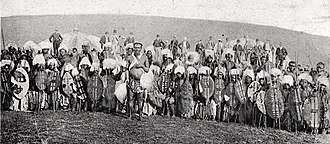
Most Zulu warriors were armed with an assegai (short spear) and a shield made of cowhide.[19] The Zulu army drilled in the personal and tactical use and coordination of this weapon. Some Zulus also had old muskets and antiquated rifles, though their marksmanship training was poor, and the quality and supply of powder and shot was almost non-existent.[20]
The Zulu attitude towards firearms was that: "The generality of Zulu warriors, however, would not have firearms – the arms of a coward, as they said, for they enable the poltroon to kill the brave without awaiting his attack."[21] Even though their fire was not accurate, it was responsible for five of the seventeen British deaths at Rorke's Drift.[22][23]
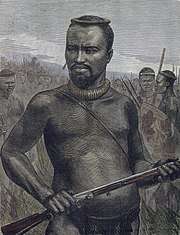
While the Undi Corps had been led by inkhosi kaMapitha at the Isandlwana battle, the command of the Undi Corps passed to Prince Dabulamanzi kaMpande (half-brother of Cetshwayo kaMpande, the Zulu king) when kaMapitha was wounded during the pursuit of British fugitives from Isandlwana. Prince Dabulamanzi was considered rash and aggressive, and this characterisation was borne out by his violation of King Cetshwayo's order to act only in defence of Zululand against the invading British soldiers and not carry the war over the border into enemy territory.[24] The Rorke's Drift attack was an unplanned raid rather than any organised counter-invasion, with many of the Undi Corps Zulus breaking off to raid other African kraals and homesteads while the main body advanced on Rorke's Drift.
At about 4:00 pm, Surgeon James Reynolds, Otto Witt – the Swedish missionary who ran the mission at Rorke's Drift – and army chaplain Reverend George Smith came down from the Oscarberg hillside with the news that a body of Zulus was fording the river to the southeast and was "no more than five minutes away". At this point, Witt decided to depart the station, as his family lived in an isolated farmhouse about 30 kilometres (19 mi) away, and he wanted to be with them. Witt's native servant, Umkwelnantaba, left with him; so too did one of the hospital patients, Lieutenant Thomas Purvis of the 1st/3rd NNC.
Battle
At about 4:20 pm, the battle began with Lieutenant Henderson's NNH troopers, stationed behind the Oscarberg, briefly engaging the vanguard of the main Zulu force.[26] However, tired from the battle at Isandlwana and retreat to Rorke's Drift as well as being short of carbine ammunition, Henderson's men departed for Helpmekaar. Henderson himself reported to Lieutenant Chard the enemy were close and that "his men would not obey his orders but were going off to Helpmekaar".[17]
Henderson then followed his departing men. Upon witnessing the withdrawal of Henderson's NNH troop, Captain Stevenson's NNC company abandoned the cattle kraal and fled, greatly reducing the strength of the defending garrison.[27] Outraged that Stevenson and some of his colonial NCOs[28] also fled from the barricades, a few British soldiers fired after them, killing Corporal William Anderson.
With the Zulus nearly at the station, the garrison now numbered between 154 and 156 men.[29] Of these, only Bromhead's company could be considered a cohesive unit. Additionally, up to 39 of his company were at the station as hospital patients, although only a handful of these were unable to take up arms.[30] With fewer men, Chard realised the need to modify the defences, and gave orders that biscuit boxes be used to construct a wall through the middle of the post in order to make possible the abandonment of the hospital side of the station if the need arose.[25]
At 4:30 pm, the Zulus rounded the Oscarberg and approached the south wall. Private Frederick Hitch, posted as lookout atop the storehouse, reported a large column of Zulus approaching. The Zulu vanguard, 600 men of the iNdluyengwe, attacked the south wall, which joined the hospital and the storehouse. The British opened fire when the Zulus were 500 yards (460 m) away.
The majority of the attacking Zulu force swept around to attack the north wall, while a few took cover and were either pinned down by continuing British fire or retreated to the terraces of Oscarberg. There they began a harassing fire of their own. As this occurred, another Zulu force swept on to the hospital and northwestern wall.
Those British on the barricades — including Dalton and Bromhead — were soon engaged in fierce hand-to-hand fighting. The British wall was too high for the Zulus to scale, so they resorted to crouching under the wall, trying to get hold of the defenders' Martini–Henry rifles, slashing at British soldiers with assegais or firing their weapons through the wall. At places, they clambered over each other's bodies to drive the British off the walls but were driven back.
Zulu fire, both from those under the wall and around the Oscarberg, inflicted a few casualties, and five of the seventeen defenders who were killed or mortally wounded in the action were struck while at the north wall.
Defence of the hospital
Chard realised that the north wall, under near constant Zulu attack, could not be held. At 6:00 pm, he pulled his men back into the yard, abandoning the front two rooms of the hospital in the process. The hospital was becoming untenable; as the loopholes had become a liability: rifles poking out were grabbed at by the Zulus, yet if the holes were left empty, the Zulu warriors stuck their own weapons through in order to fire into the rooms. Among the soldiers assigned to the hospital were Corporal William Wilson Allen and Privates Cole, Dunbar, Hitch, Horrigan, John Williams, Joseph Williams, Alfred Henry Hook, Robert Jones, and William Jones.
Privates Horrigan, John Williams, Joseph Williams and other patients tried to hold the hospital entrance with rifles and fixed bayonets. Joseph Williams defended a small window, and 14 dead Zulus were later found beneath that window. As it became clear the front of the building was being taken over by Zulus, John Williams began to hack a way of escape through the wall dividing the central room and a corner room in the back of the hospital. As he made a passable breach, the door into the central room came under furious attack from the Zulus, and he only had time to drag two bedridden patients out before the door gave way.
The corner room that John Williams had pulled the two patients into was occupied by Private Hook and another nine patients. John Williams hacked at the wall to the next room with his pick-axe, as Hook held off the Zulus. A firefight erupted as the Zulus fired through the door and Hook returned fire – but not without an assegai striking his helmet and stunning him.[31]
Williams made the hole big enough to get into the next room, which was occupied only by patient Private Waters, and dragged the patients through. The last man out was Hook, who killed some Zulus who had knocked down the door before he dived through the hole. John Williams once again went to work, spurred on by the fact that the roof was now ablaze, as Hook defended the hole and Waters continued to fire through a loophole.
After fifty minutes, the hole was large enough to drag the patients through, and the men– save Privates Waters and Beckett, who hid in the wardrobe (Waters was wounded and Beckett died of assegai wounds)– were now in the last room, being defended by Privates Robert Jones and William Jones. From here, the patients clambered out through a window and then made their way across the yard to the barricade.
Of the eleven patients, nine survived the trip to the barricade, as did all the able-bodied men. According to James Henry Reynolds, only four defenders were killed in the hospital: one was a member of the Natal Native Contingent with a broken leg; Sergeant Maxfield and Private Jenkins, who were ill with fever and refused to be moved were also killed. Reportedly, Jenkins was killed after being seized and stabbed, together with Private Adams who also refused to move. Private Cole, assigned to the hospital, was killed when he ran outside. Another hospital patient killed was Trooper Hunter of the Natal Mounted Police.[32] Among the hospital patients who escaped were a Corporal Mayer of the NNC; Bombardier Lewis of the Royal Artillery, and Trooper Green of the Natal Mounted Police, who was wounded in the thigh by a spent bullet. Private Conley with a broken leg was pulled to safety by Hook, although Conley's leg was broken again in the process.[33]
Cattle kraal and bastion
The evacuation of the burning hospital completed the shortening of the perimeter. As night fell, the Zulu attacks grew stronger. The cattle kraal came under renewed assault and was evacuated by 10:00 pm, leaving the remaining men in a small bastion around the storehouse. Throughout the night, the Zulus kept up a constant assault against the British positions; Zulu attacks only began to slacken after midnight, and they finally ended by 2:00 am, being replaced by a constant harassing fire from Zulu firearms until 4:00 am.
By that time, the garrison had suffered fourteen dead. Two others were mortally wounded and eight more – including Dalton – were seriously wounded. Almost every man had some kind of wound. They were all exhausted, having fought for the better part of ten hours and were running low on ammunition. Of 20,000 rounds in reserve at the mission, only 900 remained.[34]
Aftermath
As dawn broke, the British could see that the Zulus were gone; all that remained were the dead and severely wounded.[35] Patrols were dispatched to scout the battlefield, recover rifles, and look for survivors, many of whom were killed when found. At roughly 7:00 am, an Impi of Zulus suddenly appeared, and the British manned their positions again.
No attack materialised, however, as the Zulus had been on the move for six days prior to the battle and had not eaten properly for two. In their ranks were hundreds of wounded, and they were several days' march from any supplies. Soon after their appearance, the Zulus left the way they had come.
Around 8:00 am, another force appeared, and the defenders left their breakfast to man their positions again. However, the force turned out to be the vanguard of Lord Chelmsford's relief column.
Breakdown of British and colonial casualties:[36]
- 1st/24th Foot: 4 killed or mortally wounded in action; 2 wounded
- 2nd/24th Foot: 9 killed or mortally wounded in action; 9 wounded
- Commissariat and Transport Department: 1 killed in action; 1 wounded
- Natal Mounted Police: 1 killed in action; 1 wounded
- 1st/3rd NNC: 1 killed in action
- 2nd/3rd NNC: 1 killed;[37] 2 wounded
After the battle 351 Zulu bodies were counted, but it has been estimated that at least 500 wounded and captured Zulus might have been massacred as well.[35][38] Having witnessed the carnage at Isandlwana, the members of Chelmsford's relief force had no mercy for the captured, wounded Zulus they came across,[39] nor did the station's defenders. Trooper William James Clarke of the Natal Mounted Police described in his diary that "altogether we buried 375 Zulus and some wounded were thrown into the grave. Seeing the manner in which our wounded had been mutilated after being dragged from the hospital ... we were very bitter and did not spare wounded Zulus".[40] Laband, in his book The Zulu Response to the British Invasion of 1879, accepts the estimate of 600 that Shepstone had from the Zulus.[41]
Samuel Pitt, who served as a private in B Company during the battle, told The Western Mail in 1914 that the official enemy death toll was too low: "We reckon we had accounted for 875, but the books will tell you 400 or 500".[42][43][44] Lieutenant Horace Smith-Dorrien, a member of Chelmsford's staff, wrote that the day after the battle an improvised gallows was used "for hanging Zulus who were supposed to have behaved treacherously".[42]
Awards
Eleven Victoria Crosses were awarded to the defenders of Rorke's Drift, seven of them to soldiers of the 2nd/24th Foot – the most ever received for a single action by one regiment. (The most awarded in a day is sixteen for actions at the Battle of Inkerman, on 5 November 1854; in a single action, twenty-eight were awarded as a result of the Second Relief of Lucknow, 14–22 November 1857).[45] Four Distinguished Conduct Medals were also awarded.
This high number of awards for bravery has been interpreted as a reaction to the earlier defeat at the Battle of Isandlwana – the extolling of the victory at Rorke's Drift drawing the public's attention away from the great defeat at Isandlwana and the fact that Lord Chelmsford and Henry Bartle Frere had instigated the war without the approval of Her Majesty's Government.[46]
Certainly, Sir Garnet Wolseley, taking over as commander-in-chief from Lord Chelmsford later that year, was unimpressed with the awards made to the defenders of Rorke's Drift, saying "it is monstrous making heroes of those who, shut up in buildings at Rorke's Drift, could not bolt and fought like rats for their lives, which they could not otherwise save".
Several historians have challenged this assertion and pointed out that the victory stands on its own merits, regardless of other concerns. Victor Davis Hanson responded to it directly in Carnage and Culture (also published as Why the West Has Won), saying, "Modern critics suggest such lavishness in commendation was designed to assuage the disaster at Isandhlwana and to reassure a skeptical Victorian public that the fighting ability of the British soldier remained unquestioned. Maybe, maybe not, but in the long annals of military history, it is difficult to find anything quite like Rorke's Drift, where a beleaguered force, outnumbered forty to one, survived and killed twenty men for every defender lost".[47]
Victoria Cross[48]
- Lieutenant John Rouse Merriott Chard, 5th Field Coy, Royal Engineers
- Lieutenant Gonville Bromhead; B Coy, 24th (The 2nd Warwickshire) Regiment of Foot (2nd/24th Foot)
- Corporal William Wilson Allen; B Coy, 2nd/24th Foot
- Private Frederick Hitch; B Coy, 2nd/24th Foot
- Private Alfred Henry Hook; B Coy, 2nd/24th Foot
- Private Robert Jones; B Coy, 2nd/24th Foot
- Private William Jones; B Coy, 2nd/24th Foot
- Private John Williams; B Coy, 2nd/24th Foot
- Surgeon-Major James Henry Reynolds; Army Medical Department
- Acting Assistant Commissary James Langley Dalton; Commissariat and Transport Department
- Corporal Christian Ferdinand Schiess; 2nd/3rd Natal Native Contingent
In 1879 there was no provision for the posthumous granting of the Victoria Cross, and so it could not be awarded to anyone who had died in performing an act of bravery. Private Joseph Williams, B Coy, 2nd/24th Foot, was killed during the fight in the hospital and was mentioned in despatches that "had he lived he would have been recommended for the Victoria Cross".[49]
- John Chard VC, as a lieutenant-colonel
 Lieutenant Gonville Bromhead,VC
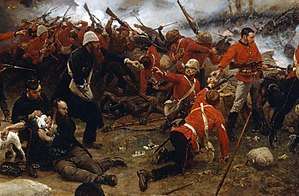 Corporal William Allen,VC [right foreground] handing cartridges to Lt Chard
 Private Frederick Hitch, VC
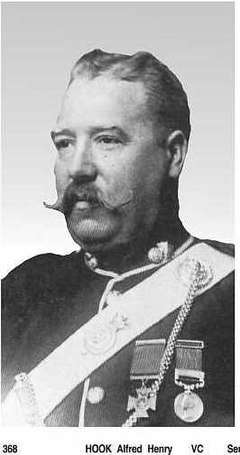 Private Henry Alfred Hook, VC
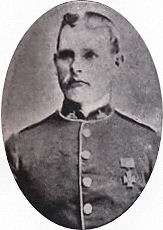 Private Robert Jones, VC
 Private William Jones, VC
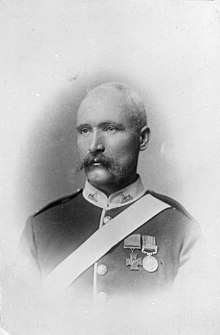 Private John Williams,VC
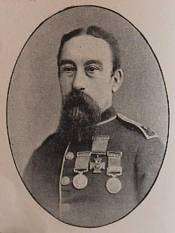
 Surgeon-Major James Henry Reynolds,VC
 Corporal Ferdinand Schiess, VC
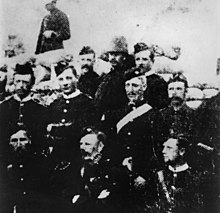 Picture taken about 1884 at site of Battle of Rorke's Drift alleged showing VC receipients including Bromhead and Reynolds. Man in rear wearing Foreign Service helmet is not Corporal Schiess but Alan Richard Hill V.C. [50]
Distinguished Conduct Medal:[51]
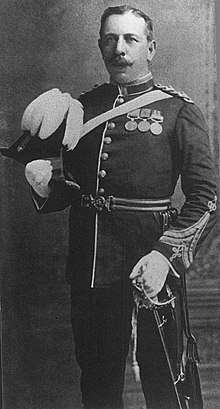
- Gunner John Cantwell; N Batt, 5th Brig Royal Horse Artillery (demoted from bombardier wheeler the day before the battle)
- Private John William Roy; 1st/24th Foot
- Colour Sergeant Frank Edward Bourne; B Coy, 2nd/24th Foot
- Second Corporal Francis Attwood; Army Service Corps
On 15 January 1880, a submission for a DCM was also made for Private Michael McMahon (Army Hospital Corps). The submission was cancelled on 29 January 1880 for absence without leave and theft.[51]
Depictions and dramatisations
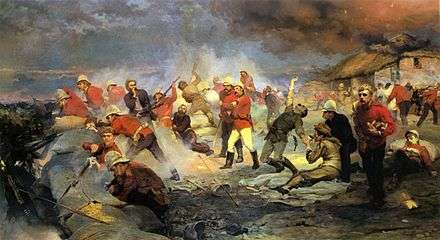
The events surrounding the assault on Rorke's Drift were first dramatised by military painters, notably Elizabeth Butler (in The Defence of Rorke's Drift (1880)) and Alphonse de Neuville (also titled The Defence of Rorke's Drift (1880)). Their work was vastly popular in their day among the citizens of the British empire.
H. Rider Haggard's true account, "The Tale of Isandhlwana and Rorke's Drift", published in Andrew Lang's True Story Book (1894), names many important figures but omits Surgeon Reynolds, who played a crucial role in the defence.[52]
In 1914, a touring English Northern Union rugby league team defeated Australia 14–6 to win the Ashes in the final test match. Depleted by injuries and fielding only ten men for much of the second half, the English outclassed and outfought the Australians in what quickly became known as the "Rorke's Drift Test".[53]
The Edison Company made a two-reel silent film titled Rorke's Drift (1914) starring Richard Tucker.
The film Zulu (1964), produced by Stanley Baker, portrays the Battle of Rorke's Drift.[54] The film received generally positive reviews from the critics. Some details of the film's account are, however, historically inaccurate (for example, in the movie the regiment is called the South Wales Borderers, but the unit was not in fact called that until two years after the battle, although the regiment had been based at Brecon in South Wales since 1873).[55] While most of the men of the 1st Battalion, 24th Regiment of Foot (1/24) were recruited from the industrial towns and agricultural classes of England, principally from Birmingham and adjacent southwest counties, only 10 soldiers of the 1/24 that fought in the battle were Welsh. Many of the soldiers of the junior battalion, the 2/24, were Welshmen.[56] Of the 122 soldiers of the 24th Regiment present at the Battle of Rorke's Drift, 49 are known to have been of English nationality, 32 were Welsh, 16 were Irish, one was a Scot, and three were born overseas. The nationalities of the remaining 21 are unknown.[57]
The battle of Rorke's Drift was given a chapter in military historian Victor Davis Hanson's book Carnage and Culture (2002), as it is one of several landmark battles demonstrating the superior effectiveness of Western military practices.[58]
Notes
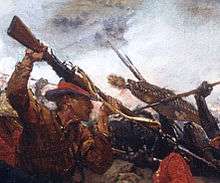
- Lieutenants John Chard and Gonville Bromhead (centre) commanding, behind them Padre George Smith hands out ammunition, Private Frederick Hitch (right, standing) handing out ammunition while wounded; Surgeon James Henry Reynolds and Storekeeper Byrne tending to the wounded Corporal Scammell (Reynolds kneeling; Byrne falling, shot). Possibly Corporal Ferdinand Schiess at centre background at the barricade, left of Chard and Bromhead, face not shown.
References
- Knight, Ian. Zulu: Isandlwana and Rorke's Drift, 1992, pp. 107–108.
- Holme, Norman. The Noble 24th, Savannah Publications, ISBN 1-902366-04-2, 1999, p. 265–369, 383.
- Whybra 2004, pp. 68–69.
- Estimates vary: Colenso 1880, p. 305, gives 3,000; Knight 2003, p. 37, gives "in excess of 3,000"; Lock and Quantrill 2005, pp. 231–232 gives 3,000, p. 231; Morris 1998 gives over 4,000.
- Knight 1996, p. 23.
- Porter 1889, p.33, "17 killed and 10 wounded" (including one killed by 'friendly fire' while fleeing the garrison at start of the battle)
- Colenso 1880, p. 305
- Lock and Quantrill 2005, excerpt from private journal of Lieutenant Colonel John North Crealock, Crealock states "351 dead were found and 500 wounded".
- Knight 2003, p. 37.
- Morris, p. 168.
- Knight 1996, p.23, "The post was guarded by one company of 2/24 ... and a company of the NNC ...".
- Estimates vary: Thompson 2006, p. 65, gives 100. Knight 1996, p. 27, gives 100 to 300. Knight, Ian. Greaves, Adrian, (ed.). Redcoats and Zulus, 2004, p. 116.
- "Map". Talana.co.za. Archived from the original on 17 March 2012. Retrieved 2012-11-09.
- Knight 1996, p. 25.
- Knight 1996, p. 28, "With 400 men to build them ..."
- Knight 1996, p.36.
- Morris 1998, p. 401
- Morris 1998, p. 370, "played no part in the battle"
- Archer, Christon I. World History of Warfare University of Nebraska Press, 2002, ISBN 0-8032-1941-5, p.462 "They had a national army of twenty-five thousand men equipped with cowhide shields, assegais and clubs." Lock and Quantrill 2005, p.62: John Shepstone, Acting Secretary for Native Affairs at the time, on the Zulu army – "Equipment: Each man carries his shield and assegais, and a kaross or blanket if he possesses one, he may also have a war dress of monkey skins or ox tails, this is all."
- Knight 1996, pp. 33, 38, 39.
- Bourquin, S. Military History Journal, V.4, No.4, The Zulu military organization and the challenge of 1879, South African Military History Society, ISSN 0026-4016, Dec. 1978.
- Bourquin, S. section 'War of 1879', subsection 'Weapons'
- Knight 1996, p. 38, "Although the Zulu position was a commanding one – a squad of good shots armed with efficient rifles could have made Chard's position untenable within minutes – the Zulus were neither good shots, nor well armed."
- Knight 2003, p. 33.
- Porter 1889, p. 31.
- Knight 1996, p.36, and on p.88 this is described by Knight as "the first shots of the battle".
- Morris, p. 402. Chadwick, G.A. . Military History Journal, V.4, No.4, The Anglo-Zulu War of 1879, Isandlwana and Rorke's Drift, South African Military History Society, ISSN 0026-4016, Jan. 1979. "This reduced the strength of the defenders drastically ..."
- Knight 1996, p.45, Corporal Scammell of the NNC is noted as remaining.
- Whybra (2004) gives the most up-to-date analysis of the numbers present at the Battle of Rorke's Drift. He counts 154 definite participants, with 2 others listed as "possibles".
- Whybra 2004, pp. 65–67.
- Private Henry Hook's account in The Royal Magazine 1905.
- Wood, M.J. (2009). Leaders and Battles: The Art of Military Leadership. Random House Digital, Inc. p. 138. ISBN 9780307537034.
- Clammer, David (1973). The Zulu War. David & Charles. p. 111. ISBN 0-7153-5672-0.
- Machanik, Major (Dr) Felix. Military History Journal, V.4, No.6, Firepower and Firearms in the Zulu War of 1879, South African Military History Society, ISSN 0026-4016, Dec. 1979.
- Private Henry Hook's account in The Royal Magazine 1905. Also Colenso 1880 and Crealocke in Lock and Quantrill 2005.
- Whybra 2004, pp. 62–64
- Also, as mentioned, one member of Stevenson's 2nd/3rd NNC, Corporal William Anderson, was killed by British fire while fleeing the station just prior to the arrival of the Zulus.
- Lock and Quantrill 2005, p. 232, "... it is possible that all the Zulu wounded were put to death.".
- Thompson 2006, p.69
- Lock and Quantrill 2005, pp. 231–232
- Laband 1992, p. 108.
- Lock and Quantrill 2005, p.232
- Smith, David. Rorke's Drift,The Guardian 21 April 2009, gives "about 400 Zulus" killed.
- Carroll, Rory. Legendary Battle of Anglo-Zulu War marred by brutal aftermath, The Guardian 29 April 2003
- "No. 24717". The London Gazette. 2 May 1879. pp. 3177–3178.
- Edward M. Spiers, The Scottish Soldier and Empire, 1854–1902, Edinburgh University Press, 2006, p. 41. ISBN 978-0-7486-2354-9 Also: Ian Knight, Zulu War, Osprey, 2004, p. 9, "By late 1878 Frere had manipulated a diplomatic crisis with the Zulus ..." Colenso 1880, pp. 261–262, "the terms ... are evidently such as he (Cetshwayo) may not improbably refuse, even at the risk of war ... to preclude you from incurring the delay ... involved in consulting Her Majesty's Government upon a subject of so much importance as the terms ..." Also: Ian Knight, Zulu War, Osprey, 2004, p. 11, "... an ultimatum with which, Frere knew, they could not possibly comply."
- Hanson, V. D. (2001). Why the West Has Won: Carnage and Culture from Salamis to Vietnam. London: Faber. p. 333. ISBN 9780571204175.
- Whybra 2004, pp. 71–72.
- Snook 2006, pp. 96–99.
- 1879 Zulu War.com
- Whybra 2004, p. 72.
- "The Defence Of Rorke's Drift". The British Medical Journal. 1 (1729): 373. 1894. JSTOR 20227493.
- Kearney, L. H. (16 March 1940). "40,000 Cheered When Wagstaff's 1914 Team Beat Australians With Eleven Men". Sunday Mail (Brisbane).
- David, Dr. Saul. Zulu: The True Story. British History in Depth. BBC. Retrieved 29 September 2011.
- "The Royal Regiment of Wales". Rrw.org.uk. Archived from the original on 23 March 2012. Retrieved 2012-11-09.
- Lock and Quantrill 2005, p.37
- Norman Holme (1999). The Noble 24th. p. 383.
- Hanson, Victor Davis (2002). Carnage and Culture. Anchor. p. 279 et seq. ISBN 0-385-72038-6.
Bibliography
- Colenso, F.E. History of the Zulu War and Its Origin, London, 1880.
- Military Heritage discussed Rorke's Drift and the politics of the Victoria Cross (Roy Morris Jr., Military Heritage, August 2005, Volume 7, No. 1, p. 8).
- Greaves, Adrian, Rorke's Drift, Cassell, London, 2002.
- Laband, John (1992). Kingdom in Crisis: The Zulu Response to the British Invasion of 1879. Manchester University Press. ISBN 0-7190-3582-1.
- Lock, Ron; Quantrill, Peter. Zulu Victory: The Epic of Isandlwana and the Cover-up. Greenhill Books. 2005, ISBN 1-85367-645-4.
- Morris, Donald R. The Washing of the Spears: A History of the Rise of the Zulu Nation under Shaka and Its Fall in the Zulu War of 1879 Da Capo Press, 1998, ISBN 0-306-80866-8.
- Knight, Ian, Rorke's Drift 1879, "Pinned Like Rats in a Hole"; Osprey Campaign Series #41, Osprey Publishing 1996, ISBN 1-85532-506-3.
- Knight, Ian, The Zulu War 1879, Osprey, 2003, ISBN 1-84176-612-7
- Porter, Whitworth (1889), "South African Wars, 1847–1885", History of the Corps of Royal Engineers, II, London: Longmans, Green, and Co, pp. 24–43, retrieved 14 August 2008
- Snook, Lt Col Mike, Like Wolves on the Fold: The Defence of Rorke's Drift. Greenhill Books, London, 2006. ISBN 1-85367-659-4.
- Thompson, Paul Singer. Black soldiers of the queen: the Natal native contingent in the Anglo-Zulu War, University of Alabama Press, 2006, ISBN 0-8173-5368-2.
- Whybra, Julian (2004). England's Sons : a casualty and survivors' roll of British combatants for the battle of ... Isandhlwana. One Slice Books Ltd. ISBN 978-1-908901-94-1.
External links
| Wikimedia Commons has media related to Battle of Rorke's Drift. |
