52nd Light Anti-Aircraft Brigade (United Kingdom)
52nd Light Anti-Aircraft Brigade was an air defence formation of Britain's Territorial Army (TA) during World War II. Formed on the outbreak of war to control static searchlight (S/L) sites in Scotland, it later operated as a headquarters (HQ) for mobile anti-aircraft (AA) gun units in the Allied invasion of North Africa (Operation Torch) and subsequent Italian Campaign.
| 52nd Light Anti-Aircraft Brigade 78 Anti-Aircraft Brigade | |
|---|---|
| Active | 26 September 1939–15 October 1944 1 January 1947–31 October 1955 |
| Country | |
| Branch | |
| Type | Anti-Aircraft Brigade |
| Role | Air Defence |
| Part of | 3 AA Division First Army Allied Force Headquarters 3 AA Group |
| Garrison/HQ | Stirling Perth |
| Engagements | The Blitz Operation Torch Italian Campaign |
Mobilisation
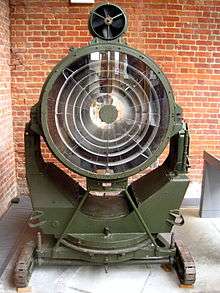
On 24 August 1939, ahead of the official declaration of war on 3 September, the TA units of Anti-Aircraft Command were fully mobilised at their war stations, with 3rd Anti-Aircraft Division covering Scotland.[1] 52nd Light Anti-Aircraft Brigade was formed at Stirling with responsibility for searchlight provision across 3 AA Division's sectors. Initially, it had the following composition:[2][3][4][5][6][7]
- 51st (Highland) Anti-Aircraft Battalion, Royal Engineers (RE) – formed 1938[8]
- HQ, 320 (Dundee) AA Company at Dundee
- 319 (City of Aberdeen) AA Company at Aberdeen
- 404 AA Company at Cowdenbeath
- 4th/5th Battalion, The Royal Scots (The Royal Regiment) (52nd Searchlight Regiment) – converted from infantry 1938 in central Edinburgh[9]
- HQ, 405, 406, 407 Companies
- 5th Battalion, The Cameronians (Scottish Rifles) (56th Searchlight Regiment) – converted from infantry 1938 at Bridgeton, Glasgow[10]
- HQ, 417, 418, 419 S/L Batteries
- 8th Battalion The Cameronians (Scottish Rifles) (57th Searchlight Regiment) – formed 1 November 1938 by duplication of above, based in south Glasgow[11]
- HQ, 420, 421, 422, 423 S/L Batteries
- 52nd AA Bde Company, Royal Army Service Corps (RASC)
On the outbreak of war, these regiments deployed 159 S/Ls;[6] by 6 June 1940 they had 297 90 cm S/Ls and four of the newer 150 cm model.[12]
On 1 August 1940 all the S/L units in AA Command, whether AA battalions of the RE or still forming part of their parent infantry regiments, were transferred to the Royal Artillery (RA). The units of 52 LAA Bde were therefore redesignated as follows:
Battle of Britain and Blitz
During the Phoney War period there were a number of attacks on the naval bases of Scotland before the Luftwaffe turned its attention to the campaigns in Norway and France and the Low Countries.[18]
Eastern Scotland largely escaped air attack during the Battle of Britain. In November 1940, at the height of The Blitz, a new 12 AA Division was formed to take over responsibility for western Scotland (including Glasgow and the Clyde) while 3 AA Division retained responsibility for eastern Scotland. The only effect of this on 52 LAA Bde was that 57th (Glasgow) S/L Rgt transferred to 12 AA Division.[19][20] When the Blitz ended in May 1941 the Edinburgh area had escaped relatively lightly,[21] though the nearby Rosyth Dockyard had been a target.
Mid-war
Other than new batteries being formed, the composition of the brigade did not change for the rest of the year:[22][23]
- 51st (Highland) S/L Rgt
- 319, 320, 404 Btys
- 52nd (Queen's Edinburgh) S/L Rgt
- 406, 407, 531 Btys
- 56th (Cameronians) S/L Rgt
- 417, 418, 419, 535 Btys
By early 1942, AA Command had more than enough S/L units, but was still seriously short of light anti-aircraft (LAA) gun units, and began a programme of converting S/L units (which also had the benefit of saving manpower):[24][25]
- 51 S/L Rgt – left and became 124 (Highland) LAA Regiment in February 1942[8][26]
- 52 S/L Rgt – became 130 (Queen's Edinburgh, Royal Scots) LAA Regiment in March 1942[9][27]
- 56 S/L Rgt – left January 1942 and became 125th (Cameronians) LAA Regiment in February[10][28]
Order of Battle 1942
As a result of these changes the brigade was no longer a S/L formation and now consisted mainly of LAA gun units with a few Heavy AA (HAA).[25]
- 147th HAA Rgt – newly formed February 1942[13]
- 317 HAA Bty – attached to School of Artillery; left July 1942
- 358 HAA Bty – joined July 1942
- 360 HAA Bty – joined from 114 HAA Rgt May 1942
- 403 HAA Bty – joined from 123rd HAA Rgt July 1942
- 417 HAA Bty – attached to 51 LAA Bde
- 437 HAA Bty – joined from 79th (Hertfordshire Yeomanry) HAA Rgt July 1942
- 19th LAA Rgt – from 36 (Scottish) AA Bde beginning of 1942; to 54th (East Anglian) Infantry Division March 1942[29]
- 60, 104, 290 LAA Btys
- 263 LAA Bty – to 67th LAA Rgt March 1942
- 67th LAA Rgt – from 51 LAA Bde early 1942; left June
- 200, 202 LAA Btys
- 263 LAA Bty (attached to 36 AA Bde)
- 279 LAA Bty (less one Troop)
- 130th (Queen's Edinburgh) LAA Rgt – see above
- 406, 407, 428 LAA Btys
- 135th LAA Rgt – newly formed February, joined April, to 36 AA Bde May 1942[13]
- 94, 445, 460, 478 LAA Btys
- 52 AA Bde Signal Office Mixed Sub-Section, Royal Corps of Signals (RCS) – part of No 2 Company, 3 AA Divisional Signals
('Mixed' indicates that women of the Auxiliary Territorial Service (ATS) were integrated into the unit.)
In August 1942 3 AA Divisional HQ moved south to join I AA Corps and assist in controlling the large number of AA units brought in to defend against Luftwaffe 'hit and run' attacks on the South Coast of England.[30] Simultaneously, 52 AA Bde HQ left AA Command and came under War Office Control. With its own RCS Signal Section and RASC transport company it mobilised for overseas service.[25][31]
Tunisian Campaign
52 AA Brigade was one of four AA brigade HQs assigned to First Army for the landings in North Africa (Operation Torch). 22 AA Brigade had units fully trained in amphibious operations and mobile warfare and would land in the assault phase of the operation, followed by 52 AA Bde. After covering the landing beaches, ports and airfields, the two brigades would then follow First Army's advance eastwards, leaving the other brigades to cover the bases in the rear. After sailing in convoy from the Clyde in late October, the invasion force began landing on 8 November, with V Corps of First Army landing round Algiers. After the initial landings were complete, V Corps sent a series of infantry and commando groups eastwards on 9 November and 52 AA Bde HQ landed under Brigadier John Ross.[32][33][34][35]
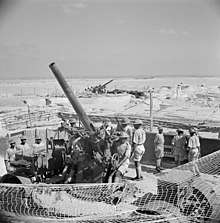
Leaving three HAA and three LAA batteries to unload and set up an 'Inner Artiller Zone' (IAZ) around Algiers, 22 and 52 AA Bdes began a long march eastwards. Reinforcing AA units were held up by congestion in Algiers docks (the tactical priorities laid down by the AA brigades had been ignored in loading the ships), and some AA units went by sea direct to Bougie. Others suffered losses of men and equipment in torpedoed ships. By 12 November V Corps' leading troops had covered 300 miles (480 km). The need to get AA units forward quickly to protect the vital airfields had been foreseen, and three of the HAA regiments deployed in the operation (58th (Kent), 71st (Forth) and 80th (Berkshire) HAA Rgts) had been deliberately equipped with obsolescent 3-inch 20 cwt guns rather than modern 3.7-inch guns, because the former were lighter and handier, and were quicker to deploy in rough country. This paid off when the light HAA and LAA guns were able to deploy and drive off Junkers Ju 87 Stukas as they deployed at Djidjelli and Philippeville airfields.[36]
As the Tunisian Campaign developed, forward movement was slowed by terrain and shortages: most units in 'Torch' had only 50 per cent of their vehicle establishment, and AA units frequently had to lend theirs to other units for urgent transport tasks. By the end of November the AA deployment had reached planned levels, but V Corps' advance had been held by the rapid arrival of German forces. As the Allies built up strength for a renewed advance, the emphasis for the AA units turned to defence for the ports and airfields against heavy attacks by the Luftwaffe. By January the arrival of reinforcements allowed 22 AA Bde to be fully committed to airfield defence, while 52 AA Bde provided front line support for V Corps and was prepared to follow up any breakthrough towards Tunis.[37][38]
By mid-January 1943, 52 AA Bde was deployed as follows:[39]
- Bougie port: Bty 58th (Kent) HAA Rgt, Bty 76th (Gloucestershire) HAA Rgt, 'V' AA Operations Room (AAOR)
- Constantine airfield: Bty 72nd (Hampshire) HAA Rgt
- Djidjelli airfield: Bty 71st (Forth) HAA Rgt
- Philippeville port and airfield: Bty 72nd HAA Rgt, Trp 71st HAA Rgt
- Youks-les-Bains Airfield: Bty 72nd HAA Rgt
- Thelepte Airfield: Bty 72nd HAA Rgt
- Ain Beida Airfield: Trp 71st HAA Rgt
- One US Army AA Artillery/Coastal Artillery battalion also under command
The policy of forward deployment paid off: when General von Arnim launched a counter-offensive against V Corps in February (Operation Ochsenkopf), 52 AA Bde was able to provide 32 HAA and over 200 LAA guns to cover the combat zone, while transferring 24 HAA and 72 LAA guns to the Free French XIX Corps. Behind, 62 AA Bde moved up to relieve 52 AA Bde of responsibility for Bougie and Djidjelli.[40][41]
By mid-March 1943, 52 AA Bde was deployed as follows:[42]
- Forward areas: 2 Btys 80th (Berkshire) HAA Rgt
- Philippeville: 79th HAA Rgt, Bty 64th LAA Rgt, 567 S/L Bty from 30th (Surrey) S/L Rgt
- Youks le Bains: Bty 71st HAA Rgt, Bty 29th LAA Rgt
- Tebessa Airfield: 11⁄2 Btys 72nd HAA Rgt, Bty 63rd LAA Rgt
- Constantine: Trp 72nd HAA Rgt
- Ain Beida: Bty 71st HAA Rgt
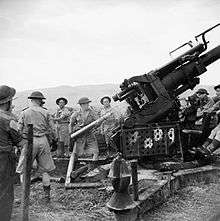
As the fighting continued in April, the HAA guns in forward positions were increasingly used to fire on ground targets to supplement the medium artillery. In one week, 20–27 April, 72nd HAA Rgt shot down seven enemy aircraft for the expenditure of 1022 rounds, but fired many more low-angle rounds at ground targets, which damaged the elevating and balancing gear of the 3.7-inch guns. Meanwhile the LAA guns were in frequent action against Stuka dive-bombers and low-level attacks by Messerschmitt Bf 109s.[43]
By the beginning of May, First Army was ready for its final assault on Tunis, Operation Vulcan. The AA plan or 'Vulcan' was straightforward: 52 AA Bde would hold three HAA and three LAA regiments, a S/L troop and a Z battery of rocket-launchers, all on their wheels and ready to move into Tunis and Bizerte immediately behind the leading battle groups. DElayed by a German counter-attack, the assault went in on 6 May and covered 15 miles (24 km) on the first day. The leading British armoured units entered Tunis on the afternoon of 7 May while US units entered Bizerte simultaneously. After a series of conflicting reports from the cities, 52 AA Bde was called forward. In fact, neither Tunis nor Bizerte was clear of the enemy. At Bizerte the AA advance parties were shelled from outside the town, and two batteries of 29th LAA Rgt had to be employed as infantry to flush out resistance.[44][45] After Operation Vulcan, 52 AA Bde deployed the following forces:[46]
- Bizerte: 58th HAA Rgt, 29th LAA Rgt, 184 Z Bty, detachment 30th S/L Rgt, AAOR
- Tunis: 72nd HAA Rgt, 45th LAA Rgt, HQ and one Bty 30th S/L Rgt, AAOR
After the German surrender on 12 May, the British forces' heaviest AA commitment was at Bizerte which was set up as an IAZ because of its importance as an embarkation port for the forthcoming Allied invasion of Sicily (Operation Husky). No sooner had 58th (Kent) HAA Rgt deployed in Bizerte than it was relieved by (being relieved by 84th (Middlesex, London Transport) HAA Rgt) and sent as part of the invasion force for Pantelleria (Operation Corkscrew). The rest of the front line AA units that had fought through the Tunisian campaign were able to be relieved for rest and refitting, and training for Husky.[47]
Italian Campaign
52 AA Brigade spent almost a year defending the North African bases at Bizerte, Bône and Philippeville before it was finally called forward to join the Italian Campaign in April 1944. Under the command of Brig John Parkes[34][48] it sailed for Barletta, arriving on 20 April with the following units:[49]
- 62nd (Northumbrian) HAA Rgt
- 79th (Hertfordshire Yeomanry)HAA Rgt
- 106th HAA Rgt
- 29th LAA Rgt
- 64th LAA Rgt
- 6th US S/L Bn
- 52 AAOR
On arrival, the brigade took over command of the following units from other AA brigades already in Italy:[49]
- 55th (Kent) HAA Rgt
- 76th (Gloucestershire) HAA Rgt
- 100th HAA Rgt
- 66th LAA Rgt
- 20 AAOR
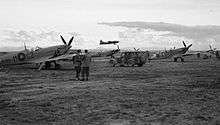
These units were distributed to defend the important complex of airfields round Foggia, Cerignola and Spinazzola:[49][50][51]
- Foggia:
- 55th HAA Rgt; Bty 100th HAA Rgt, Trp 76th HAA Rgt – 60 x 3.7-inch guns
- 29th LAA Rgt, 66th LAA Rgt – 108 x Bofors 40 mm guns
- 6th US S/L Bn – 144 x S/Ls
- 20, 52 AAORs
- Cerignola:
- 76th HAA Rgt less one Trp – 20 x 3.7-inch
- 64th LAA Rgt less four Trps – 30 x 40 mm
- Detachment 52 AAOR
- Spinazzola:
- 106th HAA Rgt less 1 Bty, 1 Bty 100th HAA Rgt – 24 x 3.7-inch
- 1 Bty plus 1 Trp 64th LAA Rgt – 24 x 40 mm
The US S/L companies were deployed in two modes: for dazzle in conjunction with Bofors guns, and in an area layout for cooperation with Night-fighters.
Over succeeding months there were minor changes: 55th (Kent) HAA Rgt left and was replaced at Foggia by 100th HAA Rgt; 106th HAA Rgt, except for one Bty, left and was replaced by 79th (Hertfordshire Yeomanry) HAA Rgt. In mid-July, 52 Bde HQ took over responsibility from 8 AA Bde for half a dozen additional airfields in the 'heel' of Italy: these were defended by 22nd LAA Rgt and an LAA Wing of the Royal Air Force Regiment.[49]
By late 1944 the Luftwaffe was suffering from such shortages of pilots, aircraft and fuel that serious air attacks were rare. At the same time the British Army was suffering a severe manpower shortage. The result was that a number of AA units were deemed surplus and were disbanded to provide reinforcements to other arms of service. The air threat to southern Italy was now minimal, and 52 AA Bde underwent a rapid run-down: 100th HAA Regiment was disbanded, 64th and 66th LAA Rgts left to be converted into infantry, and 79th HAA and 22nd, 29th LAA and the RAF Regiment Wing were transferred to other brigades. On 15 October 1944 52 AA Bde HQ converted into HQ, 'D' Sub-Area at Foggia on the lines of communication.[2][49]
Postwar
When the TA was reformed on 1 January 1947, the brigade was renumbered as 78 Anti-Aircraft Brigade, with its HQ at Perth and forming part of 3 AA Group at Edinburgh.[lower-alpha 1] The brigade had the following composition:[2][52][53][54][55]
- 471 (Mixed) HAA Rgt (Forth) at Dunfermline – the former 71st (Forth) HAA Rgt, see above[13][56]
- 501 (Mobile) HAA Rgt at Aberdeen – the former 101st HAA Rgt[13][57]
- 531 LAA Rgt at Perth – the former 31st LAA Rgt[13][58]
- 540 LAA Rgt at Inverness – the former 40th LAA Rgt[13]
- 586 (Highland) LAA Rgt at Dundee – the former 124th LAA Rgt, see above[8][13]
AA Command was disbanded in March 1955, and 78 AA Bde was placed in 'suspended animation' from 31 October that year. It was formally disbanded on 31 December 1957.[2][52]
Footnotes
- The wartime 78 AA Bde had been disbanded in 1944. The former 26th (London) AA Bde took the number 52 as part of the TA reorganisation.
Notes
- Routledge, pp. 65–6, 371.
- Frederick, pp. 1050–2.
- AA Command 1939 at British Military History.
- Monthly Army List, May 1939.
- AA Command 3 September 1939 at Patriot Files.
- Routledge, Table LVIII, p. 376.
- Routledge, Table LX, p. 378.
- Litchfield, p. 274.
- Litchfield, p. 298.
- Litchfield, p. 290.
- Litchfield, p. 291.
- Routedge, Table LXI, p. 379.
- Farndale, Annex M.
- 51 S/L Rgt at RA 39–45.
- 52 S/L Rgt at RA 39–45.
- 56 S/L Rgt at RA 39–45.
- 57 S/L Rgt at RA 39–45.
- Routledge, pp. 375–6.
- Pile's despatch.
- Routledge, Table LXV, p. 397.
- Recollections of bombing in Edinburgh.
- Order of Battle of Non-Field Force Units in the United Kingdom, Part 27: AA Command, 12 May 1941, The National Archives (TNA), Kew file WO 212/79.
- Order of Battle of Non-Field Force Units in the United Kingdom, Part 27: AA Command, 2 December 1941, TNA file WO 212/80.
- Routledge, p. 400.
- Order of Battle of Non-Field Force Units in the United Kingdom, Part 27: AA Command, 14 May 1942, with amendments, TNA file WO 212/81.
- "124 LAA Rgt at RA 39–45". Archived from the original on 2008-01-10. Retrieved 2008-01-10.
- "130 LAA Rgt at RA 39–45". Archived from the original on 2008-01-10. Retrieved 2008-01-10.
- 125 LAA Rgt at RA 39–45.
- Joslen, p. 89.
- Routledge, pp. 402–3.
- Order of Battle of the Field Force in the United Kingdom, Part 3: Royal Artillery (Non-Divisional Units), 22 November 1942, TNA file WO 212/8.
- Playfair & Molony, pp. 137-46, 165.
- Routledge, pp. 176–9 ; Map 8.
- Farndale, Annex J.
- Ross at Generals of WWII.
- Routledge, pp. 179–81.
- Playfair & Molony, pp. 165–82.
- Routledge, pp. 180–2.
- Routledge, Table XXX, p. 188.
- Playfair & Molony, pp. 326–8.
- Routledge, pp. 183–4.
- Routledge, Table XXXI, p. 189.
- Routledge, pp. 184–5.
- Playfair & Molony, pp. 430, 452–9.
- Routledge, pp. 185–6; Map 9.
- Routledge, Table XXXII, p. 190.
- Routledge, p. 186.
- Parkes at Generals of WWII.
- Routledge, p. 291.
- Routledge, Table XLIV, p. 293.
- Routledge, Table XLVII, p. 296.
- 30–66 AA Bdes at British Army 1945 on.
- 67–102 AA Bdes at British Army 1945 on.
- "Watson, TA 1947". Archived from the original on 2013-12-05. Retrieved 2018-07-31.
- Litchfield, Appendix 5.
- Litchfield, pp. 283–4.
- Litchfield, p. 286.
- Litchfield, p. 302.
References
- Gen Sir Martin Farndale, History of the Royal Regiment of Artillery: The Years of Defeat: Europe and North Africa, 1939–1941, Woolwich: Royal Artillery Institution, 1988/London: Brasseys, 1996, ISBN 1-85753-080-2.
- J.B.M. Frederick, Lineage Book of British Land Forces 1660–1978, Vol II, Wakefield, Microform Academic, 1984, ISBN 1-85117-009-X.
- Lt-Col H.F. Joslen, Orders of Battle, United Kingdom and Colonial Formations and Units in the Second World War, 1939–1945, London: HM Stationery Office, 1960/Uckfield: Naval & Military Press, 2003, ISBN 1-843424-74-6.
- Norman E.H. Litchfield, The Territorial Artillery 1908–1988 (Their Lineage, Uniforms and Badges), Nottingham: Sherwood Press, 1992, ISBN 0-9508205-2-0.
- Maj-Gen I.S.O. Playfair & Brig C.J.C. Molony, "History of the Second World War, United Kingdom Military Series: The Mediterranean and Middle East, Vol IV: The Destruction of the Axis forces in Africa, London: HMSO, 1966/Uckfield, Naval & Military Press, 2004, ISBN 1-845740-68-8
- Brig N.W. Routledge, History of the Royal Regiment of Artillery: Anti-Aircraft Artillery 1914–55, London: Royal Artillery Institution/Brassey's, 1994, ISBN 1-85753-099-3.