Enable Intel VT-X Virtualization on PC
There are two ways to enable Virtualization technology on a PC.
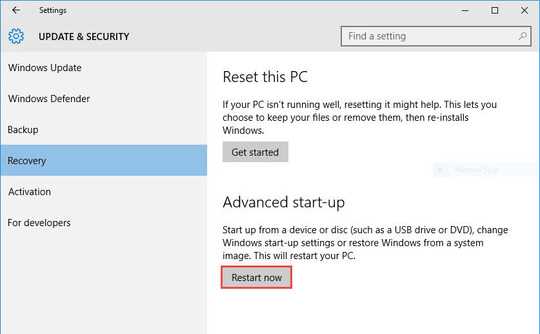
Go to Settings -> UPDATE & SECURITY -> Recovery and click the Restart now button under Advanced start-up.

Settings
While restarting your computer, choose Troubleshoot -> Advanced options -> UEFI Firmware settings -> click Restart.
If you don't have the UEFI Firmware Settings option in Advanced options then no problem, you'll find the VT-x virtualization option in the BIOS or boot menu.

UEFI Firmware Settings
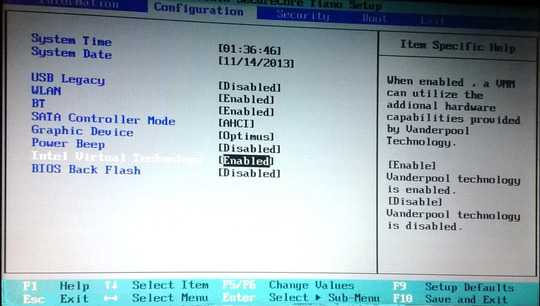
On the boot menu, navigate to Advanced options/Configuration, find Intel Virtual Technology and enable it by pressing the F6 key.

Boot menu
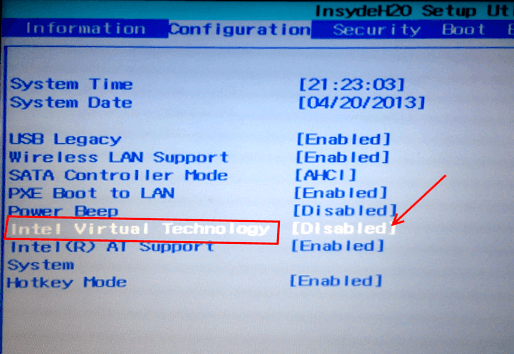
To the enable VT-X from BIOS, power on or restart your computer if it's powered on and while restarting when the first page appears press the BIOS key to enter into BIOS setup utility. Select BIOS Setup and on the BIOS setup page select System configuration and you'll find the Virtualization Technology option. Press the F6 key to toggle Disable/Enable.
BIOS Keys:
    Manufacturer    BIOS/UEFI key
    Acer            Del, F2
    ASUS            F9
    Compaq          F10
    Dell            F2
    Gateway         Tab, Del
    HP              Esc, F10, F1
    Intel           F10
    Lenovo          F1, F2
    Samsung         F2
    Toshiba         F1, F2, F3
    Sony            F1, Esc, F12
    Packard Bell    F1, Del
    NEC             F2

Enable virtualization (Intel VT-X) in BIOS - Lenovo
Source: How to Enable Intel VT-X & AMD Virtualization on a PC


