Introduction

This teardown is done as to comply with the task 2 IDES 2171. Photographed and written by Ashley Mutandiro and Aisyah Azmi, first year students of Bachelor of Industrial Design UNSW Sydney, Australia.

  1. qRE46GOT5UBnQLic
    • Breville Toaster.

    • The toaster before the teardown process.

  2. S3IFYpkJXwDNPcjV
    S3IFYpkJXwDNPcjV
    wSyAWgKjXDmXchCx
    AqQa6MXFwPhPk6bZ
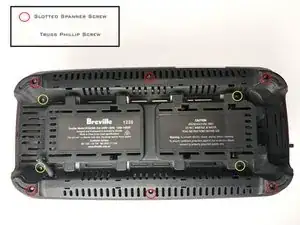
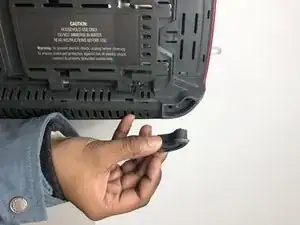
    • Turn the toaster upside-down.

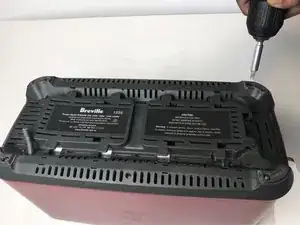
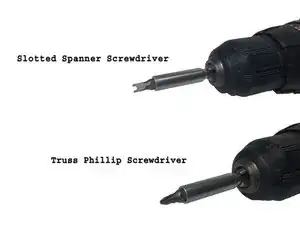
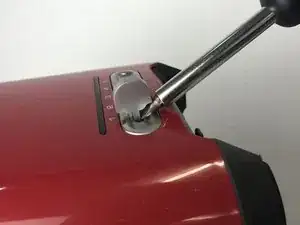
    • Use the drill to unscrew the six slotted Spanner head screws

    • Use the drill with corresponding screwdriver bit to remove the Truss Phillip screws

    • The Slotted Spanner head screws hold the four rubber feet at the bottom of the casing.

  3. KM3BwZpLkUfaYC2U
    • Unattach the four rubber feet.

  4. xAb1Q4ylUKy1tunY
    xAb1Q4ylUKy1tunY
    cFBE2W3OTsLonoQi
    Jk6ILWOXHx6gsMes
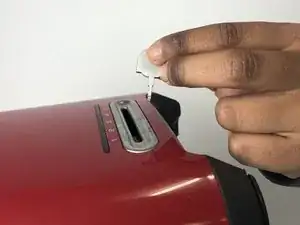
    • Detach the timer knob using a flat head screw driver

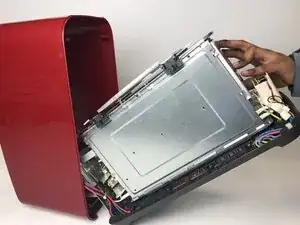
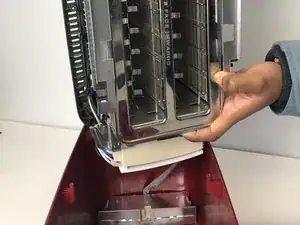
    • Remove the internal components from the red casing

    Is this indicating that the lever is pried off, or that a metal spring is being released by the screwdriver?

    David -

  5. 45oajK4WdAMfhOsZ
    45oajK4WdAMfhOsZ
    rBdGyGlYhwtikcpJ
    kB3BnG4nKV1AuH3d
    • Note: Red casing is still attached to the interior body of the toaster.

    • Detach electric circuit housing from red casing

    There is also probably the grounding for the external case. This is a troublesome ribbon cable. I'm beginning to think that these students should have had more supervision in this teardown since they seem unaware of the risks involved in mains connected devices, when capacitors may be involved. It is possible that their model doesn't have case grounding but there is clearly a need for adult supervision.

    Senor Mambo -

  6. GYoTedEtLYdxqsoK
    GYoTedEtLYdxqsoK
    dLFuBLNBTA3REwoV
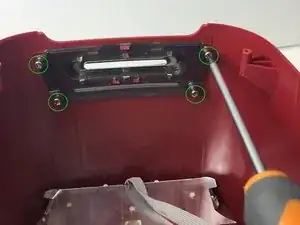
    • Firstly, unscrew the four Pan Phillip head screws

    • Then snap off the three welded plastic studs to detach the timer knob housing from the red casing

  7. PBlvXhENZL5sgTfw
    PBlvXhENZL5sgTfw
    HVPB1M25FHw6lZJO
    F3roxtGNeBPA6F5u
    • Unfasten the two Pan Phillip head screws to detach the buttons' housing

  8. YnYVCkU3YSODENDB
    YnYVCkU3YSODENDB
    Udx1wDsGktMtno6n
    cb2v42VASDeSCxde
    • Note: There are two housings attach to both side of the interior body of the toaster.

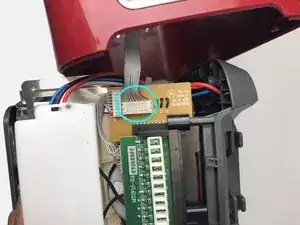
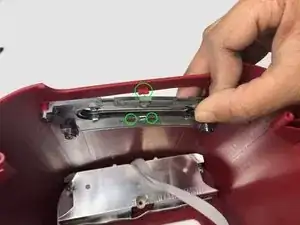
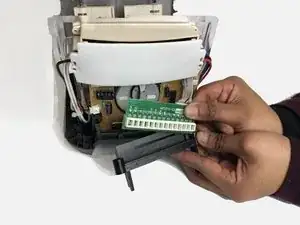
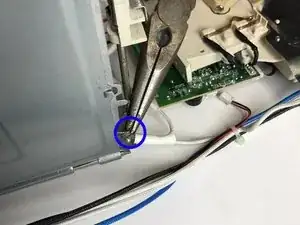
    • Remove the two Pan Phillip head screws to detach the circuit board from the heat controller housing.

    • Then, remove the slider as well.

  9. GQiGmEBrukpvGK2t
    GQiGmEBrukpvGK2t
    KNibXTP665ehX4nS
    21YPjFYHEYoPC55H
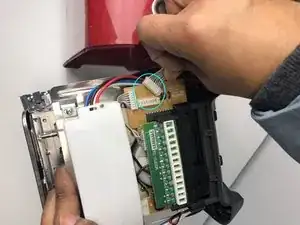
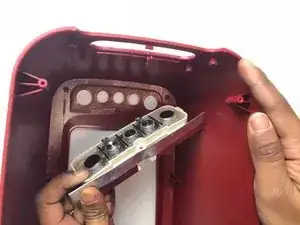
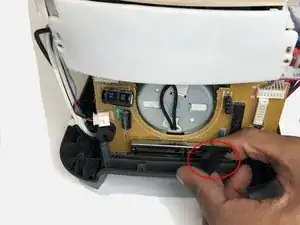
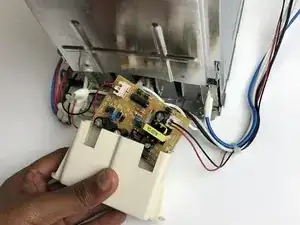
    • Remove the circuit board housing for the heat controller from the interior body of the toaster by unscrewing two Pan Phillip head screws

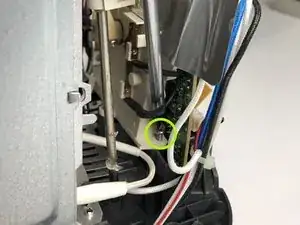
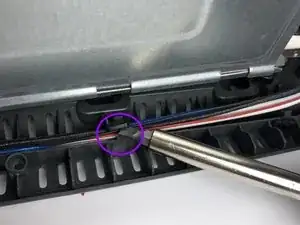
    • Remove the cable fasteners using a flat head screw driver

  10. UMoMvXLQElceb2IC
    UMoMvXLQElceb2IC
    uF1VTwSGJuZ5H4ao
    ukqAXCBYljQ4PqLk
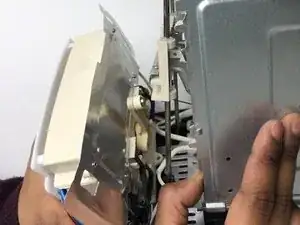
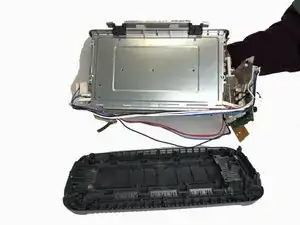
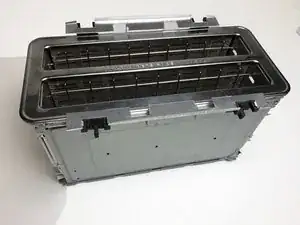
    • Separate the interior body of the toaster from the bottom cover.

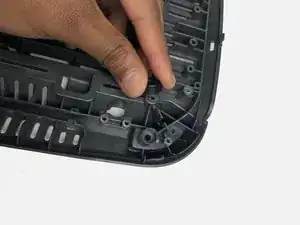
    • Remove the screw caps

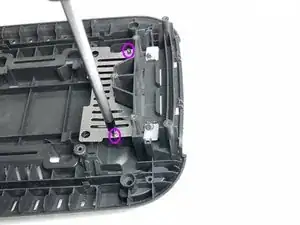
    • Unscrew the two Pan Phillip head screws to detach the aluminium vent

  11. GIX2Olydu1SxGkwQ
    GIX2Olydu1SxGkwQ
    YQPYrCyBbaQwHnBX
    Y5UHRMKs1pydIKpO
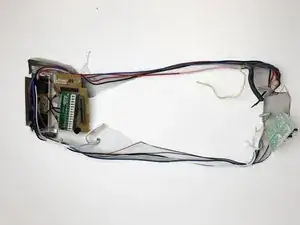
    • Use pliers to break apart the welded wires from the interior body.

    • Snip off the rest of the wires still attached to the interior body using a wire cutter

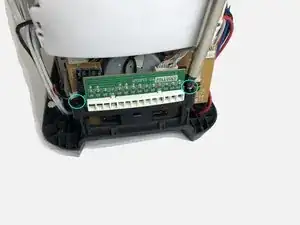
    • Remove the circuit board from its housing

  12. 1AE2GHMWWYLjGWOC
    1AE2GHMWWYLjGWOC
    NT4Hc1wqrsGwZaAJ
    • Separate the electric components from the interior body

  13. 6XyPASPuMxknhQ61
    • Insert wisdom here.

    I advise against using a screwdriver to remove the darkness control knob. That risks scratches and cracking the knob or post. If you know that the item can be pulled out safely, I suggest using a loop of paracord. That spreads the stress along the entire knob.

    Senor Mambo -

Aisyah Azmi

Member since: 30/09/18

217 Reputation

11 comments

Don’t buy this toaster…They fail and Breville won’t warranty it after 1 year….

Never again Breville..

James Payne -

Thank you for this tear down guide. Though it’s built pretty well and feels like a tank, It doesn’t seem very repairable. Mine stopped working a couple months ago and I’m contemplating throwing it out. Comments?

David Vileta -

any chance you still have the electronics for the toaster. Mine stopped working. It’s not the heating element. I THINK the issue is one of the components on the circuit board failed. I’ll buy the harness with the PCB from you, if it’s still around. Thanks.

Riccardo -

Thanks very much for posting all of this, gave me the confidence to 'go in'.

Foe anyone thinking of doing what I just did; the guts of a plastic cased model can be put into a metal cased model but there are a few differences but everything you need is there.

Sean Johnson -

Purchased a Breville die cast 2 slice toaster ($160). After one year it stopped toasting evenly and then on the out side of one slice. I am capable of fixing this but Breville will not sell parts, they want you to buy a new one. My first and last Breville product.

Lou Viscomi -

Mon Breville BTA830XL outrageusement cher ne grille qu'un coté du pain à la fois. On mets la moitié du temps sur un coté et on inverses les tranche de pain dans le fentes pour l'instant. Très difficile à ouvrir avec toute sortes de vis compliquées à dessin. Dernier Breville à vie, c'est un engagement. Ne sont pas plus durable qu'un grille pain bas de game. Trop de fonctionnalités sans la qualité.

Josée Schepper -

My family likes this toaster quite a bit, but it has started to malfunction. The two inner heating coils don't heat up or don't heat up enough to visibly glow. The odd things is that they do heat up when we select the "bagel" option. This seems like a weird combination of symptoms.

Anyhow,. thanks for the person who provided this teardown guide. Taking it apart and staring dumbly at the pieces was on my TODO list.

WJCarpenter -

Hi everyone! Power surge burnt out the IC in mine so that the part number is unreadable. Can anyone tell me what the IC is?

Jesse Fox-Allen -

There is no toaster I have used that is as good as this toaster. Have had mine for 6 years. Took it apart and fixed it myself 2 years ago. Worked perfectly until a few days ago. Not sure I can repair it this time. I will be buying another. Complex but well designed. Stands alone as far as I'm concerned.

John Phillips -

Tried to unscrew the bottom of the toaster, but not a traditional Phillips SD fit (of any size). Is it a British thing? ;) Anyway, since couldn't unscrew bottom panel as advised, I made sure all crumbs were removed with a good shake and cleaned the drawer. . .when plugging in afterwards, it worked fine. It's a tempermental toaster, for sure, but this is the first time it didn't work for me in two years, and I have gone through plenty of toasters in the past (expensive and cheap) that haven't held up as well

Dana Casale -

Our Breville toasting elements have failed. Are you saying I can't repair it?

Simon Pockley -