Introduction
Given the recent Quick Charge 2.0 revolution, I was interested in seeing what powers these new line of chargers. This is the first teardown of the fast charge series.
The charger can be purchased on T-Mobile's website.
Tools
-
-
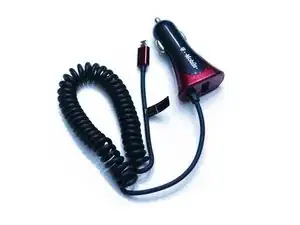
T-Mobile's 3.1AMP Micro USB Car Charger has a sleek design that fits well into almost any cigarette lighter outlet and can power up to two micro USB devices.
-
The adapter has a rating of 5V/3.1A and comes in several colors
-
The charger includes:
-
Micro USB adapter
-
USB adapter for secondary device
-
LED to indicate status of charge
-
Convenient curly cord to conserve space
-
-
-
Generally, car chargers are replaced instead of being repaired because of their low cost.
-
Because of this, it seems T-Mobile has made this charger particularly difficult to disassemble, given that there are no obvious points of entry
-
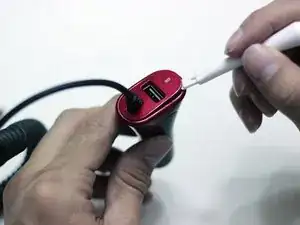
In order to pierce this seemingly impenetrable shell, we will need to reach for our plastic opening tool.
-
Pry the lid off the top of the charger with the plastic opening tool.
-
-
-
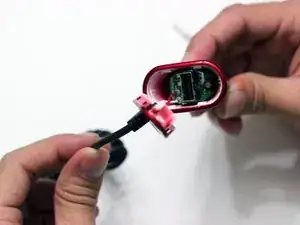
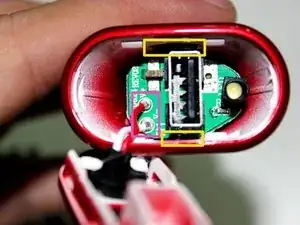
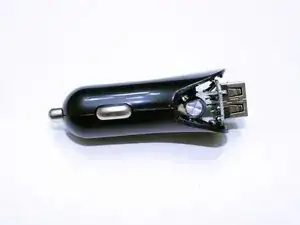
With the lid removed, we can now see a bit of the circuitry including:
-
USB port
-
LED light
-
a lone resistor
-
Separating the top cover from the bottom cover takes two steps:
-
There are two wires connecting the curly cord to the charger, so we need to cut these wires with the flush wire cutters to keep them neat and reusable.
-
Next we can see that there are two tabs keeping the red plastic cover connected to the black plastic cover. In order to separate these two we need to use two plastic opening tools in tandem with a little bit of force. As stated earlier, T-Mobile did not design these chargers to be easily repaired.
-
-
-
With the red plastic cover removed, we now need to remove the black plastic cover.
-
Remember earlier that this device was not built with future repair in mind, and this cover is proof of that.
-
In order to remove it, we'll need to use the vice grips to squeeze the cover until the tabs click and disconnect.
-
Simply pry the cover apart once the tabs are disconnected.
-
-
-
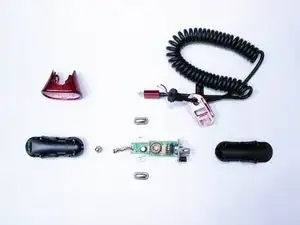
Once the black cover comes apart, there will be six parts:
-
Front and back of the cover
-
Front contact that connects with the positive end of the cigarette lighter
-
Two side contacts that connect with the negative end of the cigarette lighter
-
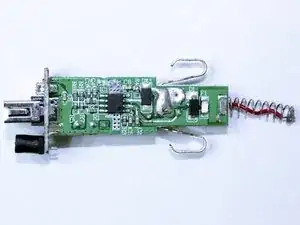
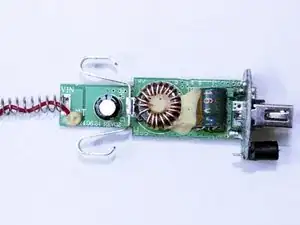
Circuit board with wire and spring
-
-
-
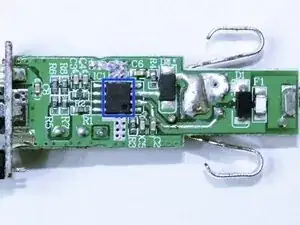
Now we are in the meat and potatoes of this device, the circuit board.
-
Surprisingly, the ONLY chip on the board is:
-
Active-Semi ACT4533B DC/DC Converter
-
This CLA was implemented with a relatively simple design using very few parts, including:
-
Several resistors, capacitors
-
Two diodes
-
Fuse
-
and one inductor
-
-
-
T-Mobile 3.1AMP Universal USB Charger Repairability Score: 1 out of 10 (10 is easiest to repair)
-
Plastic cover was very difficult to remove.
-
Wires needed to be cut in order to disassemble (needs to be resoldered to put back together).
-
Contacts are difficult to keep in alignment during rebuilding.
-
It's clear that T-Mobile did not intend for these devices to be repaired, rather they are intended to simply be replaced.
-
One comment
I am impressed that you were able to take it apart! These things can be a real hassle.
