Introduction

For this teardown you should have a small phillips screwdriver a flathead screwdriver or some other kind of prying device. A 3mm phillips screwdriver will work for all of the screws in this teardown. Note: This teardown does not include removing any components from the internal PCB.

  1. UCODBfpCNFBtaQps
    • Undo the bottom battery clip and remove any AA battery within.

    • Remove the USB receiver if stored

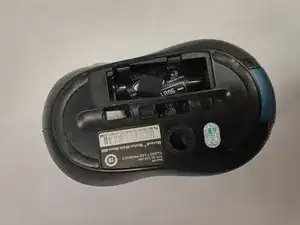
    • The device should look as pictured.

  2. bsPwVMIo3RbYYEY2
    bsPwVMIo3RbYYEY2
    tMXUlkLQUAK45YgL
    WMWUM56qSYxT5cnH
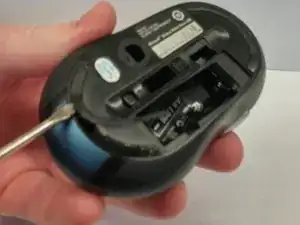
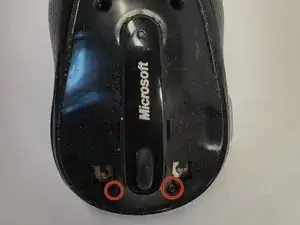
    • Using your prying device, pick at the corner of the lower rubber traction pad on the bottom of the device.

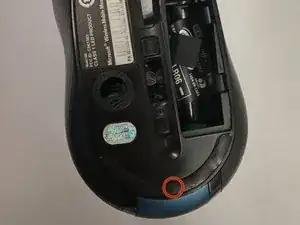
    • Pull this traction pad off to reveal the screw underneath.

    • Unscrew this middle screw using the small 3mm phillips screwdriver.

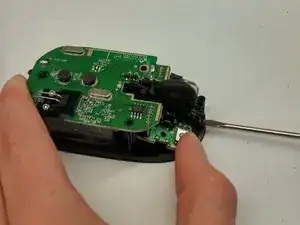
    • Carefully disconnect the top click pads.

    • Note: Moving each towards its corresponding outer edge makes this easier

  3. RuTGlMuVCEGHQbnT
    RuTGlMuVCEGHQbnT
    RBSTocYXAZLtDOUp
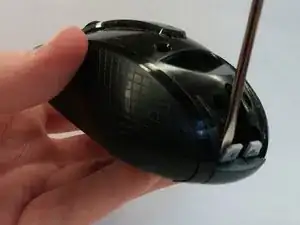
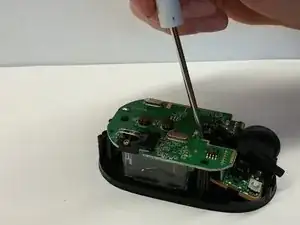
    • Unscrew the two screws on the top front of the device.

    • Using prying tool undo the back clip piece shown.

  4. UHqIeI3fXObjnPNC
    UHqIeI3fXObjnPNC
    bsG5lDIrapLB6ACF
    EWRnT2BmYZKokH1F
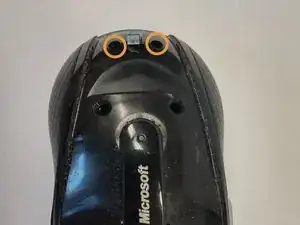
    • Remove two screws in the top back of the mouse.

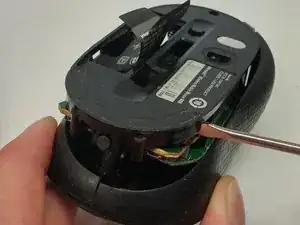
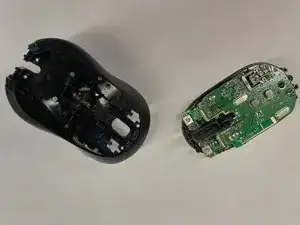
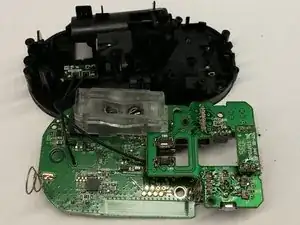
    • Pry the top and bottom halves apart.

    • This takes a little prying between the outer pieces, which are connected to the top half, and the plastic bottom half.

    • The mouse should now have two separate parts as shown.

  5. oU3DLQ6GO6OCCDXO
    oU3DLQ6GO6OCCDXO
    4vPvVwZBjB3a5Zfo
    • Using prying tool press against the bottom of each side of the click wheel apparatus to cause it to snap out of place.

    • The end of the click wheel closest to the middle of the mouse is more difficult to remove and requires getting the prying tool down the gap to reach the spot where it is clipped in.

    How do I do it like what motion? I don’t want to break anything.

    Leldon Cason -

  6. IvgAZZxAKZmPvdhS
    IvgAZZxAKZmPvdhS
    PCpqcvY4CECFwuNq
    UfO3gYijLUtsBlZJ
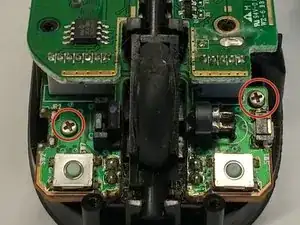
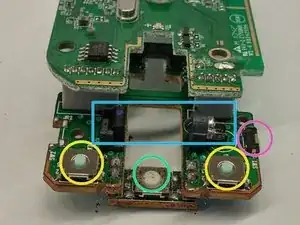
    • Remove 2 Screws from either side of the click wheel on the lower tier of the PCB.

    • Remove the 3 screws from the top tier of the PCB.

    • Do not separate the PCB from the plastic backing too fast. There is a separate small PCB screwed into the plastic backing which is connected to the main PCB with 2 wires.

    • Remove the screw holding the small PCB to the plastic backing

  7. pXPMSiDlXQEHgYr4
    pXPMSiDlXQEHgYr4
    UqLOkTIuGvVROQUA
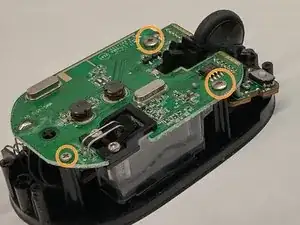
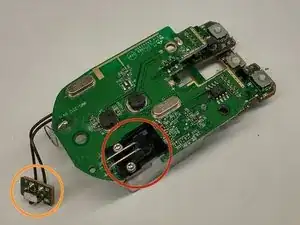
    • Parts of the PCB are listed below and correspond to the colored circles on the pictures

    • LED tracking apparatus

    • Battery power receiving mechanism

    • Left and Right Click Buttons

    • Click Wheel Button

    • Scroll wheel sensing apparatus

    • Programmable Button

Austin Fox

Member since: 11/04/12

91 Reputation

12 comments

Thank you for this guide. It helped me successfully repair my mouse!

Justin Hren -

nice post!

thumb up for u!

Wilson Chan -

great, thanks for do it!

antonio sanchez -

thanx a lot :)

simo.tech.me -

Thanks a lot, I was able to replace the mouse wheel !

Niek -

Please help me. It can not move pointer but can click and scroll .

Plase point for repair

สุบิน แพทย์รัตน์ -

Really great tutorial! I got my mouse fixed in no time! Congratulations for such a very detailed step-by-step!

Agostinho Júnior -

My mouse’s left click button has become oversensitive. It double clicks while I drag objects. I could not find a replacement button in online stores. Is there a standard name for the button like OMRON D2FC-F-7N ?

Hakan İslamoğlu -

I actually swopped the internals of a 4000 with that of the 6000 perfect fit. Tanx again

Nic Pretorius -

do you know how to fix the left click button?, mine is not work

antonio sanchez -

Hi, I love this mouse. I have bought my third one, but I feel that the scroll wheel is a little rough when turning. In the past, before finding this manual, I have opened the mouse and had to break the column which holds the screw which is hidden below back traction pad. However, I fear that when I have to put it back on, it will not sit correctly. Is it possible to buy traction pads for this mouse? Or is it easy to put the traction pad back on?

Regards,

KL

Killian -

Thanks, I was able to deconstruct my friends mouse in the middle of class.

Matthew Moyes -