Introduction
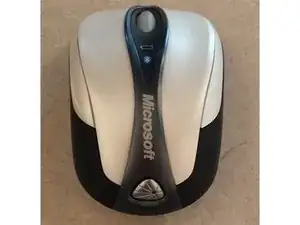
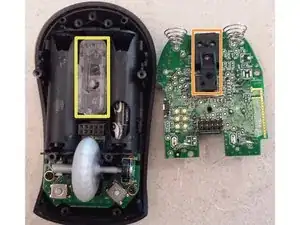
Teardown of Microsoft's Bluetooth Notebook Mouse 5000 - Thanks to Joe Ten for his guide and making mistakes so I didn't have to: Blog Teardown
-
-
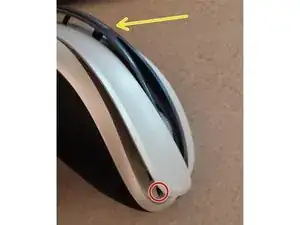
Pop off the lazer symbol from the back of the mouse. it is stuck on with a simple adhesive.
-
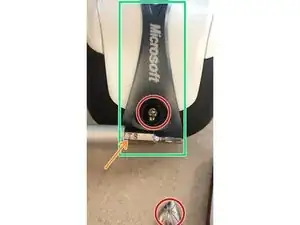
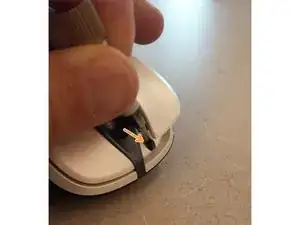
Torx 6 screw under the cover
-
DO NOT try to remove the Microsoft spine between the buttons. It will break. we'll cover what to do with it in the next step.
-
-
-
Don't try to remove the "Microsoft" spine piece.
-
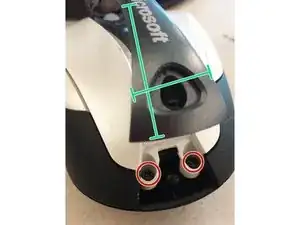
Just move aside the spine to get to the 2x Phillips 0 screws below.
-
-
-
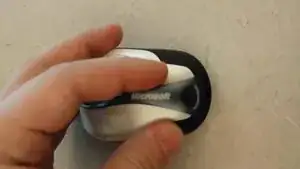
This side to side motion also lets you pop the L and R buttons past the grey spine as needed for the next step.
-
-
-
The last 2x 00 philips screws are located under the L and R click buttons.
-
Do not remove the "Microsoft spine" piece. Instead move it aside to pop the buttons past it.
-
You might have to angle your screwdriver to get to the screws but this was not too difficult. I found it easier to come in from the middle.
-
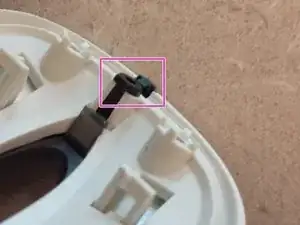
The "Microsoft spine" is pressed into the button assembly using a one way barb as pictured. This would break if you try and take it off before removing the whole assembly.
-
-
-
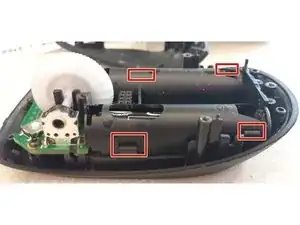
The left and right sides hinge up then tip out away from the device. No screws, just two pegs per side.
-
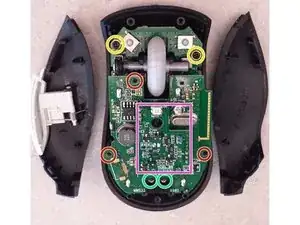
3x phillips 00 screws hold the main board on.
-
2x phillips 00 screws hold the L + R buttons and scroll wheel assembly.
-
The laser eye board seems to be soldered to main board and is not removable.
-
2x torx T6 screws hold the lens to the main board. Unless you need to clean this, there is no need to remove these screws.
-
To re-assemble the wings, drop the front onto the front peg then "hinge" down onto the back peg.
-
-
-
This is the underside of the main board.
-
A clear laser lens rests in the black base if the 2x T6 screws are removed.
-
The other half of the laser lens.
-
-
-
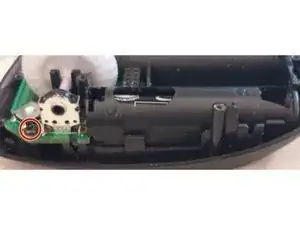
2x phillips 00 screws hold the wheel and button assembly. I never removed this because of the two buttons underneath. Any further tear down should be simple.
-
10 comments
Great Dismantling Guide!! // ¡¡Fantástica Guía de Desmontaje!! (+1)
jabaenam -
Thanks! I couldn't figure out how to open this up. Had to remove the nasty old rubber paint from the outside. Easy enough with some mineral spirits and elbow grease.
One thing to note. If you completely and carefully disassemble the left and right buttons from their carrier you can easily replace the four screws that hold it down and then pop the center strip back into place before putting in the last Torx screw. I had to completely disassemble mine to get all the nasty goo off it. (I bought it used for $1.00)
This mouse was obviously designed for assembly, NOT for repair. I NEVER would have figured out how to take this thing apart without these instructions. Thank you to the author.