Introduction
Tools
-
-
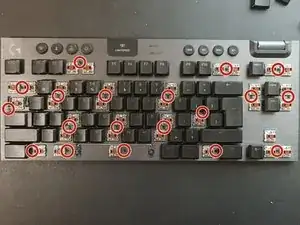
Using a keycap puller or by simply pulling from the tops of the keycaps, remove all the keycaps shown and their screws underneath. You can remove screws using the Phillips #00 Screwdriver
-
-
-
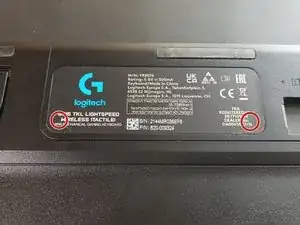
Flip over the keyboard and you will see a black sticker with the Logitech logo. Two screws hold the battery in place underneath. Use the screwdriver to take out the screws. Remove the plastic casing and proceed to the next step.
-
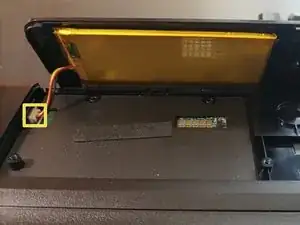
Carefully unplug the battery connector by pulling the small plastic connector on display in the image. Proceed to the next step.
-
-
-
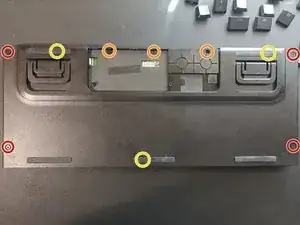
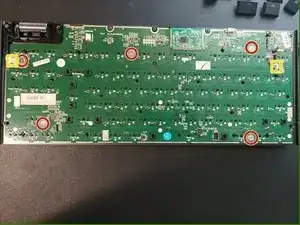
First, remove all the screws marked with red and orange, as they are the easiest to unscrew.
-
Next, there are screws under the rubber feet, their locations are marked with yellow. To remove the feet, use something sharp to gently pry them upwards. The feet should stick at least a few times after you've done this.
-
-
-
Finally, if you wish to remove the PCB, you'll need to pull off the rest of the keycaps and unscrew and unplug everything.
-
To reassemble, repeat the steps in reverse.
-

3 comments
on this last step, when the 5 screws were removed, I was not able to remove the circuit board. Not sure what was still holding it in place
1. The PCB is not removable without de-soldering every switch. There is a slight overlap.
2. For replacement switches/keycaps, Kailh low-profiles should work because there are just slightly custom Kailh (the switch's clear casing has "Kailh" imprinted on it)... as long as you are willing to make slight modifications with a dremel.
3. If you want to reduce weight, the bottom casing has a glued, steel plate with no purpose except to increase the weight. A heat gun can be usefull to loosen the adhesive if you're afraid of breaking the plastic case.
4. I used water and a toothbrush to clean under the caps, then let sit on a heat plate for 10 hours before plugging the battery back in.
Does anyone know how to take off the legs / kick stands? I have replacements but I don't know how to remove the old one which has broken
if i want to do maintenance that requires removing the top chassis only, can i do this step only? or are all steps required (i.e. removing battery and all screws from bottom).
I dont need to remove the PCB i am just trying to replace the rubber media keycaps.
Deltron Z -