Introduction
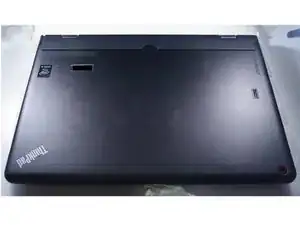
Disassemble the keyboard pro down to the keyboard assembly. Useful for swapping keyboard, or if you just want to get a glimpse at the internals of the keyboard dock.
Tools
Parts
-
-
Prepare pen and paper to remember where you remove the screws from (about 30+something in total, various sizes).
-
You should be making some rough drawings to figure out where which screw goes, since I don't give reassembly steps.
-
Put everything aside and read the steps at least once before disassembly the dock!
-
You are responsible if you break your stuff.
-
If you order a keyboard, make sure to get one with the metal backplate, since the backplate is glued to the plastic back cover of the keyboard, which in turn is glued to the keyboard frame and keeps the electronics (switches, backlight,...) in place. See last step for pictures.
-
I am uploading a video, too.
-
-
-
Fully extent the tablet to the maximum angle. This will make things easier in a later step.
-
Remove the tablet and all cables (USB, Display, mains) from the dock.
-
Remove the 8 screws from the back of the keyboard dock, and place them on a beautiful drawing of the keyboards back.
-
Carefully start prying the keyboard dock open at the top (where the hinges are). I used only my fingers, it is pretty easy.
-
Don't overextend it, instaead, pry open at bottom, too.
-
Put backcover aside.
-
-
-
Disconnect the battery connector from the controller board
-
At the bottom, two stickers hold the audio wires in place, remove them.
-
Remove the 5 screws holding the battery pack (2 center, 3 surrounding it), place them on an appropriate drawing of the battery pack.
-
Carefully remove the battery pack, and remember how those speaker wires were put in there at the bottom.
-
If you want to replace the battery, you're done here. Just work backwards from here and reassemble everything.
-
-
-
With utmost care, disconnect all connectors from the board. But not the big one on the top left (leading to the dock<->tablet connector). I did not get that one out, and it is not necessary.
-
Remove the 4 screws from the board, put on drawing.
-
Remove the two screws from the hinges
-
Remove board and hinge assembly en block. Put aside.
-
-
-
Make a drawing of the keyboard
-
Remove all screws surrounding the keyboard (and put them on the drawing!).
-
Don't be smart, the keyboard assembly might look like two parts (keyboard itself + metal backplate), but the two are glued together.
-
Put in new keyboard assembly, reassemble the whole thing by following the steps in reverse order (you made drawings to figure out screw placement, didn't you?).
-
The last pictures shows the full keyboard assembly (right) and the keyboard itself (left, spare part I ordered). One of them is rotated by 180 degrees (see videos for better comparison).
-
The metal plate is glued to the black plastic of the keyboard. I could not seperate the two (tried heat and cutting and both) without deforming the metal and ripping apart the original keyboard. So if you plan to do a repair, get the variant with the metal backplate!
-
5 comments
Eine Frage, woher bekommt man so eine Tastatur (bzw. wie lautet die Nummer oder ähnliches)? Denn ich bräuchte eine mit DE-Layout.
MfG
Thanks for providing at least some advice.
Is the hard drive replaceable? Is it an M.2 2280?
Is the ram upgradeable? (I think its soldered on in both 1st and 2nd gen)
I just bought a 2nd gen and I think its only the 1st gen that has upgradeable parts.
Thanks in advance!
Just answering my own question, the Helix 1 has a replaceable HDD, soldered ram.
For the Helix 2, everything is soldered on. The only expansion you can do is putting in a large micro SD card for data.
the ssd on the helix 2 is upgradable
d sims -


