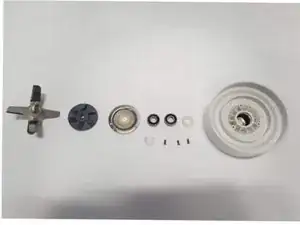
Introduction
An easy step by step guide on how to disassemble the Blitz Pro 800W blender.
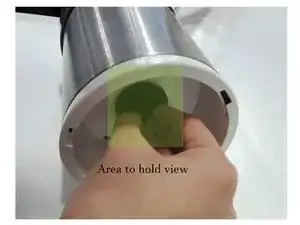
== Key areas include==:
Red circles - Areas to focus on (eg. located where the screws would be unscrewed from section or removed).
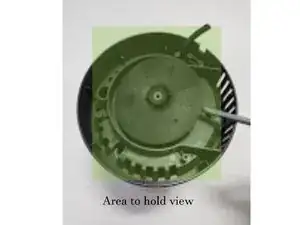
Green areas - Indicating areas where the dissembler would grip with their hand (eg. where the main component divides into different sections).
-
-
Unplug the device from the wall and turn the powerbase upside down.
-
CAUTION: Make sure the cord is not plugged into the outlet in order to prevent electrocution.
-
CAUTION: Make sure the cord is also wrapped up to eliminate the risk of tripping.
-
-
-
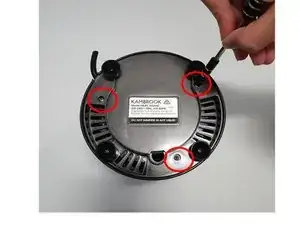
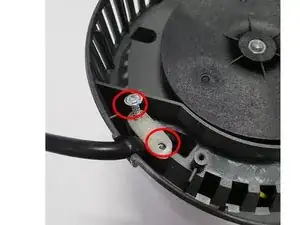
Unscrew the three 10mm screws located at the bottom of the base using the Philips screwdriver #1 head (located where the red circles are placed).
-
CAUTION: In order for the component to be put back together again, place the screws in a zip lock bag so all components can be easily relocated.
-
-
-
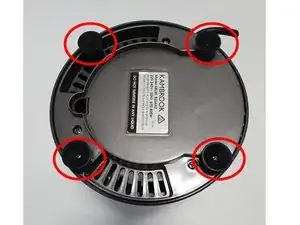
Firmly pull the rubber cups off the base of the component by gripping the bottom component with one hand and pulling with slight force with the other.
-
-
-
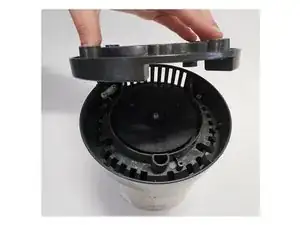
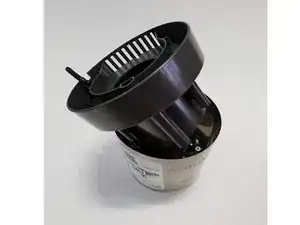
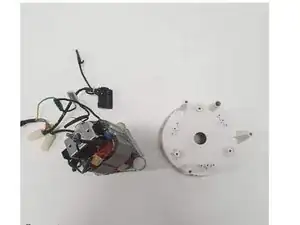
Use force to remove the plastic base from the NutriBullet (once all screws are removed).
-
CAUTION: Once the base is removed the fan will be exposed. Make sure the component is moved slowly so no other parts fall out or cause any sort of injury.
-
-
-
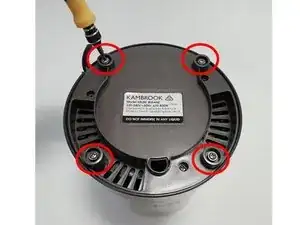
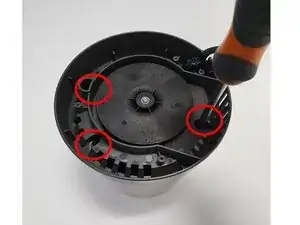
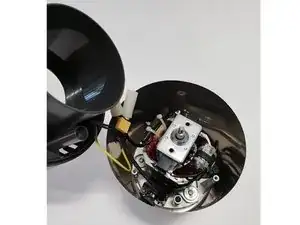
Unscrew the two 10mm screws (located in the red circle) with the #2 Phillips head. When all screws are separated from the main body, without effort, detach the plastic component off the appliance.
-
-
-
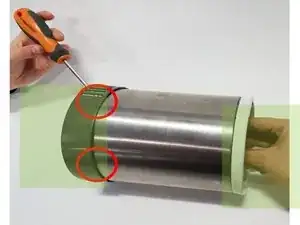
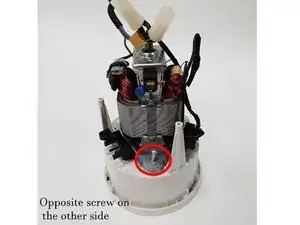
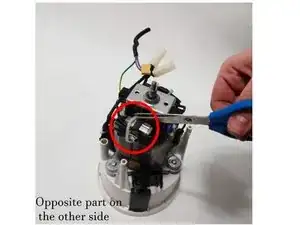
Firmly hold the top section of the rotator up (indicated in the green section), while firmly using the other hand to unscrew the internal screw with a #1 Phillips head (located in the red circle section). Continue this process until the two parts are separated from the main component.
-
-
-
(After the part is removed from the component) slowly slide the cord through the base to reveal the internal component.
-
-
-
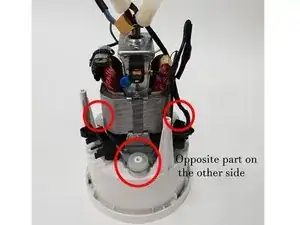
(Located in the red circle) remove the cord by unscrewing the two 5mm screws with the #1 Phillips screwdriver to remove the side component.
-
-
-
Cut the zip ties off the sides of the device with scissors. Make sure ONLY the zip ties are cut AND no other cords (as the Blitz Pro would not be able to work).
-
-
-
Remove the black inserts by unclipping and pulling down the black inserts. Continue this process for the other three sides (located in the red circles).
-
-
-
Unscrew the three 5mm screws (located where the red circles are placed) with the #1 Phillips head.
-
CAUTION: Be very careful when removing the screws as there is a flat piece under the screw which may fall off and be very easy to lose.
-
-
-
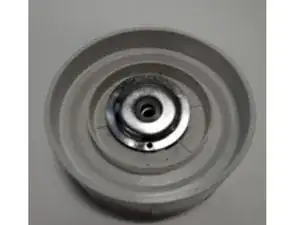
Place the blade firmly into a vice, allowing the grey circular turning mechanism to face upwards.
-
Turn clockwise with multi-grip pliers the grey circular turning mechanism, until it detaches from the white plastic base.
-
CAUTION: Make sure a strong grip is applied to the component in order to minimise injury.
-
-
-
(Underneath the grey circular turning mechanism, will reveal a washer, attached to the white plastic base by 3 small 5mm screws.)
-
Unscrew the three 5mm screws with the number 1 Phillips head screwdriver, until the washer is fully detached from the blade component.
-
-
-
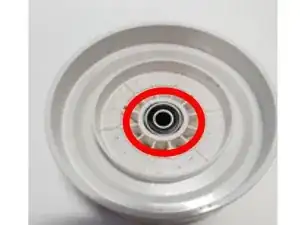
Securely tighten white plastic base into a vice.
-
CAUTION: Do not tighten the white plastic base too tightly into the vice, as the part will be more prone to cracking and snapping.
-
Gently, but repeatedly (using a Flathead screwdriver and a rubber hammer), with minimum force, slowly tap the bearings around the circumference (located in the red circle) until they pop out.
-


One comment
I need a new silicone gasket. I am surprised how soon it broke in half. Am I supposed to wash it separately after each use or not? Can I buy a generic replacement as seen on Ali Express instead of $12 for one? What size would I need? Thanks