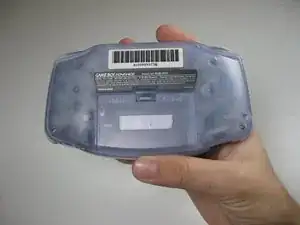
Introduction

Use this guide to disassemble all or any of the parts of the Game Boy Advance.

  1. FQtv1v6UntVUhZbZ
    FQtv1v6UntVUhZbZ
    evt4WKJq2JU6NORS
    uV53WW1WLpuX3Xcv
    • Remove the back battery cover by pinching down on the tab and pulling outward.

  2. n2BM6E3TNmNQc1vv
    • Remove the six back panel screws using a Y1 screw driver.

  3. YDNPJjBYq4IIvkO4
    • Remove bottom back panel screw with a Phillips #1 screw driver.

  4. YjidaLAxBustDHfg
    • Remove the back panel by pulling away with one hand and the front secured in the other hand.

    • Beware of right and left triggers, the right and left panels, and the power switch falling off as the back panel is removed.

  5. dEkU6llJcUF2igH3
    dEkU6llJcUF2igH3
    PfOcLcSAP6gX2pXX
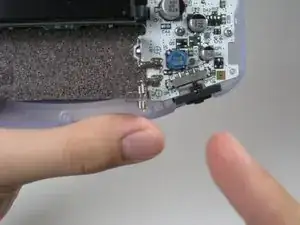
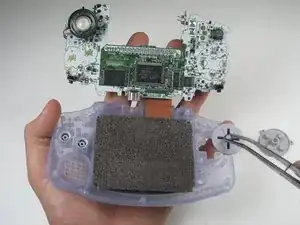
    • Remove left and right triggers by lifting and pulling them away from the system.

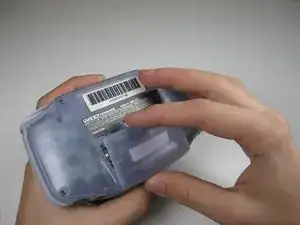
    • Do the same for side panels.

    • For finicky or jammed triggers only. Adjust and correct triggers and reassemble. Most jammed triggers are caused by buttons misplaced or jammed in its enclosure.

  6. fCOBrNvTgtKZ3WC2
    fCOBrNvTgtKZ3WC2
    buPCeDKOkuwUWENq
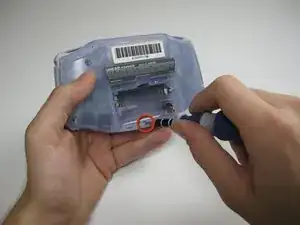
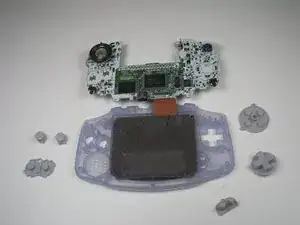
    • Remove the gray On/Off Switch by pulling up and away from the unit. Replace with another switch if necessary.

  7. ODjLTdxT2hd2rIF4
    • Remove the three screws on the circuit board with a Phillips #1 screw driver.

    • The last screw on the right is not included on some Game Boy Advance systems.

    some motherboards only have 2 screws holding it in place. keep this in mind if you cant find one

    Max R. -

  8. fACppBePP3QF5XAR
    fACppBePP3QF5XAR
    Po2GpWoUg3UvggRU
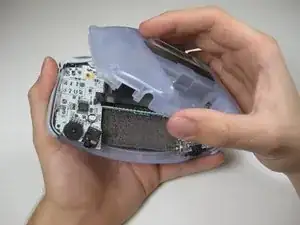
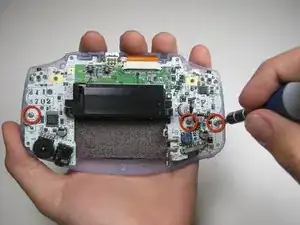
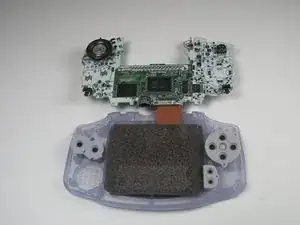
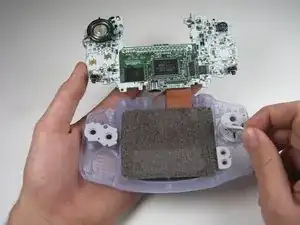
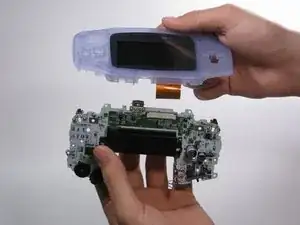
    • Pull circuit board away from the front panel by pulling up at the bottom of the circuit board, keeping the top ribbon still connected.

    • Beware not to damage the top ribbon by pulling up gently.

  9. ZhG4WYWRBXIQS1nl
    ZhG4WYWRBXIQS1nl
    TmsfPpSUY2P22rSV
    ZqTvGZGvqcNWTJxb
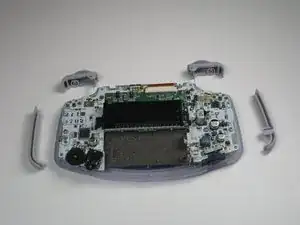
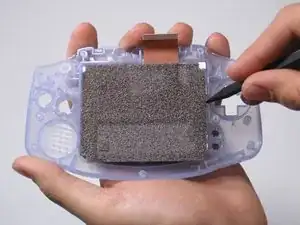
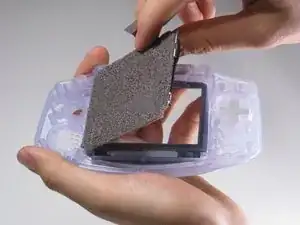
    • Remove the rubber button pads from their pockets.

    • Remove the plastic buttons and the D-pad from beneath the rubber pads with tweezers or by hand.

  10. Y1XGVqih1NjNZbsV
    Y1XGVqih1NjNZbsV
    BqM6MXAjJ3V2XfDh
    ZYQ4E4KRqZy6ME1W
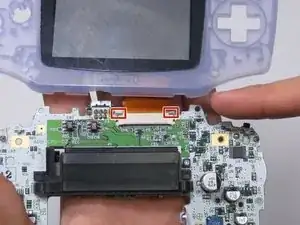
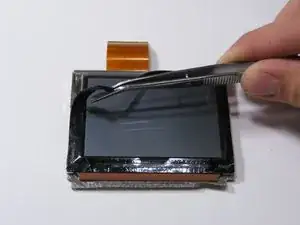
    • Use a spudger/tweezers/fingernail to unlatch the LCD ribbon port by pulling the grey tabs on the sides upwards (towards the top edge of the PCB).

    • Once the LCD ribbon port has been unlatched, the LCD ribbon should very easily slide out and can be removed with zero force using fingers or tweezers.

    Guide does not indicate that the ribbon cable port should be UNLATCHED before attempting to remove the ribbon cable, I strongly suggest revising this as someone unfamiliar with these style of ports may assume that the ribbon cable is a compression fit and just needs to be "pulled" free of the port.

    This is a terrible idea that will potentially result in tearing the ribbon! Please consider revising guide to add a step to indicate the proper method/detail for unlatching the LCD ribbon port! Thanks :)

    Ben Steel -

  11. StGr2Ks6JuTNdsoo
    StGr2Ks6JuTNdsoo
    fJZogxVx2dKyOrVY
    BGKsVlcA1ufbonoB
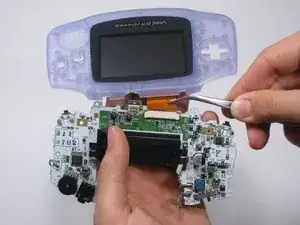
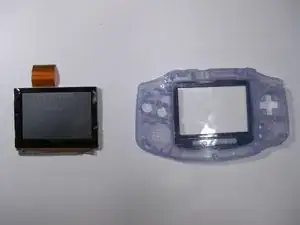
    • Use the spudger to lift the screen from the front panel. Place the spudger in the space directly left of the D-pad.

    • The screen and the front panel is connected by a black tape that could rip if not removed carefully.

    • You can use an iOpener or a hair dryer on the other side of the front panel in order to soften the black tape.

    This is a BAD place to pry on a functioning LCD. I used this exact method, slowly and carefully, and my LCD shattered.

    Instead, remove the lens (it’s worth it to sacrifice the lens adhesive to save your LCD), and gently and slowly press with a gloved thumb on a corner to push it through from the front of the Game Boy. Let the adhesive release itself, don’t force it. If the room is super quiet, you should be able to hear a faint peeling sound, even if you can’t see anything moving. That means you’re doing it right; just wait and it will release.

    trevorsklar -

    Actually you can just pry under the ribbon cable. The LCD has a metal frame there that allowed me to slowly and carefully pry from that point without (re)breaking my LCD.

    trevorsklar -

    Yep. Same thing just happened to me :(

    Robert Carlson -

  12. 6galgqIuLon5Ce6X
    • Use the tweezers to remove the black tape if needed.

Adam

Member since: 21/01/10

807 Reputation

7 comments

used this to replace the case and buttons on my GBA worked like a charm thanks!

Josh -

I dont understand. The items in “Tools featured in this teardown" is different from the tools written on the article e.g. Y0 in “featured" but Y1 in the “article”.

darelldechavez -

Bruh thx for

ColdPizza -

Great guide. My dumb ass didn’t see the screws holding the circuit board to the front shell lmao

RikaSprout -

What is the cpu

znlisowski@icloud.com -

I am having difficulty determining the size of the Tri-Point screws used on the Game Boy Advance. As a previous commenter noted the screw driver listed as “Tools Featured in this Teardown” shows a size of Y0, but in the text of the teardown it shows Y1. Can someone please clarify?

bhandl1 -

How do you remove the CPU and SRAM chips?

Steven Steele -