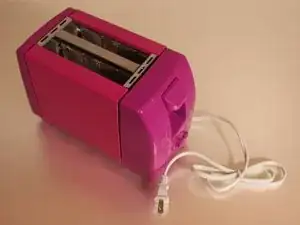
Introduction
As with any electrical device, unplug it before beginning work. Many toasters contain heating elements that act as exposed wires connected directly to the mains power. Never stick your hand inside the toaster slots in a toaster. There is a high chance of touching a live wire and getting an electrical shock. One's hand can also get stuck, which would be awkward and embarrassing.
-
-
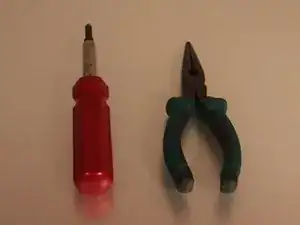
Gather the required tools: a #2 Phillips screwdriver and a pair of small needle nose pliers
-
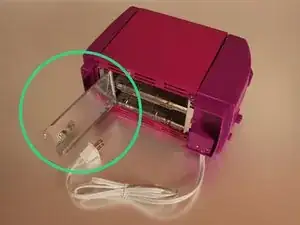
Remove breadcrumbs, if any, through the breadcrumb hatch on the bottom of the toaster.
-
-
-
Carefully pull the toaster lever straight off. It may require a fair amount of force and wiggling back and forth.
-
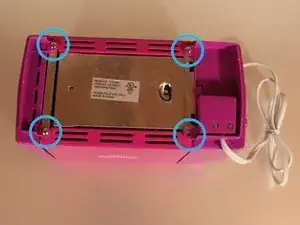
Remove the 4 screws on the bottom of the toaster. One screw has already been removed in this picture. It was lost in a terrible screwing accident and will make no appearance in this guide.
-
At this point the front and back plastic panels should fall away from the toaster. Do not worry if they do not; that will be addressed later in the guide.
-
Pull the bread crumb tray out by pulling it towards the front and slightly away from the toaster. It is also possible to rip it out with brute force and repair any damage to the sheet metal with a pair of pliers
-
-
-
Remove the front and back plastic panels. 2 plastic slides hold the panels to the toaster. Slide the panels straight down, towards the toaster bottom.
-
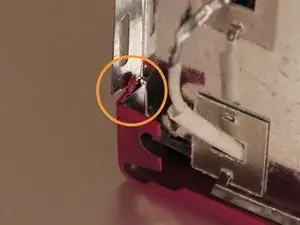
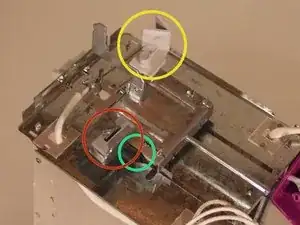
Locate the 4 tabs at the top corners of the toaster.
-
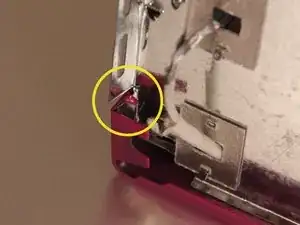
Bend the 4 tabs downward with the needle nose pliers to match the tab marked in yellow. Take care to not over stress the tabs and break them off.
-
-
-
One at a time, slide the metal side panels upwards and remove them from the toaster. The bottom flanges must be slightly bent outward to clear the toaster internals.
-
If the panels do not remove cleanly, double check that the tabs mentioned in Step 3 are clear of the other sheet metal parts in the toaster.
-
-
-
Remove the 5 screws on the PCB and switch. Only 3 screws are visible in the guide. 1 is lost forever and 1 is hiding in shadows.
-
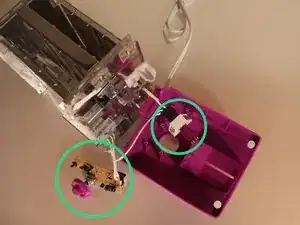
Carefully pull the control board and power switch off. The knob is fixed to the control board potentiometer. The Stop button is only held in by the control board.
-
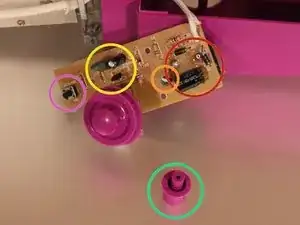
The control board features:
-
Rectifier
-
Frequency Divider (produces a period of about 30 seconds)
-
Stop Button
-
Simple NPN Switch
-
Electromagnet (on back)
-
-
-
The latch mechanism contains:
-
A ferromagnetic piece that the electromagnet holds
-
An arm to close the power switch
-
A spring to launch toast in a vertical direction
-
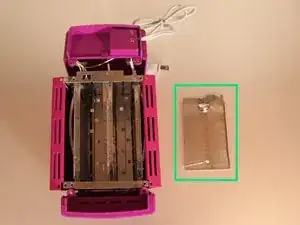
Pieces of electrical insulation board hold the wires. The heating elements are directly riveted to the boards and the boards are riveted to the sheet metal frame.
-
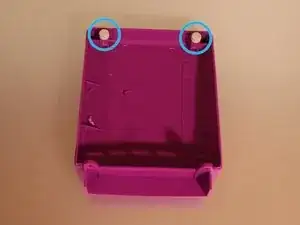
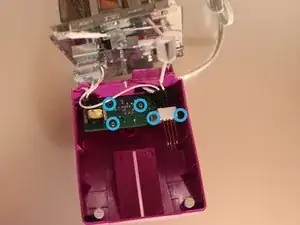
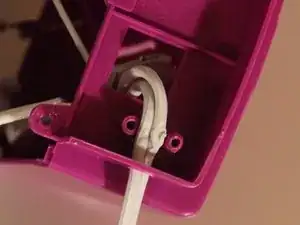
The strain relief can be removed by undoing 2 screws (blue). The screws have a special head type. They can be gripped with small needle nose pliers or wire cutters.
-
The strain relief cover comes straight off once the screws are removed
-
-
-
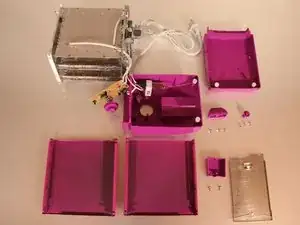
Congratulations! You have successfully torn down a 2 slice toaster.
-
Adventurous teardowners can take apart the sheet metal case by twisting the metal tabs that lock it together, but that might cause permanent damage to the toaster.
-

One comment
This is very similar to a “Mia Model TA 0404” (OEM: “YT-2001T” Ningbo Yonghao Food Industry Co., Ltd. Zhejiang, China) sold in Germany in 2007, however, that’s rated 230V~, 50 Hz, 750 W.
I found two sites with images:
- https://www.made-in-china.com/showroom/k...
- https://www.8mpay.com/toster-yt2001t?lan...
While the PCB dimensions seem to be the same, the electronic circuit is quite different (Mia has three transistors and a thermistor).
0x7F -