Introduction
Removing the battery is an important step because it takes away the power from the device so you don't harm any of the other components. It should be one of the first things you should do.
Tools
-
-
Flip the device over onto its back.
-
Find the side brush, and unscrew the single screw that connects to brush motor by using the Phillips head #2 screwdriver.
-
-
-
Using a Phillips #1 screwdriver, remove the four screws on the back panel.
-
Once the screws are loose gently pry the back plate away from the body by using the spudger tool.
-
-
-
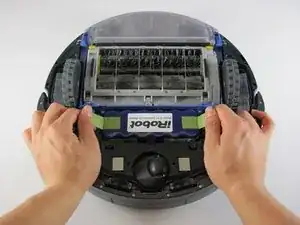
Grab the two pieces of green tape with your thumb and index finger
-
Pull up on the battery in an upwards direction to remove it
-
-
-
These are the contact points on the Roomba for the battery
-
These are the contact points on the battery
-
To reassemble your device, follow these instructions in reverse order.


