Introduction

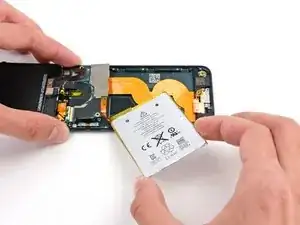
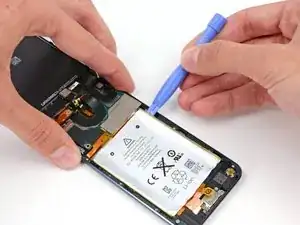
Prerequisite only, loosen the battery from the rear case.

  1. smfOLc6Iw1nMcIFL
    • Remove three 1.6 mm #000 Phillips screws securing the logic board to the rear case.

  2. DNBptMRXPLGdbc3U
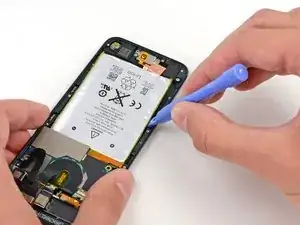
    • There are two strips of adhesive keeping the battery in place.

    • Turn the iPod over and heat the BACK of the aluminium iPod case. Do not heat the battery.

    • The aluminium case does not have to be hot; you should always be able to touch heated parts with your fingers at all times without it being uncomfortable.

  3. 5EZPQfvQNDxuKVrv
    5EZPQfvQNDxuKVrv
    VTJe4GUuiSk5CRRC
    • There are three notches on either side of the battery. In the next few steps, you will be using these notches to gradually pry the battery up from the rear case.

    • The battery is secured with large amounts of adhesive, so you'll need to go slowly and carefully to avoid puncturing or creasing the battery.

    • Insert a plastic opening tool into the top right notch and gently pry up on the battery.

    • Do not attempt to pry up the entire battery at this point; you just want to start to loosen the adhesive at each of the prying points, in turn.

  4. BVCuXxHoZC5CLVUA
    BVCuXxHoZC5CLVUA
    tCG5cZKiDQFDoat2
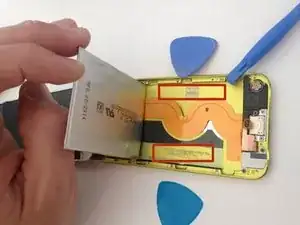
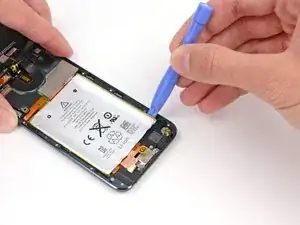
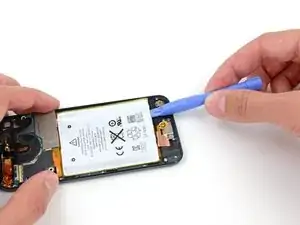
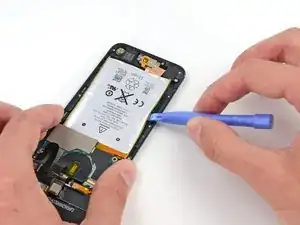
    • Continue with the lower right notch. Insert the plastic opening tool into the notch, and gently pry up on the side of the battery.

  5. DxfMBArClCbEpWOn
    DxfMBArClCbEpWOn
    MJk5dHvtrWYZQMKP
    • Continue prying the battery up from the bottom.

    • When prying along the bottom, be careful not to press down too hard against the speaker or headphone jack.

  6. qoajNaoATRCxOBx1
    qoajNaoATRCxOBx1
    pRQ2yExWXFWeOrEh
    • Pry along the left side as well.

    • You may need to move back and forth between the sides and bottom of the battery, prying a small amount at a time until the battery is entirely free from the adhesive.

  7. gcHWYZefXHQW4qmp
    gcHWYZefXHQW4qmp
    OYHfhEVnFxuEajMj
    YFu1IqKh16cu2GPk
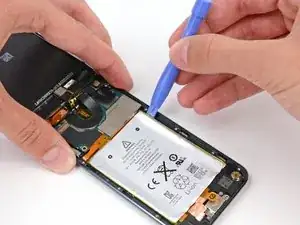
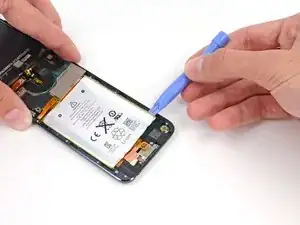
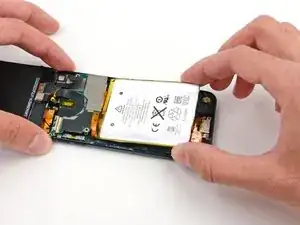
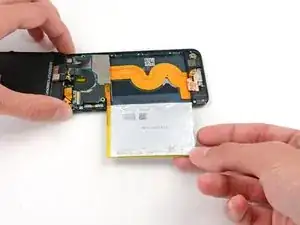
    • Once all of the adhesive is loosened, lift the battery up from the bottom and swing it out over the left side of the rear case.

    • Be sure not to yank it out, as it is soldered to the logic board.

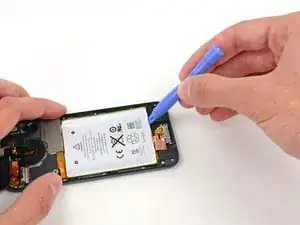
    • Flip the battery over to straighten its cable and set it down.

Conclusion

To reassemble your device, follow these instructions in reverse order.

Tarun Thiruma

Member since: 20/11/19

35226 Reputation

0 comments