Introduction

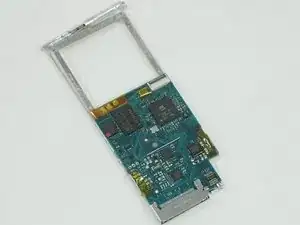
Your iPod's motherboard controls just about everything on the iPod and includes the headphone jack.

  1. uRvrnZJYQ4QXAueM
    • Before opening your iPod, ensure that the hold switch is in the locked position.

  2. XvqkhFsGQbNwaKGg
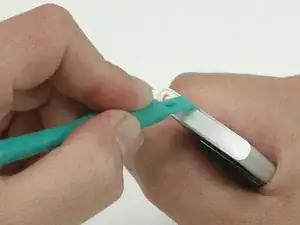
    • Carefully insert an iPod opening tool in the seam between the metal casing and white plastic top.

    • Lift the top bezel off the iPod. It's glued on using a mild adhesive, so some force may be required.

  3. fAksAYvQta6HdPGp
    • When removing the bottom bezel, be sure not to bend the plastic surrounding the dock connector.

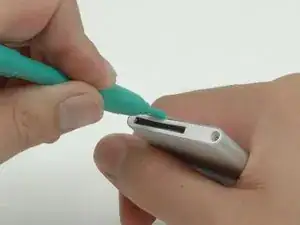
    • Carefully insert an iPod opening tool in the seam between the metal casing and white plastic bezel.

    • Lift the bottom bezel off the iPod. It's glued on using a mild adhesive, so some force may be required.

    I tried using a heat gun to soften the glue, but it ended up melting the white plastic part.

    gordonhamachi -

    I used an Avid Power heat gun at setting 3 heat and 2 fan and did not melt it. I pointed it at the metal case not the plastic thanks to tip above and kept my hand wrapped around it so I could tell how hot it was getting. If it was too hot to keep my hand there then I deemed it would be too hot for the plastic. That seemed to do the trick and loosen the adhesive just a little bit to help with extraction. Thanks gordon.

    N. Watson -

  4. LoNuLUdhfZUCkMTN
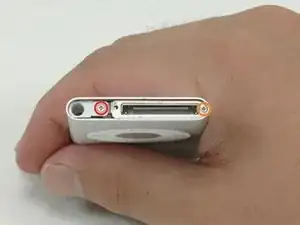
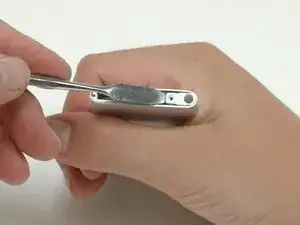
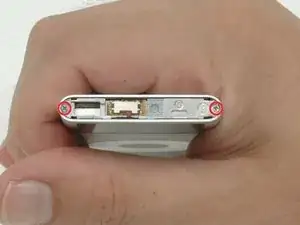
    • Remove the following two screws:

    • One #00 Phillips screw with a large head near the headphone jack.

    • One #000 Phillips screw with a smaller head near the side of the iPod. This screw strips easily, so be sure to press down firmly on the screwdriver.

    On the iPod I worked on, #000 Phillips was the correct bit. Not #00.

    Eric -

    my small screw is completely stripped, what can I do?

    wittyahole - -

  5. 2Lb5LGRf1xw5lHuh
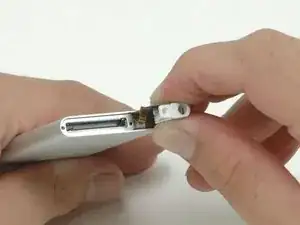
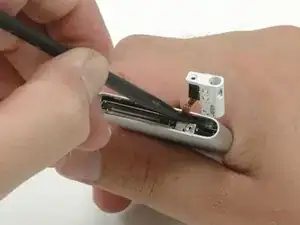
    • Use a metal spudger to carefully pry the headphone jack out of the casing. DO NOT remove the headphone jack from the iPod entirely, as it is connected via a fragile ribbon connector to the click wheel.

    I used electrical or beading tweezers that were in my kit to remove headphone jack, seemed to work well also.

    N. Watson -

  6. MSaSqU2lCIRIUAUn
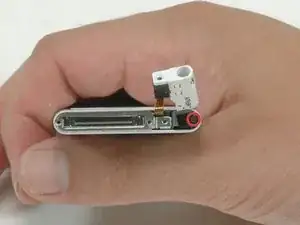
    • Slide the headphone jack out until the white plastic housing is no longer held in place by the metal casing.

  7. DmhPA1tLKiKYVtba
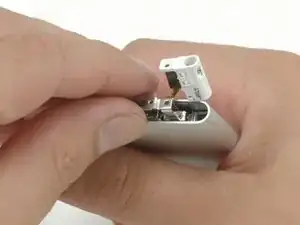
    • Remove the newly-revealed Phillips #00 screw from beneath the headphone jack. Be careful, this screw is easily stripped.

    I logged this as a success, but I actually wound up stripping the screw on this step (I printed out earlier instructions that didn't have the warning). Reassembled it without said screw and I'm hoping for the best!

    anja -

    The screw on this step also stripped when I was following this tutorial, despite being very careful and taking the time for everything. This really happens _REALLY_ easily!

    I too reassembled the iPod without this particular screw. So far I've noticed no side-effects from this.

    Ultimately I was able to complete the whole guide and repair the Nano succesfully! :-D

    wil -

    i have also stripped this screw in this step. can i change the display without removing this screw? any help is greatly appreciated

    Lori Baldridge -

    I used a Phillips #000. No issues with the screws.

    JPagan -

    Also used #000 on all screws around bevels based on comments with success, thanks peeps!

    N. Watson -

    I stripped my screw on this step, i did everything method from google. But stuck, how can i solve it?

    Rakai -

    I agree. You want to use a Philips #000 here.

    Sam Dissanayake -

    I tried using a Phillips #00 and almost stripped it, but I got it out with a 1mm flathead (all of my other Phillips drivers were too large)

    David Harrell -

  8. qQSmVENkDDyeuHFH
    • Lift the bottom bezel bracket out of the iPod.

  9. ppFWngX3ARNScMo6
    • Remove the two Phillips #00 screws from the top of the iPod.

    Had to pick out resin with dentist tool to enable Philips driver to engage screw heads.

    Need to be very slow and careful with sharp end of dentist pick.

    afdelaurier -

    Use a Phillips #000.

    JPagan -

  10. rQHKYyPaWHeWTVcf
    • The highlighted connector attaches the click wheel and headphone jack to the logic board. This cable must be disconnected from the logic board before continuing.

  11. RcKwNqm3QIiXQmbF
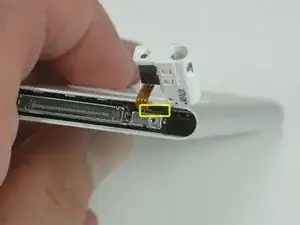
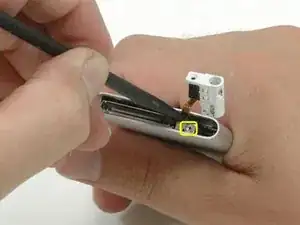
    • Use a spudger to disconnect the headphone jack cable from the logic board. You need to gently pry the connector toward (or up, if you like, the connector is like LEGO® building blocks) the front of the iPod until it comes loose from the logic board.

    • Special hint for the reassembly: Push the connector inside until it is over the corresponding connector of the logic board. Then insert a thin tool over the connector and push it down onto the logic boards connector.

    When reassembling, the jack connector cable broke :'( iPod woking fine, with a new battery.... but no more sound. Grrrr

    TheRV -

  12. KJHIZdv3GHgOjOfk
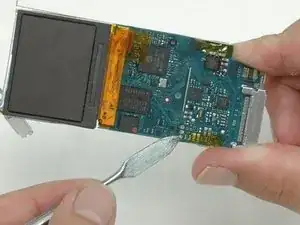
    • Use a spudger to push the logic board through the iPod out of the casing. The click wheel and headphone jack should remain in the iPod.

    • Be careful not to catch the headphone jack and click wheel on the logic board as you remove the logic board and display.

    The headphone ribbon and the click wheel is on the top side of the cover, so be sure to apply force toward the down side to avoid scratching the click wheel's PCB.

    [deleted] -

    Before pushing I carefully used the spudger to move the top bezel (with the hold switch) out of the case first. Be careful, it’s got a tiny ribbon cable. But getting that out first made the logic board slide out relatively easily.

    jack.jansen -

    I really appreciate that tip! Couldn’t get mine out until I did that and it slid right out

    Timothy -

    If you have a swollen battery, as I did, it was not possible to remove logic board. My case was visibly expanded near the top making everything inside locked in position. I did the disassembly before any part purchases. If I got to the point where everything came apart nicely, I'd invest in the parts. Thank you ifixit.com for the comprehensive instructions and parts for this procedure.

    armcomdes -

    @armcomdes - well done! I wish i’d read your insight before ordering my replacement battery. My nano 2g battery is swollen, and only a sledgehammer could move any part that it now locks in place. So long, nano. I’ll try to return that sealed battery.

    Your insight should be at the top of all related nano pages: swollen battery? iChuckit is your only real option

    dantegd -

  13. sbWaUe4CAWRpUmEE
    • When removing the logic board, place the tip of the spudger into the hole where you removed the screw and gently push it out. The crevice will keep it in place and decrease the chance of you damaging your board.

    My battery swelled and it was not possible to push out. Looks like I cracked the screen trying to free it up inside the case.

    SEAN Tanton -

    It is possible to remove a swollen battery although I think the correct term is definitely birth a swollen battery, as I just did 1 successfully and 1 unsuccessfully to the rest of the ipod, but still removed! If the battery is swollen, in most cases the screen may already be cracked or will get that way in order to get it out. Very poor design to retrieve Li-ion batteries for recycling. The battery that I was successful in getting out without damage was actually much more swollen than the other one but I learned from the 1st 1. I used a carpentry nail set so I did not put the tip inside the hole but on that piece of metal, which is quite strong. I put a piece of paper over the headphone connection to add some protection in case my nail set slid off while pushing. It took at least an hour or more, probably more but I had to take lots of breaks. Most of the time seemingly not budging it at all. My hand hurts now where I was gripping the ipod.

    N. Watson -

    Cont.—-I would love to make my own pictorial about it because I had to push on it in such a way that I could still use my headlamp to see what I was doing and control where the nail set was pushing and not let it slip out of place. Before I started pushing I also used 1 of my blue plastic triangles to wedge some coconut oil down both the battery side and screen side. I really do think that helped a lot and may have even been a key factor so if anybody has a more appropriate lubricant for this type of electronics, I am open for suggestions. I wouldnt want to do it again but it was very beneficial to learning about how much force it can take and discovering some other tools that worked better in that situation. Also taking apart an ipod that didnt have a battery issue was so easy, I feel like a master now, lol.

    N. Watson -

    my ipod is old and the screen is white (it was my moms). also can you sum this down im olny 10

    Danielle Gatewood -

    It just means he wants you to use whatever tool you're using and push the rest of the iPod out via pushing through that hole, good luck!

    Finn Brandt -

  14. qUNJQJo6gTtYj21j
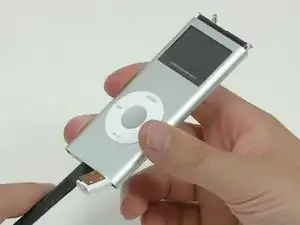
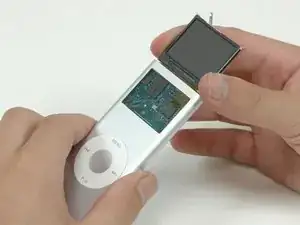
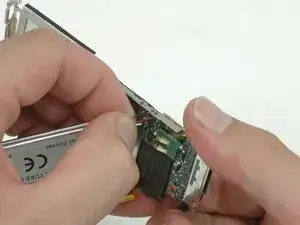
    • Completely remove the display and logic board from the metal casing.

    • When reassembling, ensure that the battery is well seated. If the fit is too tight, the edge of the display will score the inside of the screen window.

    When sliding back the logic board, watch out not to put too much stress on the side with the screen and the window, cause it may lead to annoying stripes on your window

    Jasper Jonkman -

    reassembly : use a small dry paint brush to remove dust and crime from display screen to avoid spots .

    afdelaurier -

    On my nano, step 13 there is no screw on the yellow indicated spot, instead there is a screw deep in the housing below the headphone connector on the side

    Grit -

  15. KUPOQW6cRcBYdemi
    • Use a spudger to scrape away the black glue covering the three battery wires.

  16. BS6LZGkqMiYFXMVZ
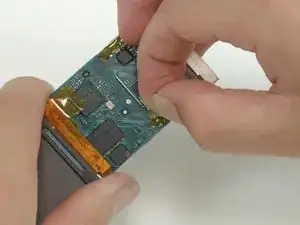
    • Peel up the orange tape covering the three solder points on the other side of the logic board.

  17. ZCLTSFCG1RXisSvM
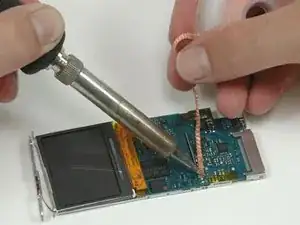
    • Place the desoldering wick on top of the existing solder ball.

    • Place the soldering iron on top of wick above the existing solder ball.

    • Hold the soldering iron in place until the solder melts into the wick.

    • Repeat the same procedure on the remaining two connectors.

  18. RGEAHPEFjjjLBpM4
    • Be careful not to scrape the metal rings surrounding the connectors off the logic board. If you accidentally scrape these off, you won't be able to reconnect the replacement battery.

    • Use a metal spudger to carefully straighten the battery wires. Be sure to only touch one contact at a time.

  19. CAj65YWGU45BTTMW
    • Pull the battery wires through the logic board to free the battery. If the wires don't easily come free, make sure the wires are straight and all the solder has been removed.

  20. FNBOBhhGtrmQtHvy
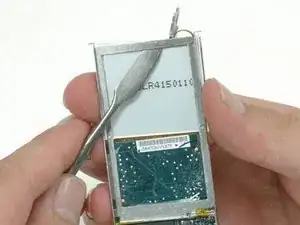
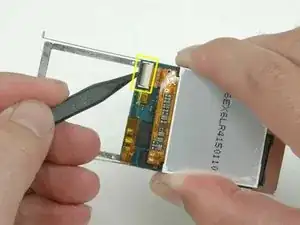
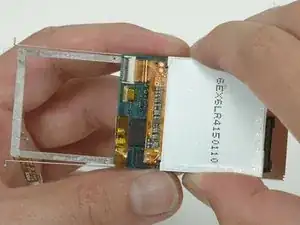
    • Use a metal spudger to carefully pry the metal bracket off the back of the display. Make sure you only pry off the bracket and not the clear shielding on the rear of the display. By working from the inside of the display, you won't be able to accidentally pry up the clear plastic shielding.

  21. gquYMgBhKnhWKbVj
    • Peel up the orange tape covering the display ribbon cable.

  22. bILYTAZgwuvE6HoK
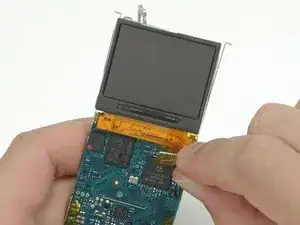
    • Use a spudger to flip up the black plastic tab holding the orange display ribbon in place. The tab will rotate up 90 degrees, releasing the ribbon cable.

  23. BMfQgO5EHkOOO5TT
    • Slide the display ribbon out of its connector and lift the display off of the logic board.

  24. CAuPIKvXP34RPelU
    • Logic board remains.

Conclusion

To reassemble your device, follow these instructions in reverse order.

iRobot

Member since: 25/09/09

0 Reputation

0 comments