-
-
NAND replacement is a common repair procedure in iPhone repair, whether for storage upgrade or fixing issues like not turning on caused by a damaged NAND. For NAND replacement, a NAND programmer is needed to read and write the NAND data.
-
-
-
Today we will repair an iPhone with the latest NAND programmer P12. Compared to other NAND programmers on the market, P12 supports a wide array of models, which includes NAND read & write and WiFi unbinding for iPhone 6-iPhone 11 Pro Max and some iPad models. What's more, P12 can work without an internet connection and is free for use permanently.
-
-
-
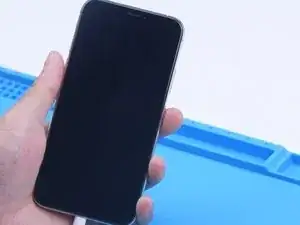
Then we use P12 to fix an iPhone XS that won't turn on. The iPhone XS is unable to boot up.
-
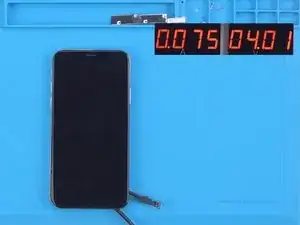
Then we disassemble the phone for further testing. Connect the motherboard with Power Cable. The boot current only has 75 mA. It can be preliminarily judged that the system is faulty.
-
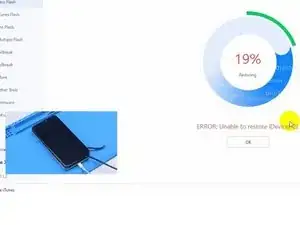
Next, connect the phone with the computer. The phone is in DFU mode automatically. The flashing gets stuck at 19%. We can confirm now that the not turning issue is induced by faulty circuits related to the NAND.
-
-
-
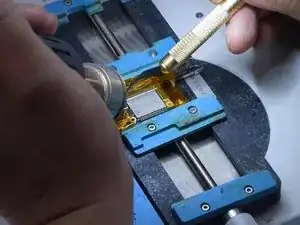
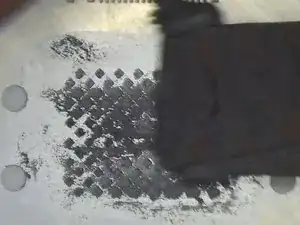
The next step is to replace the NAND with a new one. Remove the display and detach the motherboard. Apply high-temperature tape around the motherboard. First of all, remove black adhesive around the NAND with Hot Air Gun at 280 °C.
-
Pry up the NAND with Hot Air Gun at 400 °C.
-
-
-
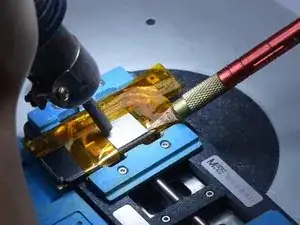
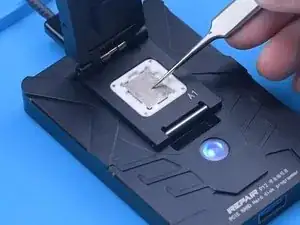
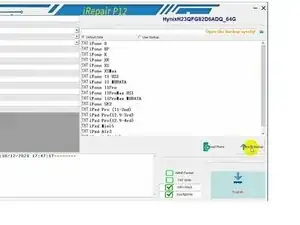
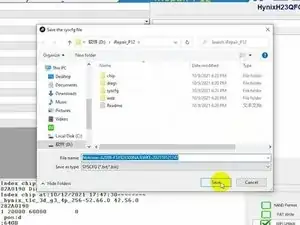
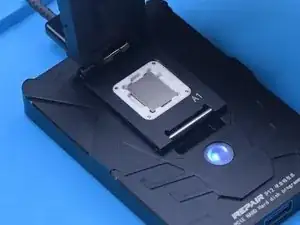
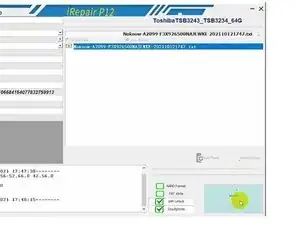
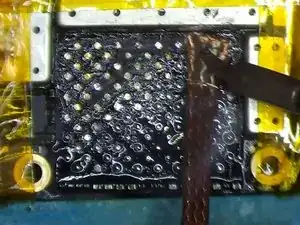
Attach the NAND to P12. Please pay attention to aligning the NAND with the A1 pin. Click "Syscfg Backup". Then save the data.
-
-
-
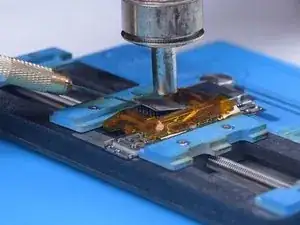
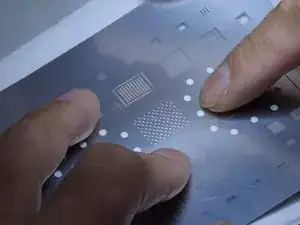
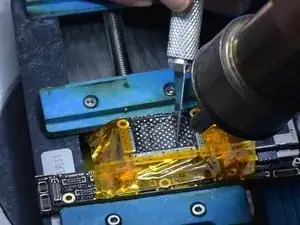
Next, we reball the NAND with the written data. Place the reballing stencil in position. Apply a layer of middle-temperature Solder Paste evenly. Heat with Hot Air Gun at 340 °C.
-
-
-
Before NAND soldering, we need to remove tin on the bonding pads. Apply some middle-temperature Solder Paste with Soldering Iron. Clean the bonding pads with Soldering Iron and Solder Wick.
-
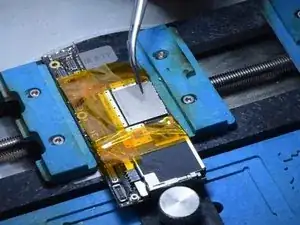
Remove black adhesive on the bonding pads with Sculpture Knife. Then clean the bonding pads with PCB Cleaner. After cleaning, apply some Paste Flux Align the new NAND. Heat with Hot Air Gun at 380 °C to solder.
-
-
-
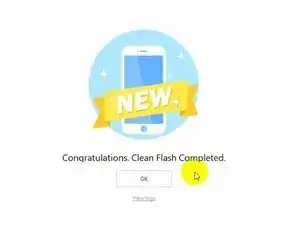
Then we install the motherboard. Connect the phone with the computer to flash. The flashing has been successful.
-
The phone turns on normally. After activation, the phone also functions well.
-

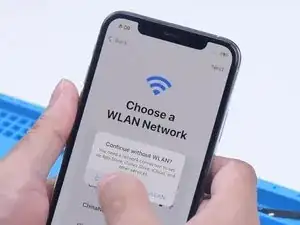
To reassemble your device, follow these instructions in reverse order.

One comment
Can i put the NAND to other phone will it work