Introduction

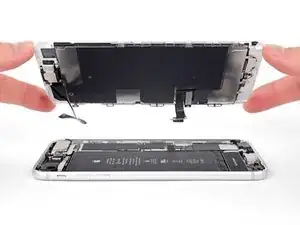
Prerequisite-only guide for detaching the display assembly from the iPhone 8 Plus.

  1. hSevVTlWDAgGghXZ
    hSevVTlWDAgGghXZ
    xRZuRojAQGBGB3jM
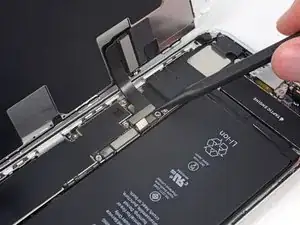
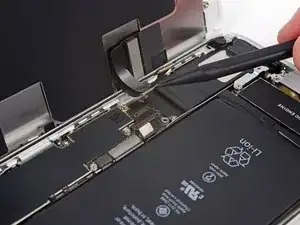
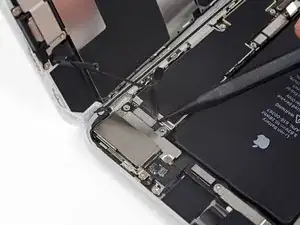
    • Use the tip of a spudger or a fingernail to disconnect the large lower display connector by prying it straight up from its socket.

    • To re-attach press connectors like this one, press down on one side until it clicks into place, then repeat on the other side. Do not press down on the middle. If the connector is even slightly misaligned, the connector can bend, causing permanent damage.

    I got hold of a iPhone 8 Plus with cracked screen that I am planning to fix.

    Here is my problem:

    When I tried to take out the screen from my phone, (step 15-18) I was curious about the new screen, so I tried to connect it. It was completely dead! Then I tried the old cracked one, and suddenly that was dead to! This is a phone that some fool has been inside earlier and changed battery, but I suspect he has done some more really stupid things. The Taptic Engine is living its own life and vibrating every time I slightly touch the home button. (I have a new Taptic Engine) The phone is also full of dust and small particles that does not belong there. One tri-point Y000 screw (step 18) is even missing! Now the biggest problem is that both screens are black! I know the phone is on, because I hear voice command speak when I turn on the power. The screen worked before I tried to change it? And one last thing: My new LCD screen came with new flex cables. Is it possible to switch over, so I can use the old ones?

    smikalsen -

    Hi,

    Is your problem solved?

    Daniel Leprince -

    Be careful of damaging MOSFETs by the LH side of the large lower display cable. After replacing the battery and turning the device on, the phone showed low charge and didn't have a charging symbol even after plugging into multiple cables and chargers. Turns out I had damaged the logic board attempting to disconnect the connector.

    Chris Cerrudo -

  2. aWkRBoqdn5JLDxut
    aWkRBoqdn5JLDxut
    NNsd3K6mmfCyvmLZ
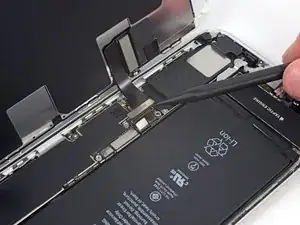
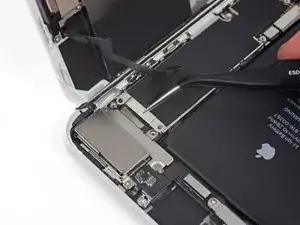
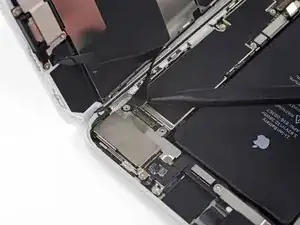
    • Disconnect the second lower display cable connector, directly behind the one you disconnected in the previous step.

    I used the other end of the spudger on this connector and it seemed to work a little better for me. I came in from underneath the top-right edge instead of the bottom right.

    Jessica Kirsh -

  3. oJa4BeNCiLydYrFd
    oJa4BeNCiLydYrFd
    GA64GXyHWNMhEGK5
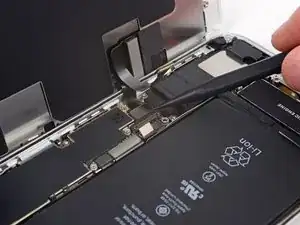
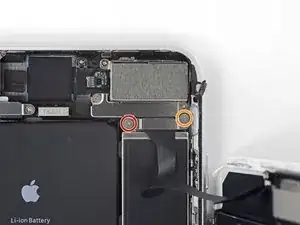
    • Remove the two tri-point Y000 screws securing the bracket over the front panel sensor assembly connector:

    • One 1.0 mm screw

    • One 1.2 mm screw

    una vite da 1mm e due viti da 1.2 mm???

    Matteo Carachino -

    Ciao Matteo! Grazie per l’osservazione. Ho appena modificato il testo :) La traduzione è aperta a tutti. Hai quindi la possibilità di fare le tue suggestione direttamente nel testo e sei il benvenuto se vuoi usare di questa possibilità nel futuro. Grazie ancora per la vigilanza! Saluti, Claire

    Claire Miesch -

    The tool kit does include a 1.0 or1.2mm screwdriver! How am I supposed to remove those screws?

    peter frommer -

    Bought the screwdriver that supposedly fits these screws and it still doesn’t work.

    hypercarduser -

    My bracket looks different. Can’t get these screws out.

    Ray Rushing -

    kit came with wrong bit. i received 2x P02 (penta tips) and no tri point y000.

    Christopher Shane Gripp -

    There is no such thing as a trigger point y000 screwdriver. Why couldn't they use Philips like the rest of the screws.Nobody knows what these trips point y000 even look like. this is a scam to force you to buy a new phone.

    Al tb -

    y000 tri-point screw driver comes with the iFixit repair kit at minimal cost

    godo -

  4. hBRGDcEYEQNRA2A1
    • Remove the bracket covering the front panel sensor assembly connector.

  5. GacqUhpZexRIIL1r
    GacqUhpZexRIIL1r
    gTmxBknJLSOFdNJx
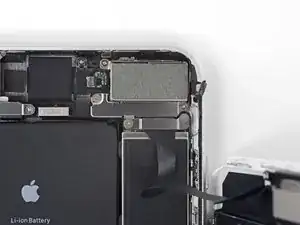
    • Use the tip of a spudger or a fingernail to disconnect the front panel sensor assembly connector from its socket.

    What happens is this strip is torn and how does one fix it

    Mijinyawa Dauda -

  6. AVYiAe5OJSrbfHdg

    Should there be a step somewhere in here to point out when to remove the blue plastic from the new iFixit screen?

    Paul Santora -

Conclusion

To reassemble your device, follow these instructions in reverse order.

Jeff Suovanen

Member since: 06/08/13

427153 Reputation

0 comments