Introduction

Prereq only for logic board.

  1. fxownC3PGcvJQQRl
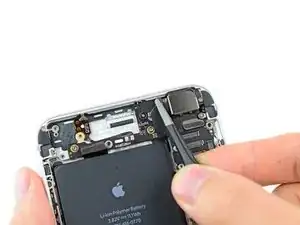
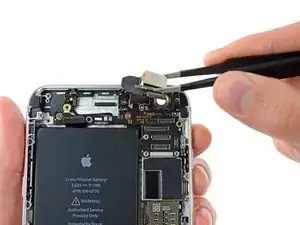
    • Use a pair of tweezers to peel back the piece of tape covering the hidden screw securing the rear-facing camera bracket to the rear case.

  2. gsRjqmltFGfCRMFF
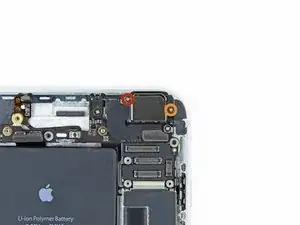
    • Remove the following screws securing the rear-facing camera bracket to the rear case:

    • One 1.7 mm Phillips #00 screw

    • One 2.3 mm Phillips #00 screw

    In my case, the rear facing camera was connected to the antenna clip with a piece of black tape, the two can come off together if removed very carefully

    derwentx -

  3. TSFYocEGRn6RfjJD
    • Lift and remove the rear-facing camera bracket off the rear-facing camera.

    On my iPhone 6+, the screw removed in step 41 had to come off too as the part number A21-2247A is attached to this cover… seems to have a tiny coil or other component connecting the (ground) post at the 1.6mm screw in step 41

    Matthew Goheen -

    Apparently the antenna clip in step 41 has self adhered to my rear facing camera cover… had I not already removed the screw from step 41 it would have broken when I pulled that cover with just two screws off

    Matthew Goheen -

    WARNING:

    When doing this step 35, you must do step 41 (Simply undo the small screw under “One 2.3 mm Phillips #00 screw “ as well) .

    Step 42 shows a ribbon. This ribbon seems to be stuck on the rear-facing camera bracket (step 35).. so pulling rear-facing camera bracket off  , be careful it is not adhered and pulling off Step 42 ‘s ribbon!

    It is electronic and a ribbon.

    Anyname -

  4. rTPYFRBa41aqguHt
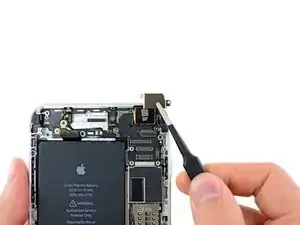
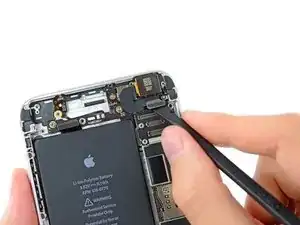
    • Use the flat end of a spudger to disconnect the rear-facing camera connector from its socket on the logic board.

  5. hAQuTADJHht2a3q1
    • Carefully lift and remove the rear-facing camera out of the iPhone.

Conclusion

To reassemble your device, follow these instructions in reverse order.

Walter Galan

694047 Reputation

0 comments