Introduction

Prereq for display assembly.

  1. SBlkTVGogWclLvRN
    SBlkTVGogWclLvRN
    tGGCUyDTLGGtcOME
    W4nCObTTDgZnIpev
    • The next two steps demonstrate the Anti-Clamp, a tool we designed to make the opening procedure easier. If you aren't using the Anti-Clamp, skip down three steps for an alternate method.

    • For complete instructions on how to use the Anti-Clamp, check out this guide.

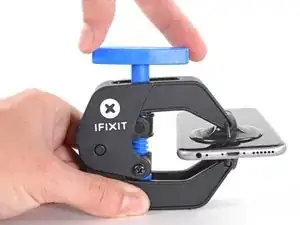
    • Pull the blue handle backwards to unlock the Anti-Clamp's arms.

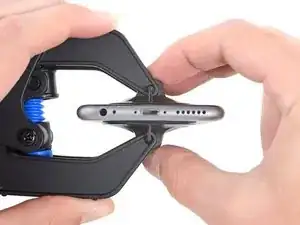
    • Slide the arms over either the left or right edge of your iPhone.

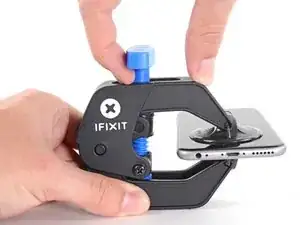
    • Position the suction cups near the bottom edge of the iPhone just above the home button—one on the front, and one on the back.

    • Squeeze the cups together to apply suction to the desired area.

    • If you find that the surface of your iPhone is too slippery for the Anti-Clamp to hold onto, you can use tape to create a grippier surface.

  2. RDiNQyxvb5Aijlf6
    RDiNQyxvb5Aijlf6
    p1RYLeVRPjmbDtOf
    THpGQ5vNQfxdiEaP
    • Pull the blue handle forwards to lock the arms.

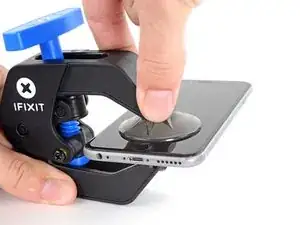
    • Turn the handle clockwise 360 degrees or until the cups start to stretch.

    • Make sure the suction cups remain aligned with each other. If they begin to slip out of alignment, loosen the suction cups slightly and realign the arms.

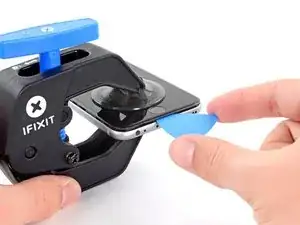
    • Insert an opening pick or tool under the screen when the Anti-Clamp creates a large enough gap.

    • If the Anti-Clamp doesn't create a sufficient gap, rotate the handle a quarter turn.

    • Don't crank more than a quarter turn at a time, and wait a few seconds between turns. Let the Anti-Clamp and time do the work for you.

    • Skip the next three steps.

    Use clear nontextured tape place that over the phone screen. Refer to any guide that addresses replacing a shattered screen

    Abigail Cherry -

    I know it's tough with cracked glass. You just need enough to get in a plstic pry tool or guitar pick. Then you can pry it apart. Just be patient, I cannot stress that enough; the electronics are very, very small and fragile.

    Mike -

Conclusion

To reassemble your device, follow these instructions in reverse order.

Walter Galan

694047 Reputation

0 comments