
Introduction
Prerequisite for removing the battery after the logic board.
-
-
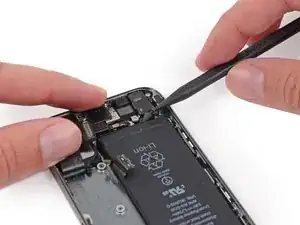
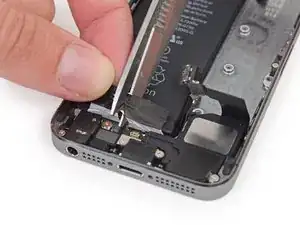
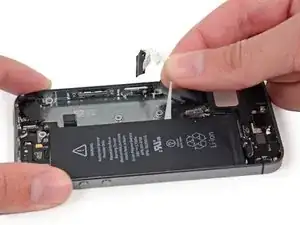
Insert the tip of a spudger into the hole in the battery adhesive tab near the headphone jack.
-
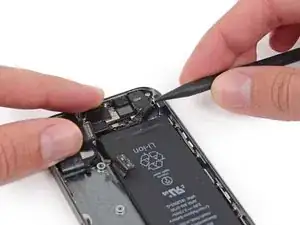
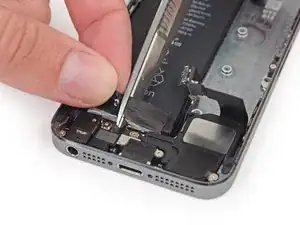
Lift the tab up slightly and use the spudger to unfold the tab from its recess.
-
-
-
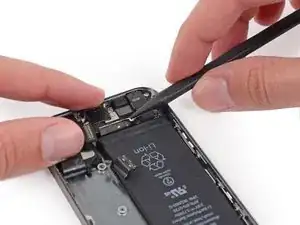
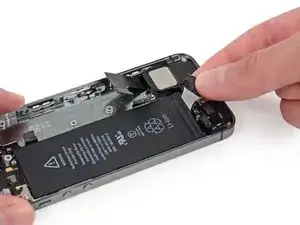
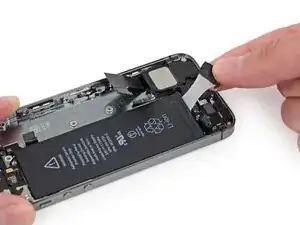
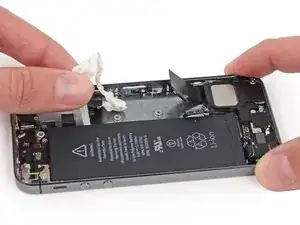
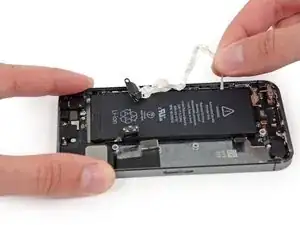
Pull the battery adhesive tab straight up from the phone.
-
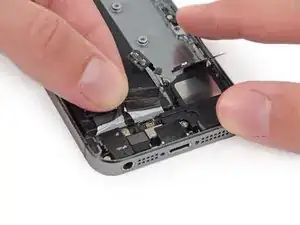
Cut the black battery adhesive tab between the two white adhesive strips, separating them.
-
-
-
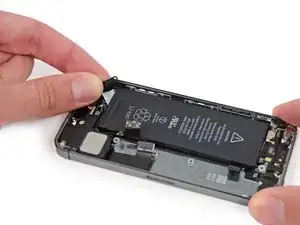
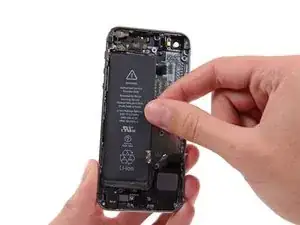
Slowly pull one of the battery adhesive strips away from the battery, toward the bottom of the iPhone.
-
Pull steadily, maintaining constant tension on the strip as it slips out from between the battery and the rear case. For best results, pull the strip at a 60º angle or less.
-
-
-
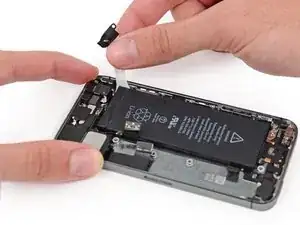
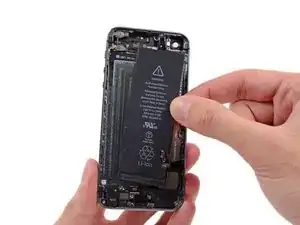
Repeat to remove the second adhesive strip.
-
If you removed both strips successfully, skip the next two steps.
-
-
-
If any of the adhesive strips broke off and the battery remains stuck to the rear case, prepare an iOpener or use a hair dryer to heat the rear case directly behind the battery.
-
-
-
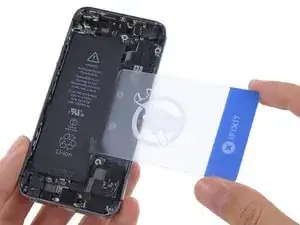
Flip the iPhone back over and insert a plastic card between the case side of the battery and the rear case.
-
Press the card in farther to break up the adhesive behind the battery.
-


To reassemble your device, follow these instructions in reverse order.

2 comments
I feel like this guide should at least start with a link to another guide on opening up your phone. It’s weird that it just jumps in assuming your phone has already been opened. From a UX perspective, I should have to hunt around for a preceding guide when the topic of this one shows up on the top of my search results and describes exactly what I want to do.
alex -
Use this battery guide to replace your battery. This guide is a prerequisite to remove the battery in the course of another repair, and isn’t meant to be followed on its own.