Introduction
Internal prerequisite with front facing camera removed.
Tools
-
-
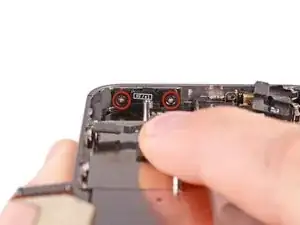
Remove the two 1.6 mm Phillips screws securing the power button bracket to the outer case.
-
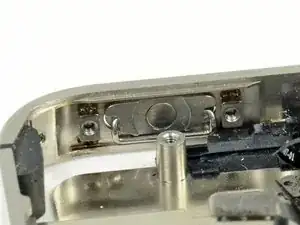
Slightly pull the power button bracket away from the outer case.
-
Conclusion
To reassemble your device, follow these instructions in reverse order.


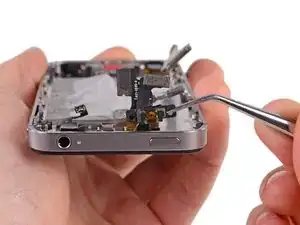
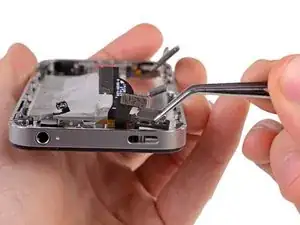
This is the most dangerous step of all !!! You have to be VERY careful with the digitizer and screen ribbon cables when you bend it back to unscrew lock button. It is best to partially remove the screen so that you can get the cables out of the way (you've already disassembled most of the phone anyway, a little more won't hurt). The first time that I did this repair, I ended up damaging the cable and my screen was useless. Many people that I have talked to suggest the same thing!
Felipe Da Cruz -
This exact thing happened to me. Be very careful as a cheaper power/sensor cable repair can quickly turn into a more expensive screen replacement as well.
umagon1337 -
My screen is stuffed too. All because I bent the cables like the photo.
Stephen Shaw -
Yea, this went wrong in my attempted repair last night. It would be really great if step 28 included a warning here, or insert a step to remove the screen so those ribbon cables are safely out of the way!
I can't tell you how disappointing it is to find the cause of my failed repair in hidden comments 8^(
bdv -
Another solution for this step is to carefully push the digitizer and screen ribbon cables down (into the back of the front screen) instead of bending them back. If you do this carefully, you can minimize how much the cables bend and still have enough clearance to angle a screwdriver in from the top to remove the rightmost screw.
This worked for me without damaging the cables. I did not have to remove the front screen either.
Michael Huynh -
I tried this and it worked, thanks. I was worried with the comments about damaged video connectors, but everything luckily worked after putting it back together and powering on.
davisyang -
Also, if your "power button is stuck", you may not have to replace the whole power cable. After you unscrew the power button bracket, you should see a small black dot in the center of the gold colored area (where the button makes contact). Usually, stuck power buttons mean that either this black dot has worn away or has been shifted/misaligned. If the black dot is misaligned, put it back in the center and test if this has solved the issue. If the black dot does not exist, find/cut a small piece of rubber and carefully glue it to the center of the gold area. I cut a small piece of rubber from a thin o-ring and then used a dab of superglue to attach the rubber. Another commenter used nailpolish instead of rubber to create enough height to contact the power button. After all of this, screw the power bracket back on and test the power button. If the power button does not click, it may be that you screwed the bracket on too tightly such that the button is always depressed. Loosen the bracket screws.
Michael Huynh -
I guess this is where I lost the screen. In any event... the power button now works, and I have sound, but no picture. I can't even punch in my PIN to reformat the phone and give it away.
steve -
Btw, this was written in the comments for the 4S Power Button and Sensor Replacement, so if you see it anywhere else, caveat lector
steve -
I was careful but I did kill half the digitizer, presume a broken cable and will sell it for parts.
paulverket -
The right hand screw thread stripped on my repair. I reassembled it with only the left hand screw holding it in and it is working OK.
gregm -