Introduction
Use this guide to replace a broken front facing camera.
Tools
Parts
-
-
Power off your iPhone before beginning disassembly.
-
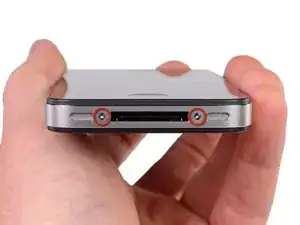
Remove the two 3.6 mm Pentalobe P2 screws next to the dock connector.
-
-
-
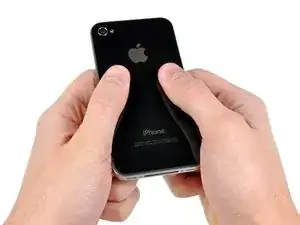
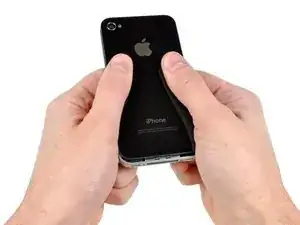
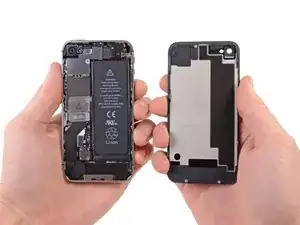
Pull the rear panel away from the back of the iPhone, being careful not to damage the plastic clips attached to the rear panel.
-
Remove the rear panel from the iPhone.
-
-
-
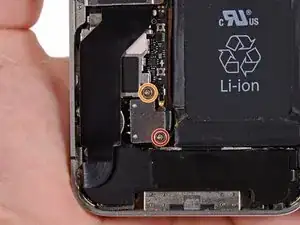
Remove the following screws securing the battery connector to the logic board:
-
One 1.7 mm Phillips screw
-
One 1.5 mm Phillips screw
-
-
-
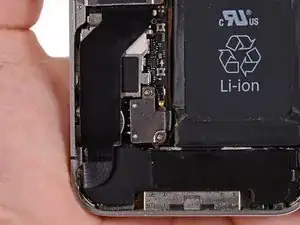
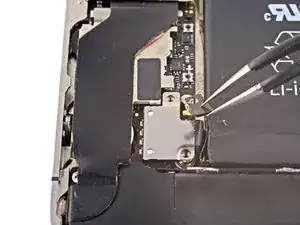
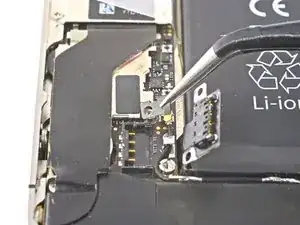
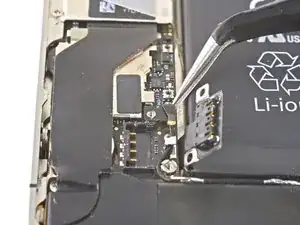
Carefully push the pressure contact away from the battery connector until it slides free from its position.
-
Remove the pressure contact.
-
-
-
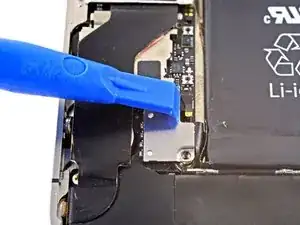
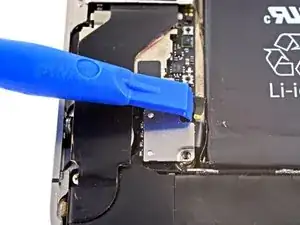
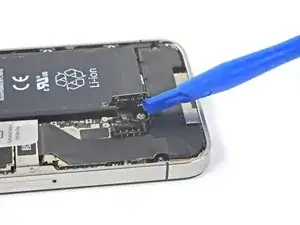
Use a plastic opening tool to gently pry up the battery connector from its socket on the logic board.
-
Place the tip of the tool between the loudspeaker enclosure and the metal cover of the connector, and lift the bottom edge of the connector first.
-
-
-
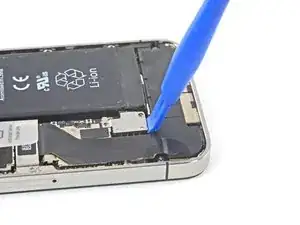
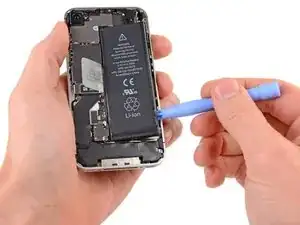
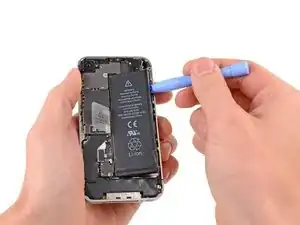
Insert the edge of a plastic opening tool between the battery and the outer case near the bottom of the iPhone.
-
Run the plastic opening tool along the right edge of the battery and pry up at several points to completely separate it from the adhesive securing it to the outer case.
-
Wait about one minute for the alcohol solution to weaken the adhesive.
-
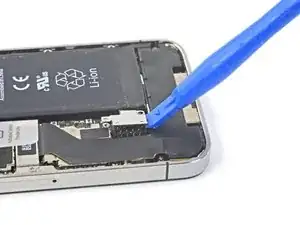
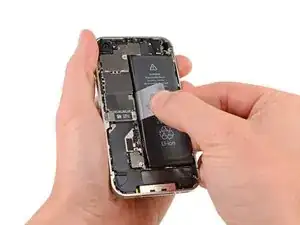
Use the flat end of a plastic opening tool to gently lift the battery.
-
-
-
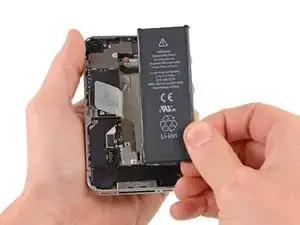
Use the exposed clear plastic pull tab to peel the battery off the adhesive securing it to the iPhone.
-
Remove the battery.
-
-
-
Remove the following screws securing the dock connector cable cover to the logic board:
-
One 1.5 mm Phillips screw
-
One 1.2 mm Phillips screw
-
Remove the metal dock connector cable cover.
-
-
-
Use the edge of a plastic opening tool to pry the dock cable up from its socket on the logic board.
-
-
-
Peel the dock connector cable off the adhesive securing it to the logic board and the side of the speaker enclosure.
-
-
-
Use the edge of a plastic opening tool to pry the cellular antenna cable up from its socket on the logic board.
-
De-route the cellular antenna cable out from under the metal fingers attached to the logic board.
-
-
-
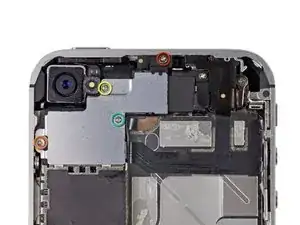
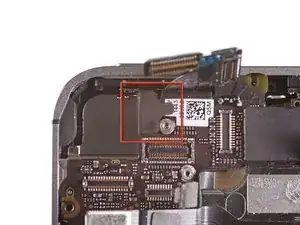
Remove the following four screws securing the cable cover to the logic board:
-
One 2.7 mm Phillips screw
-
One 2.6 mm Phillips screw
-
One 1.3 mm Phillips screw
-
One 1.2 mm Phillips screw
-
-
-
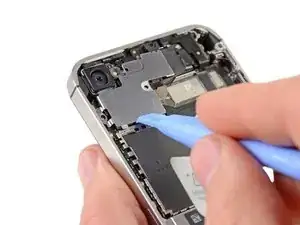
Use the edge of a plastic opening tool to pry the cable cover tabs out of their slots cut into the EMI shield on the logic board.
-
Lift the cable cover from its edge nearest the top and remove it from the iPhone.
-
-
-
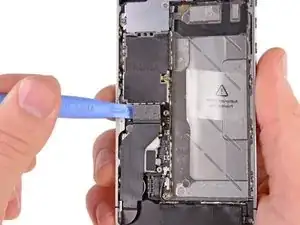
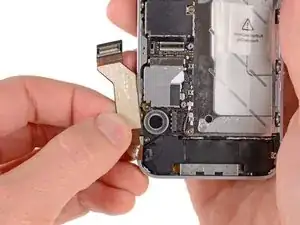
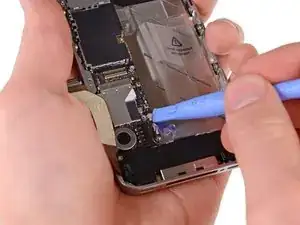
Use the edge of a plastic opening tool to pry the rear camera connector up from its socket on the logic board.
-
Remove the rear camera from the iPhone.
-
-
-
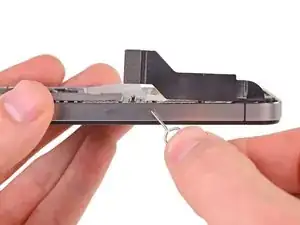
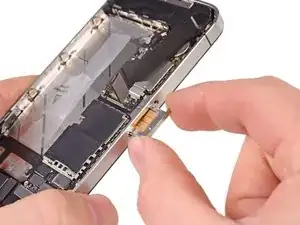
Use a SIM eject tool or a paperclip to eject the SIM and its tray.
-
Remove the SIM and its tray.
-
-
-
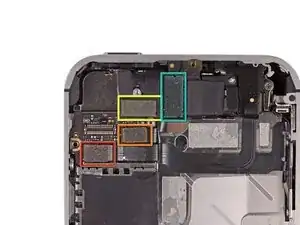
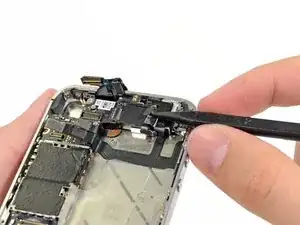
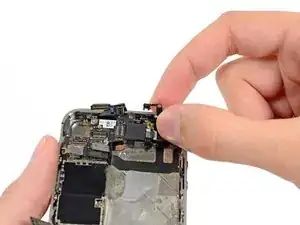
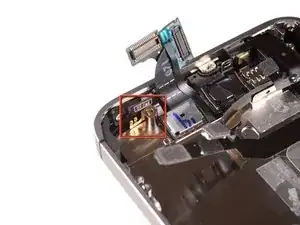
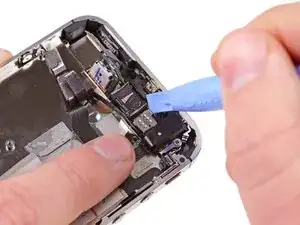
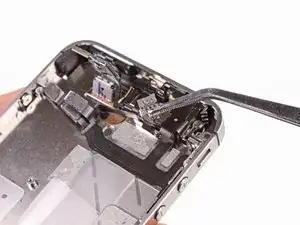
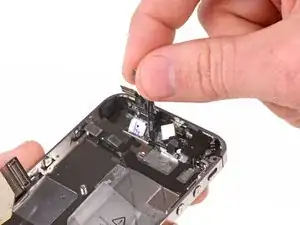
Remove the five cables near the top of the logic board in the following order:
-
Headphone jack/volume button cable
-
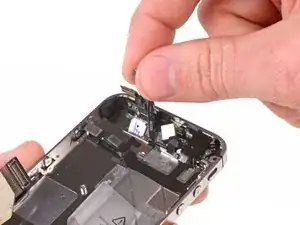
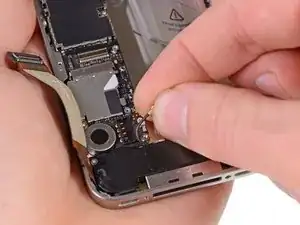
Front facing camera cable
-
Digitizer cable
-
Display data cable
-
Power button cable (located underneath the headphone jack/volume button cable as shown in the second picture.)
-
-
-
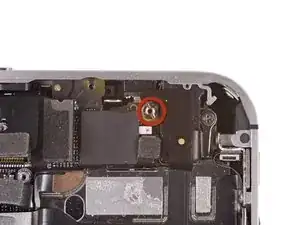
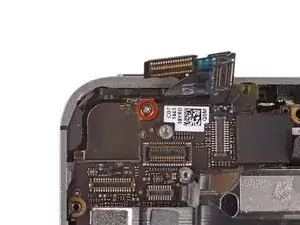
Remove the 1.5 mm Phillips screw securing the grounding clip to the logic board near the headphone jack.
-
-
-
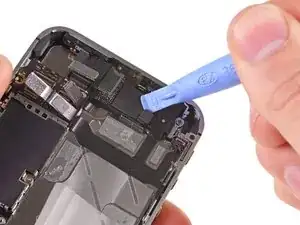
Use the tip of a spudger to pry the small grounding clip up off the logic board.
-
Carefully grasp the grounding clip and remove it from the iPhone.
-
-
-
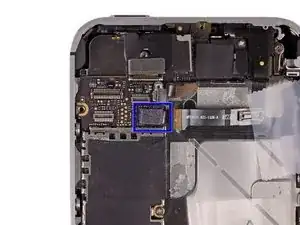
Use the edge of a plastic opening tool to disconnect the Wi-Fi antenna from the logic board.
-
-
-
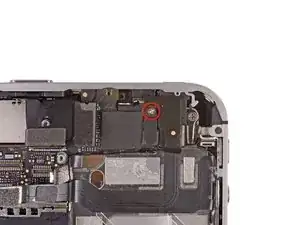
If present, peel the piece of black tape covering the hidden screw near the power button.
-
Remove the 2.6 mm Phillips screw securing the logic board near the power button.
-
-
-
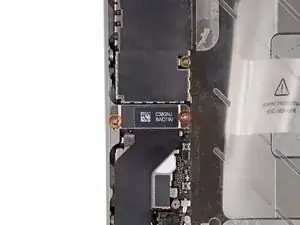
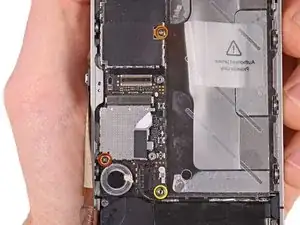
Remove the following screws securing the logic board to the case:
-
One 2.5 mm Phillips screw near the vibrator motor
-
One 2.4 mm Phillips screw
-
One 3.6 mm standoff along the side of the logic board nearest the battery opening.
-
-
-
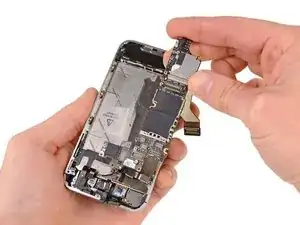
Carefully lift the logic board from the end closest to the speaker enclosure and slide it away from the top edge of the iPhone.
-
Remove the logic board.
-
-
-
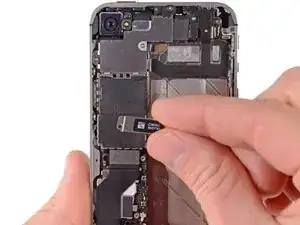
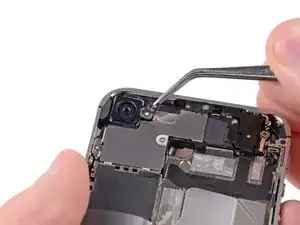
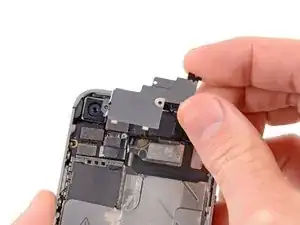
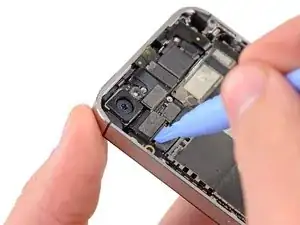
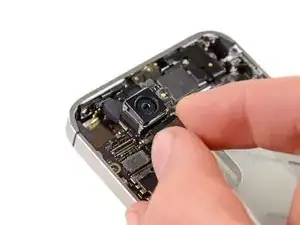
Use the edge of a plastic opening tool to carefully pry the metal front facing camera retainer away from the case of your iPhone.
-
Remove the front facing camera retainer.
-
To reassemble your device, follow these instructions in reverse order.
6 comments
What if I can't put the two initial screws back?
desarme el telefono para cambiar la camara frontal y ahora no me funciona me aparace en negro que sera?
I did it and it worked. But be prepared and patient. :)

The Liberation Kit just stripped the screw. Now what.
nimpsy -
Had local iPhone repair shop remove the screw. Repair complete!
nimpsy -
I left the battery in and everything above the middle, using a pen knife to flex the logic board, I had plenty of room to else the old out and the new in.
Worked well and saved a lot of time.
Keith M -
After reviewing the steps I decided to follow this guy's advice and left the battery in.....one less item to possibly foul up. I don't know if it made it any faster (first time to open my phone, so nothing to compare it to) but I can say that my phone is charging for the first time in 6 months :D
Jennifer -
BEFORE YOU START:
1) This is doable but not easy, quick or without risk.
2) If this is your 1st time, the whole process can take >2 hours (half of it reading this fixit manual and notes, which I highly recommend!)
3) I highly recommend placing a large, thin clean white cloth on the table. This prevents screws from rolling around and you will clearly see anything falling out.
4) If you have them, use tight surgical (latex) gloves. This prevents you from greasing up contacts.
5) Have e.g. a big old egg box ready, so you can place the screws in order (and maybe write step/screw size on the side).
6) I bought my display from "Generic" on Amazon ($20.36). Screen works fine and tools were ok but not great (screw drivers do not withstand force needed to unscrew some).
7) I had my own 2mm Phillips screw driver and a 2.4mm flat (for the big screws).
8) Have a nice cold beer by your side! Good luck!
superedu111 -
Sounds like this comment relates to a screen replacement, not a rear panel replacement. No way a rear panel replacement would take 2 hours - can be done in 2 minutes!
Jonathan Deamer -
I was paranoid about stripping the pentalobes - I used the ifixit pentalobe screwdriver TOGETHER with a layer of Glad Wrap (cling film or saran wrap for the non-Aussies) over the pentalobe holes - absolutely no problems. Guess it helps the driver head gain purchase?
Anyway hat tip to this guy:
http://modmyi.com/forums/hardware/806092...
jimforbes -
It's also called glad wrap in the US as well. :)
Scorppio500 Webmaster -
After seeing the comments about trouble finding the carrier, I shut down the phone, did a soft reset (by holding the power and home buttons until it started and then shut down and stayed off), and removed the SIM. After the repair, I replaced the SIM and plugged it in to the charger. It started up and found the carrier (Verizon, as it happens) immediately. I would guess that only the soft reset made a difference, but I did both.
DavidLewis -
Thank you David, will I need to reload operating system if I replace thr logic board? I'm hoping to use a 32gb boards from a locked but working phone to place in my 8gb device. Thanks for your advice,
Sharif
Sharif Bagnulo -
I pried one end of the back off only to find 2 funny little screws holding the other end on so I took my Dremel, like Jack said, and ground those suckers out. Once I had the back off I loosened all the screws then turned it upside down and shook the crap out of it. The screws went flying everywhere and fell on the floor. Its my moms house so of course she's got gross brown carpet. How am I supposed to find my screws in that? I get the vacuum out and go over every inch of the floor to suck up all them screws. Then I dump the bag on the table and all I find is a bunch of hair and gods knows what else, but no screws. When I look for my phone I see its covered in all that stuff that came out of the vacuum. I mean, what's up with that? How can I work on my phone if its covered in dirt? Nobody said anything about that, did they? The average guy's gonna screw up his phone big time if he follows these instructions and nobody warns him about all the dirt that's gonna end up in his phone. Are you kidding me!! Now what?
Marv -
Here's a little vacuum trick for anything small: put nylons/panty hose over the end of the hose and then you don't have to dig thru the bag contents.
paul -
Marv you a first class pleb! Please don't try and fix anything again. Tool
ticklejahfancy -
It's clear who's at fault here, Marv.
It's as clear as the day has long legs. It's your Mom's fault.
Milfs who make earth-tone carpet choices, are more likely to twerk, than tweek.
And as far as trimmin the hedges are concerned, she's more likely to float a turd in the punchbowl,
than to give you your inch.
I know you think I'm crazy. But everyone else agrees. We all politely try to the other way...
Your cuck stops here. We'll not near me, go over there...
Nathan Brazil -
my screws are stipped and i am going though the front glass to get to the logic board could some one give me a guide on how to get to the board please... thanks
Caleb Croft -
all you need to do is remove the clip over the wifi antenna and the one that actually attaches the wifi antenna to the iphone two steps to do this job...
Ray Leahy -
The physical battery replacement went off without a hitch, and saw that the phone had no network connection, but also had no way to unlock. The slide lock said "Slide for Emergency Call" over my custom wallpaper and sliding would give the passcode screen, but it would reject the 6 digit passcode (it would buzz and go dark after the 4th digit, re-awakening and putting in the last 2 would indicate bad passcode). Very frustrating! I get it into recovery mode and convinced iTunes to "update" the OS, but it still didn't let me in. I performed a restore to fully factory reset the phone, and it worked! Sort of... the start screen kept being replaced by "Temperature - phone needs to cool down" but it's cold. Temp sensor is on the battery and returning to old battery fixed it. New battery is bad, and phone is wiped. Fun night.
I'm going to guess that disabling the password might save you from a similar fate. So, I'll suggest BEFORE YOU START, backup your phone and disable the passcode. Good luck.
Ian Epperson -
Same here.. Going through that terrible night myself! Guess you had to return your battery right?
Nuno Alves -
Is it possible to replace front glass only? If so, please provide a manuel
Iva -
Yes, it is. But it's very difficult and risky. Forget it... Have a look here: https://youtu.be/L_kCY05jR10
Jiri Altman -
I didn’t find this particularly difficult, even though I’m pretty inexperienced at this sort of work. I watched the video overview to get me going and then followed the steps in the guide. My tips would be to keep the screws and parts organised as you dismantle, and ensure you read all the reassembly tips as you go; it’s easy to skip over them. I also found using the Liberty Kit to replace the pentalobe screws was worthwhile.
Poor old Marv of Feb 2015. Suggest he sticks to chopping logs.
graemebagnall -
caught fire as soon as I replaced the back phone destroyed
Stuart Laurie -
The battery on the phone is swollen so I need to replace it but I can’t turn it on to drain the battery, what do I do?
Beetroot -