Introduction

Prereq for removing the top left antenna.

  1. R5EDxBYHCjAEQMqQ
    R5EDxBYHCjAEQMqQ
    R1QEvu1ncElwkdeT
    JERFLoFReSCkV1qf
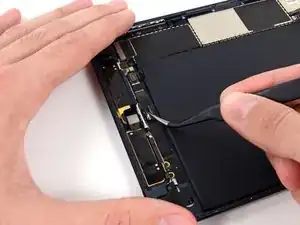
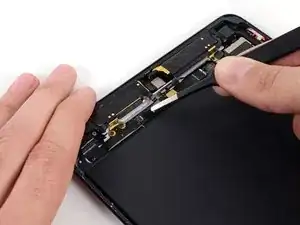
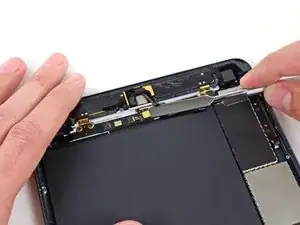
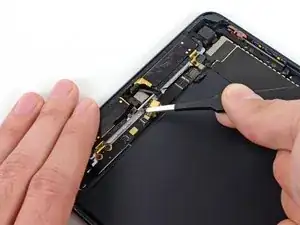
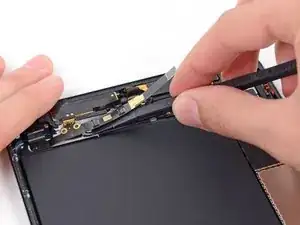
    • Use tweezers to gently peel back and remove the black tape covering the gold patch on the headphone jack cable.

    • For reassembly, note that this tape fits in a U-shape in this space, adhering both to the headphone jack cable below it, and the camera cable above it.

  2. BWkgFVsIedGuGSAT
    BWkgFVsIedGuGSAT
    Up3OHANtbeSc3WgF
    i4ZbAUqHyQoFjnUe
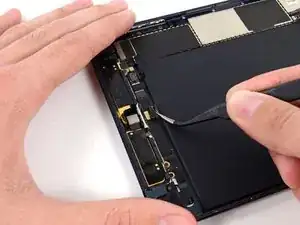
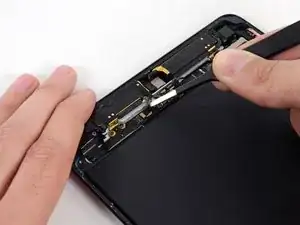
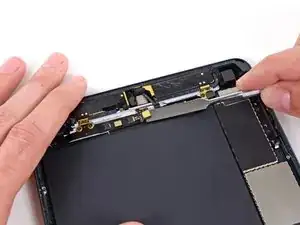
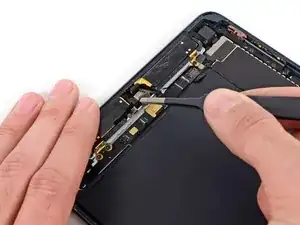
    • Use tweezers to peel and remove the long thin black tape covering the top of the headphone jack cable.

  3. qFsdxqgF1ojbF3DX
    qFsdxqgF1ojbF3DX
    CR5EkdTcX3ATyUXb
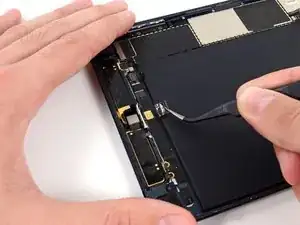
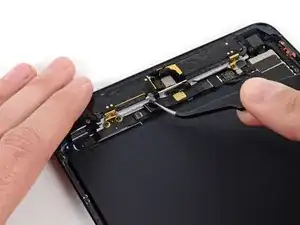
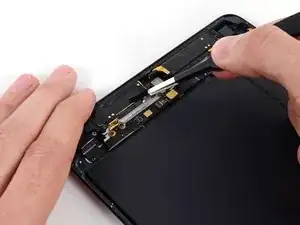
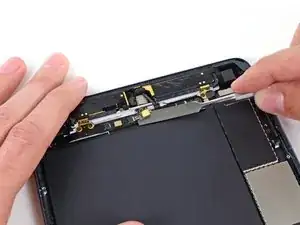
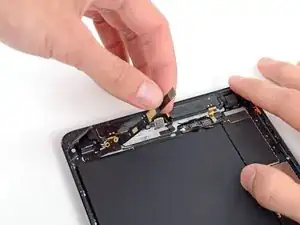
    • Use the tip of a spudger to gently lift the tab on the top left antenna ribbon cable's ZIF connector.

  4. AKRgeMavC5b6X25M
    AKRgeMavC5b6X25M
    TXLmyesthZiDuNDL
    6eeUnMcjcVtUMnCi
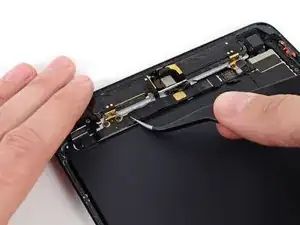
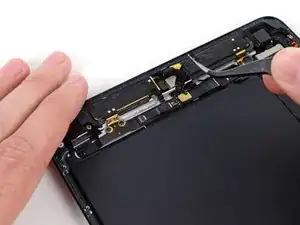
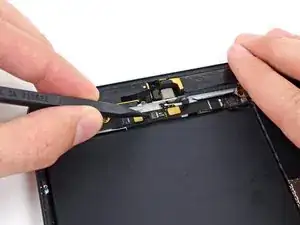
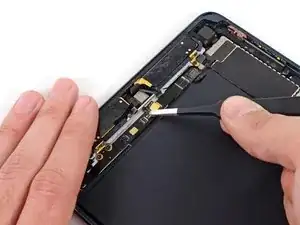
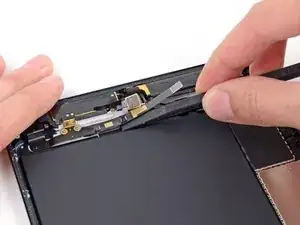
    • Use tweezers to pull the top left antenna ribbon cable straight out from its ZIF socket.

    • Gently bend the cable up and out of the way of the headphone jack cable.

  5. hrItGsQ4o1RWrSFU
    hrItGsQ4o1RWrSFU
    TRllqW5AUMyDfyP6
    • Use the tip of a spudger to lift the tab on the microphone data cable ZIF connector.

  6. GPhIaFoEHyALvACN
    GPhIaFoEHyALvACN
    qNUWJcsDviBOmkDN
    eGbFhtq1paUDLYsK
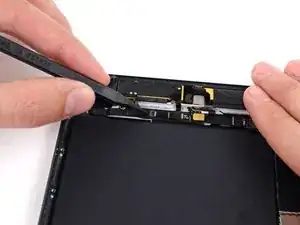
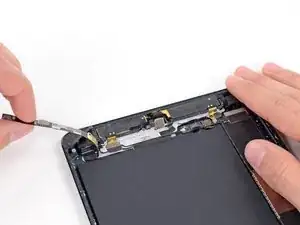
    • Slowly work the flat end of a metal spudger underneath the microphone cable, separating the adhesive securing it to the headphone cable.

  7. NpJI4AqpvVItSGfT
    NpJI4AqpvVItSGfT
    QOEFWXaMpikdX36w
    4QawUrHMHrlAl2Pm
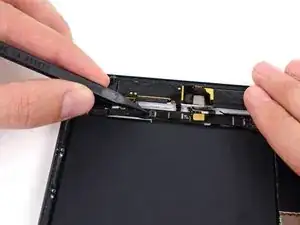
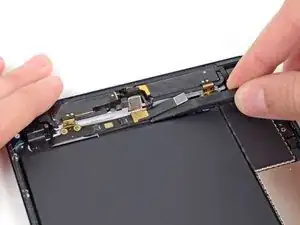
    • Use tweezers to pull the microphone cable straight out from its ZIF socket.

    • Gently bend the cable up and out of the way of the headphone jack cable.

  8. HRb3W4bs3q4pgWV1
    HRb3W4bs3q4pgWV1
    HTn1abrCbPX1p2CG
    • Peel up and remove the small piece of tape covering the headphone jack cable connector.

  9. n2vsKh2or4uE5qpK
    n2vsKh2or4uE5qpK
    eG4R1vI4Xgo6Jd3T
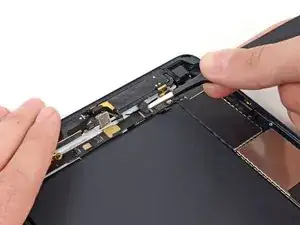
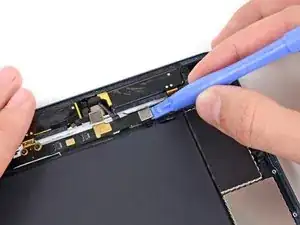
    • Use a plastic opening tool to gently pry the lower metal plate up from the headphone cable connector.

    • Being careful not to break the plate or the tape attached to it, pry it up and fold it away from the headphone cable connector.

    What if someone was to break the tape on one side?

    Charles Friend II -

  10. KWrWRPZNYJWr1OSf
    KWrWRPZNYJWr1OSf
    4FJIWicRNhKCdBW4
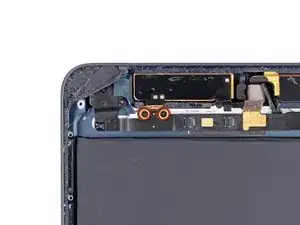
    • Use a plastic opening tool to gently pry the second (upper) metal plate up from the headphone cable connector.

    • Again, carefully pry the plate up and away from the headphone cable connector.

  11. E5gEJMf6DHwsjarW
    E5gEJMf6DHwsjarW
    CqwMAkjA1TX2DsFO
    • Use a plastic opening tool to pry the headphone cable's connector up from the logic board.

  12. mnITjxmxP3MBVtmF
    • Remove two 1.8 mm #00 Phillips screws from the screw tab on the top left antenna.

  13. DQ5jOPMSDYVqKYsE
    DQ5jOPMSDYVqKYsE
    EDRJVHuo6FBo4wpW
    icfIkHItZd162v1O
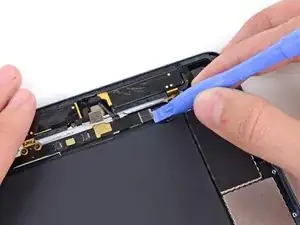
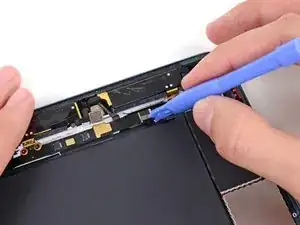
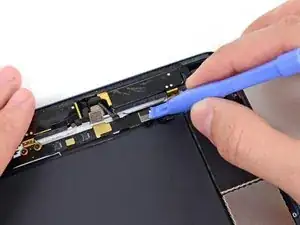
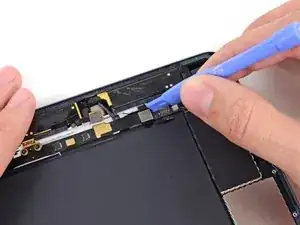
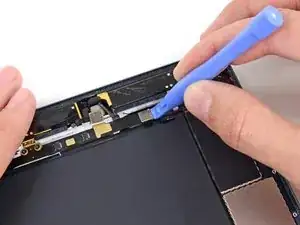
    • Slide the flat end of a spudger beneath the length of the headphone jack cable, separating the adhesive securing the cable to the rear case.

  14. xcBkyvhKqSklMmIA
    xcBkyvhKqSklMmIA
    HKIWlBqCL52KtPRa
    • Lift the headphone jack cable up and fold it out of the way.

Conclusion

To reassemble your device, follow these instructions in reverse order.

Walter Galan

694047 Reputation

0 comments